
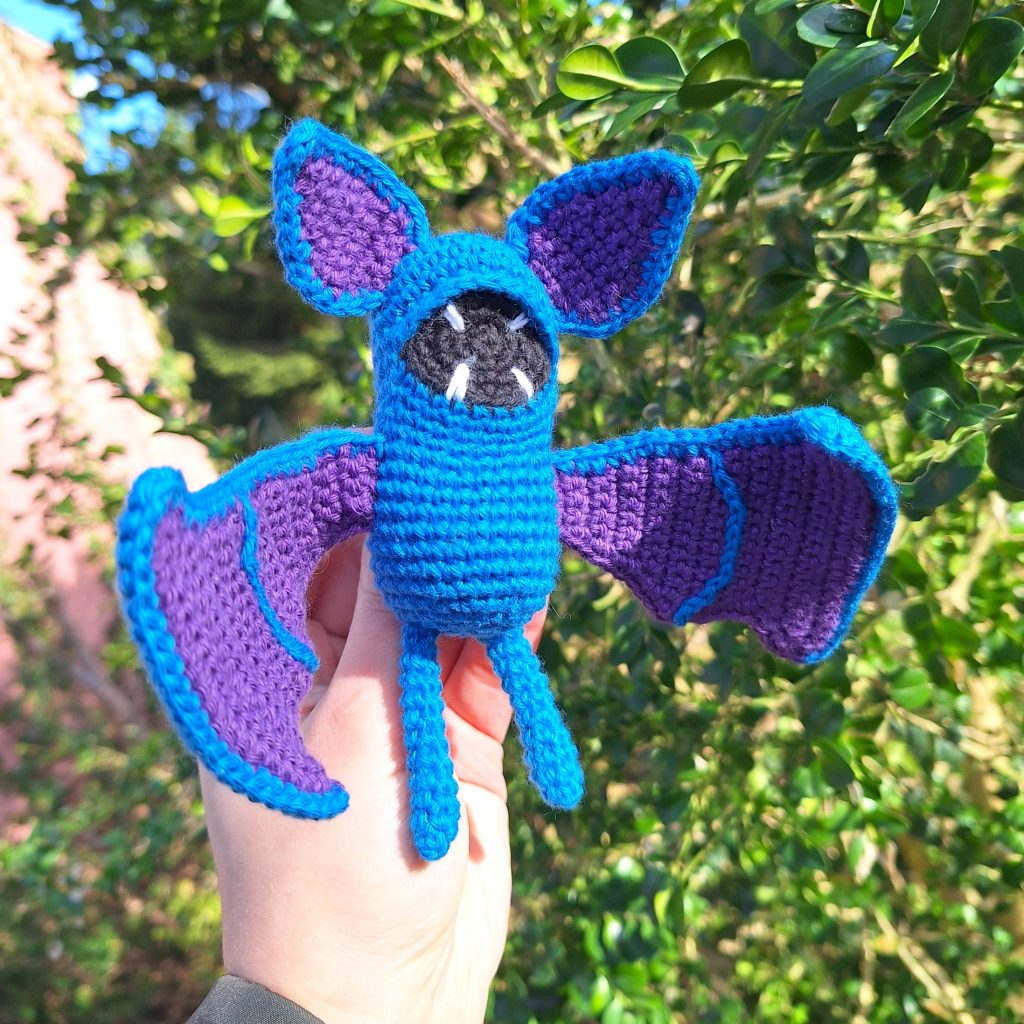
Get ready to crochet your very own Zubat, the enchanting Bat Pokémon! With its sleek body and striking wings, Zubat is a captivating addition to any amigurumi collection. This free crochet pattern allows you to bring Zubat to life stitch by stitch, capturing its mysterious charm and nocturnal nature.
This pattern is doable by anyone with a bit of experience with amigurumi. The Zubat crochet pattern features clear, step-by-step instructions to guide you through each part of the process. Whether you’re a new to amigurumi but looking for a fun challenge or an experienced crafter seeking a new project, crafting Zubat will be a fun experience!
Once completed, your crocheted Zubat will be a delightful companion, ready to accompany you on your crochet adventures or to brighten up any Pokémon-themed space. So, grab your crochet hook and yarn, and let’s get started on this crochet journey with Zubat!
Supplies you'll need to crochet Zubat
General supplies:
- Crochet hook 2,5 mm for small version, I always use clover amour hooks for my projects!
- Sewing needle
- Stuffing
- Stitch marker
With Amigurumi you guage doesn’t matter much. Using smaller hook and yarn will make you finished Zubat smaller, and bigger hook and yarn will make him bigger. Just make sure that your yarn and hook fits together and makes a tight fabric so the stuffing won’t show through!
With the recommended yarn, Zubat will be about 10 cm/4 inches tall.
I reccomend Hobbii Rainbow cotton 8/4. This yarn is a 100% cotton and incredible to work with! With this yarn, I use a 2,5 mm hook (or a B-1 or C-2 should work too!). If Rainbow cotton is sold out, I can also recommend Friends cotton from Hobbii as a direct substitute.
- 1 x blue (31)
- 1 x purple (39)
- A bit of black and white for mouth and fangs
Abbreviations in this crochet pattern
Rnd = round
mr = magic ring
sc = single crochet
inc = increase, 2 sc in the same stitch
dec = decrease, make 2 stitches into 1
ss = slip stitch
ch = chain
BLO = Back Loop Only
FO = Finish Off chain
Zubat crochet pattern
To achieve the wide-open mouth of Zubat, the mouth-piece is crocheted on its own and attached to the body while crocheting. Therefore we start by making the mouth.
Mouth
In black
Rnd 1: 6 sc in mr (6)
Rnd 2: inc x 6 (12)
Rnd 3: (sc, inc) x 6 (18)
Rnd 4: (sc, inc, sc) x 6 (24)
FO
Body
In blue
Rnd 1: 6 sc in mr (6)
Rnd 2: inc x 6 (12)
Rnd 3: (sc, inc) x 6 (18)
Rnd 4: (sc, inc, sc) x 6 (24)
Rnd 5: (7sc, inc) x 3 (27)
Rnd 6: (4sc, inc, 4sc) x 3 (30)
Rnd 7-8: sc around (30)
In the next 2 rounds the mouth will be incorporated.
For round 9 position the mouth-piece behind the stitches you need to work, with the wrong sides facing each other. Your hook will first go through a stitch of the body and continuing through a stitch of the mouth, then finish the sc as normal.
Rnd 9: 9sc, 12 sc through a normal stitch and a stitch of the mouth-piece, 9 sc (30)
Now half of the mouth-piece is connected to the body. In the next round, simply use the remaining stitches of the mouth-piece instead of the normal stitches.
Rnd 10: 9sc, in BLO 12 sc in the remaining st of mouth-piece, 9sc in remaining normal stitches (30)
Continue the pattern as normal.
Rnd 11: 7sc, dec x 2, 8 sc, dec x 2, 7sc (26)
Rnd 12: 7sc, dec, 8sc, dec, 7sc (24)
Rnd 13: sc around (24)
Rnd 14: (3sc, inc) x 6 (30)
Rnd 15-21: sc around (30)
Rnd 22: (3sc, dec) x 6 (24)
Rnd 23: (sc, dec, sc) x 6 (18)
Rnd 24: (sc, dec) x 6 (12)
When stuffing, make sure the mouth-piece is pointed inwards toward the body. You can optionally fasten the middle of the mouth loosely to the back of the head on the inside to keep the shape better.
Rnd 25: dec x 6 (6)
FO.
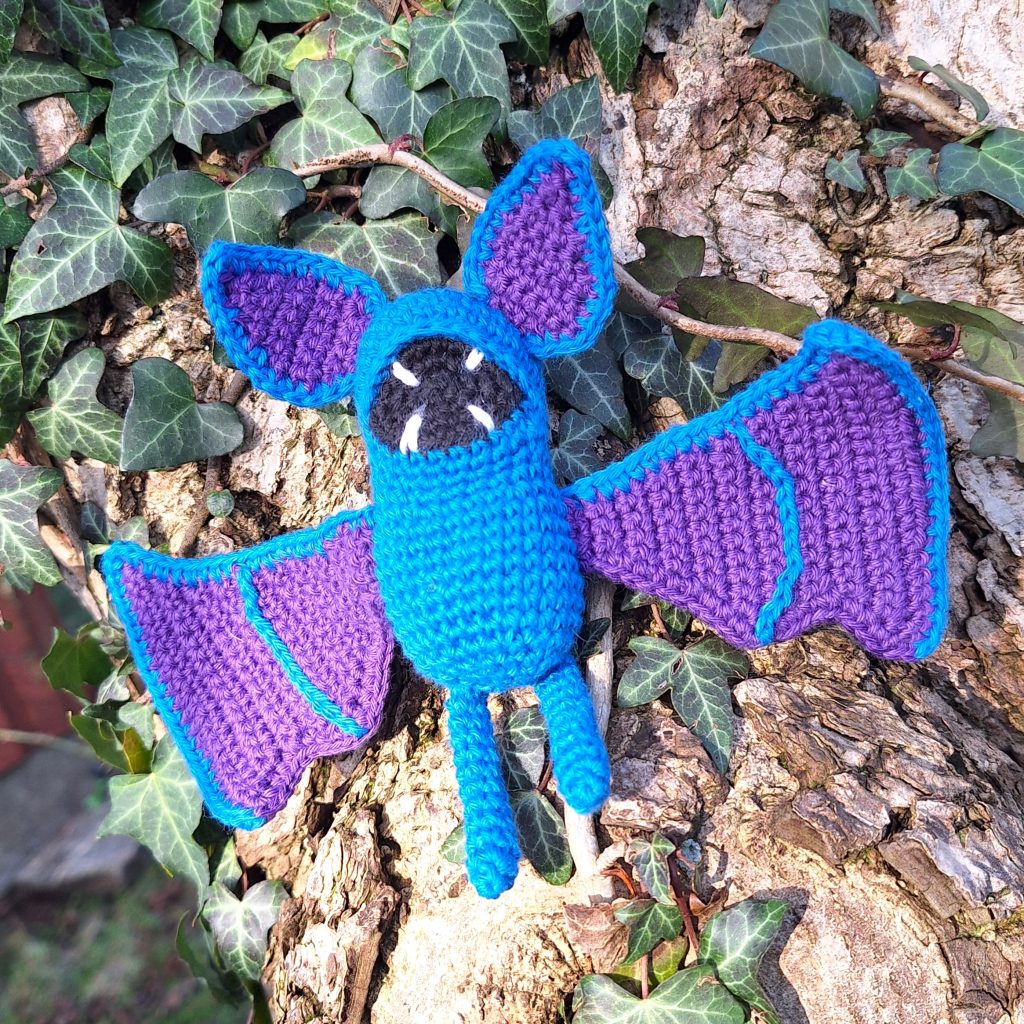
The wings are made in two pieces and later crocheted together. This creates the blue back and the purple inside of the wings.
Wing pieces
Make 2 purple pieces and 2 blue pieces. The piece is worked in rows. After every row chain 1 and turn.
Start by chaining 5.
Row 1: sc in 2nd st, 3sc (4)
Row 2-3: 4sc (4)
Row 4: 3sc, inc (5)
Row 5: 4sc, inc (6)
Row 6: 5sc, inc (7)
Row 7: 6sc, inc (8)
Row 8: 7sc, inc (9)
Row 9: inc, 8sc (10)
Row 10: inc, 8sc, inc (12)
Row 11: inc, 11sc (13)
Row 12: inc, 10sc, dec (13)
Row 13: dec, 11sc (12)
Row 14: inc, 11sc (13)
Row 15: dec, 11sc (12)
Row 16: inc, 10sc, inc (14)
Row 17: inc, 12sc, inc (16)
Row 18: inc, 14sc, inc (18)
Row 19: inc, 16sc, inc (20)
Row 20: inc, 5sc, 8hdc, 5sc, inc (22)
Cut yarn and FO.
Now take 1 blue and 1 purple piece and lie them on top of each other. Double check that you are making both a left and a right wing, lay them out besides the body if needed.
Sc the purple and blue piece together by following and crocheting through both pieces. Use blue yarn at the top and sides of the wings and purple yarn for the bottom of the wings.
Embroider blue lines on the purple side of both wings. I used embroidered surface crochet stitches.
Legs
In blue. Make 2.
Rnd 1: 4sc in mr (4)
Rnd 2: (sc, inc) x 2 (6)
Rnd 3-12: sc around (6)
FO and stuff.
Optional: add wiring for extra support for the legs.
Ears
The ears are made in 2 parts and crocheted together, similar to the wings. Make the following piece in blue and purple. Cut the yarn on the purple, but leave the yarn on the blue for crocheting them together.
Ch 6
Row 1: 5sc, ch 1, turn (5)
Row 2: inc, 3sc, inc, ch1, turn (7)
Row 3-5: 7sc, ch1, turn (7)
Row 6: dec, 3sc, dec, ch1, turn (5)
Row 7: 5sc, ch1, turn (5)
Row 8: dec, sc, dec, ch1, turn (3)
Row 9: dec, sc, ch1, turn (2)
Row 10: dec (1)
FO the purple piece.
Make a second piece in blue without FO
Attach blue yarn at the base of the ear and sc around. Make an inc or a 3-inc (3sc in 1 st) at the top of the ear.
Make 2 ears.
Assembly of your crochet Zubat
Attach the ears on each side of the head. Next attach the wings a few rounds below the mouth, and make sure they are evenly placed on each side of the body. Lastly attach the legs to the bottom of the piece.
To finish off your Zubat, embroider 4 white fangs in the mouth.