
Get the ad-free PDF on Ravelry!
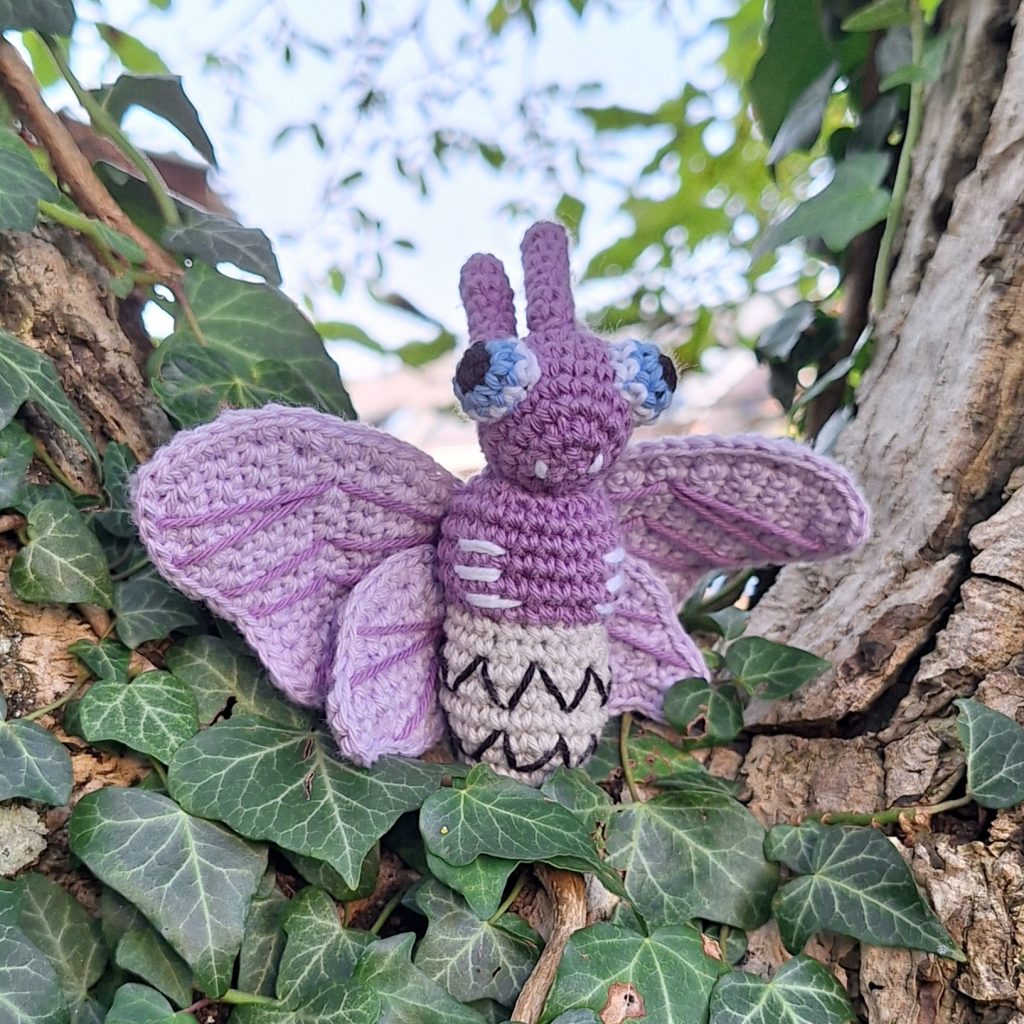
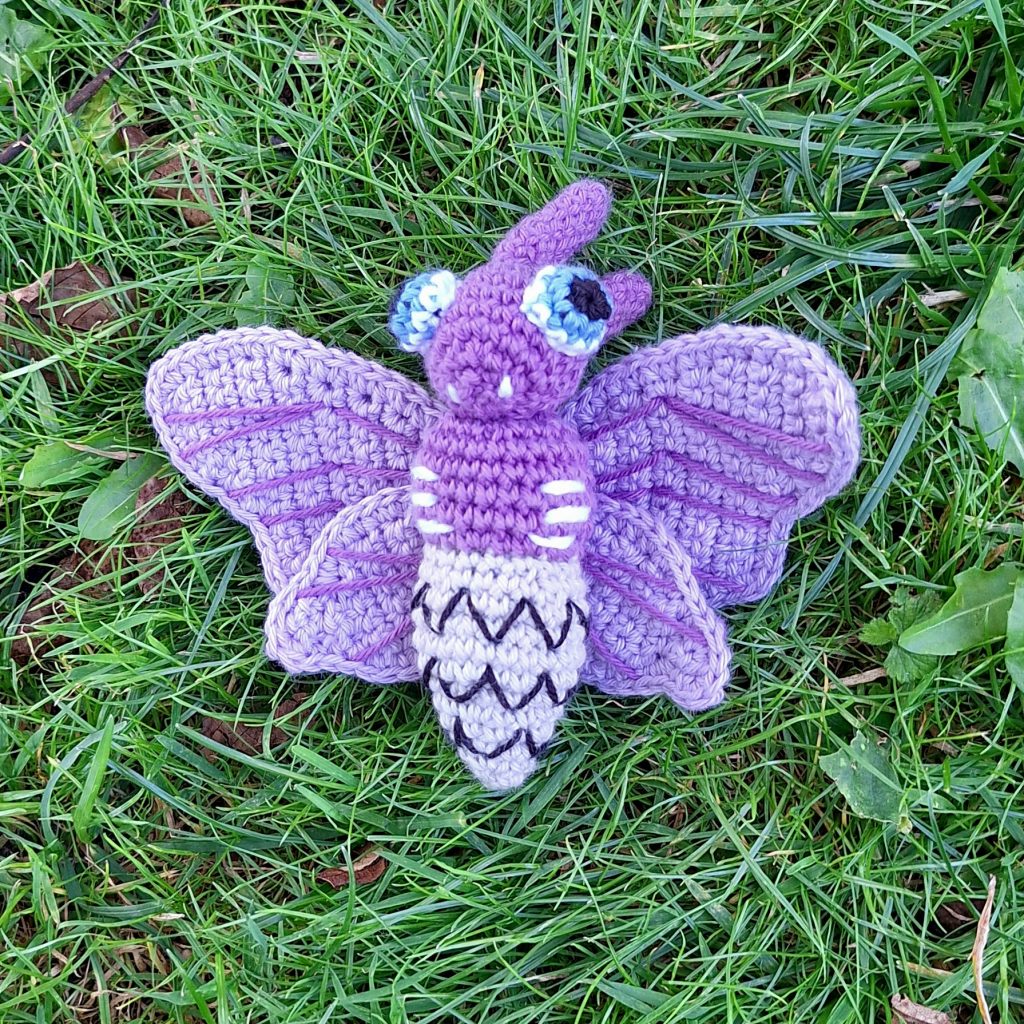
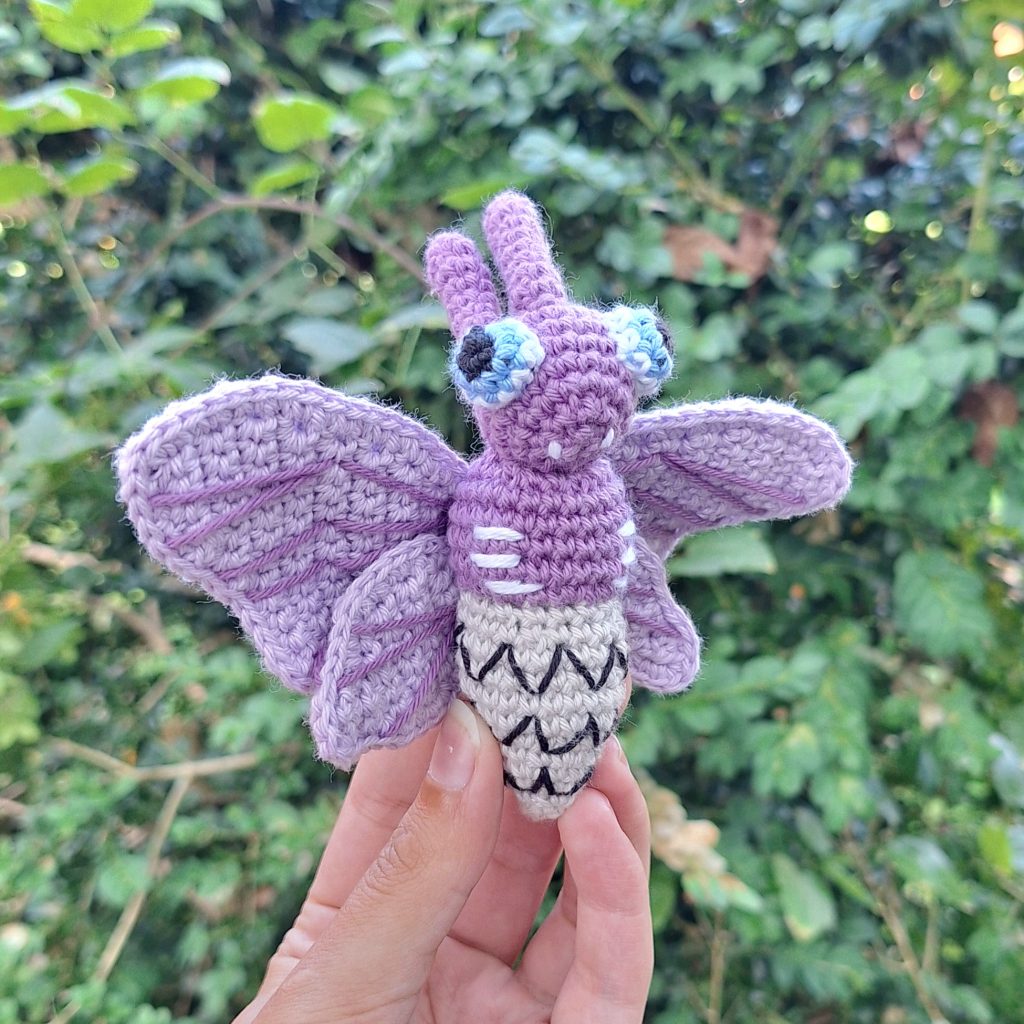
Embark on a crafting adventure with this free Venomoth crochet pattern! This captivating Bug/Poison-type Pokémon is known for its intricate wings and striking appearance, making it a fascinating project for any crocheter. Venomoth’s distinctive purple color and eye-catching wing patterns offer a delightful challenge to crocheters and amigurumists.
This amigurumi pattern captures the essence of Venomoth, from its large compound eyes to its fluttering wings. Detailed crochet pattern guide you through the process, ensuring each stitch adds to the cute result of this nocturnal Pokémon.
Whether you’re adding to your Pokémon collection or crafting a gift for a fellow enthusiast, the Venomoth crochet pattern is sure to impress with its complexity and beauty. So, gather your purple yarn and get ready to create a stunningly detailed Venomoth, perfect for display or play.
Supplies you'll need to crochet Venomoth
General supplies:
- Crochet hook 2,5 mm, I always use clover amour hooks for my projects!
- Sewing needle
- Stuffing
- Stitch marker
With Amigurumi you guage doesn’t matter much. Using smaller hook and yarn will make you finished Venomoth smaller, a bigger hook and yarn will make it bigger. Just make sure that your yarn and hook fits together and makes a tight fabric so the stuffing won’t show through!
For a smaller version, about 10 cm tall, or 4 inches, you will need the following yarn.
I reccomend Hobbii Rainbow cotton 8/4. This yarn is a 100% cotton and very nice to work with! With this yarn, I use a 2,5 mm hook (or a B-1 or C-2 should work too!). If Rainbow cotton is sold out, I can also recommend Friends cotton from Hobbii as a direct substitute.
- purple
- Light purple
- grey
- A bit of black, white and blue for details
Abbreviations in this crochet pattern
Rnd = round
mr = magic ring
sc = single crochet
inc = increase, 2 sc in the same stitch
dec = decrease, make 2 stitches into 1
ss = slip stitch
ch = chain
sc2tog = decrease, not invisible (used when working in rows)
FO = Finish Off
Venomoth crochet pattern
Head
Work in darker purple
Rnd 1: 6sc in mr (6)
Rnd 2: 6inc (12)
Rnd 3: (sc, inc) x 6 (18)
Rnd 4: (5sc, inc) x 3 (21)
Rnd 5-6: sc around (21)
Rnd 7: 6sc, (dec, sc) x 3, 6sc (18)
Rnd 8: 3sc, (sc, dec) x 3, 3sc (15)
stuff the head
Rnd 9: (3sc, dec) x 3 (12)
Rnd 10: 6dec (6)
FO
Antenna (front)
Work in darker purple
Rnd 1: 4sc in mr (4)
Rnd 2: (inc, sc) x 2 (6)
Rnd 3-9: sc around (6)
ss, FO with tail for sewing. Stuff before sewing if possible.
Antenna (sides)
Work in darker purple
Rnd 1: 4sc in mr (4)
Rnd 2: (inc, sc) x 2 (6)
Rnd 3-8: sc around (6)
ss, FO with tail for sewing. Stuff before sewing if possible. Make 2.
Body
The body is worked from the bottom and up. Start work with gray.
Rnd 1: 4 sc in mr (4)
Rnd 2: (sc, inc) x 2 (6)
Rnd 3: (sc, inc) x 3 (9)
Rnd 4: (sc, inc, sc) x 3 (12)
Rnd 5: (3sc, inc) x 3 (15)
Rnd 6: (2sc, inc, 2sc) x 3 (18)
Rnd 7: (5sc, inc) x 3 (21)
Rnd 8: (3sc, inc, 3sc) x 3 (24)
Rnd 9-11: sc around (24)
Rnd 12: (2sc, dec, 2sc) x 2 (20)
Rnd 13: (3sc, dec) x 4 (16)
Change color to dark purple
Rnd 14: In FLO, (sc, inc) x 8 (24)
Rnd 15-18: sc around (24)
Rnd 19: (sc, dec, sc) x 6 (18)
Stuff the body.
Rnd 20: (dec, sc) x 6 (12)
Rnd 21: 6dec (6)
FO leaving tail for sewing
For the wings of Venomoth, we are making a big wing and a small wing for each side. All wings will be double sided to give the best result.
Big wing
Work in lighter purple
The wing is made in rows. Between every row be sure to ch1, turn. Start by chaining 4, the work starts in the 2nd chain from the hook.
Row 1: inc, sc, inc (5)
Row 2: inc, 4sc (6)
Row 3: 5sc, inc (7)
Row 4: inc, 6sc (8)
Row 5: inc, 6sc, inc (10)
Row 6: inc, 9sc (11)
Row 7: 11sc (11)
Row 8: inc, 10sc (12)
Row 9: 12sc (12)
Row 10: inc, 11sc (13)
Row 11: sc2tog, 11sc (12)
Row 12: inc, 11sc (13)
Row 13: sc2tog, 11sc (12)
Row 14: 7sc, ss (8 – the row ends early)
Row 15: sc2tog, 6sc (7)
Row 16: 5sc, ss (6)
Row 17: sc2tog, 4sc (5)
Row 18: sc2tog, sc, ss, FO
Make 4 pieces in total. Line up 2 pieces and attach yarn through both layers in a corner near the starting chain. sc through both layers around the entire wing, add increases in the tips of the wing. FO when you make it around the whole wing excluding the starting chain. Do the same to the other wing pieces to get 2 wings.
Small wing
Work in lighter purple
The wing is made in rows. Between every row be sure to ch1, turn. Start by chaining 4, the work starts in the 2nd chain from the hook.
Row 1: inc, sc, inc (5)
Row 2: 5sc (5)
Row 3: inc, 3sc, inc (5)
Row 4-7: 7sc (7)
Row 8: sc2tog, 3sc, sc2tog (5)
Row 9: sc2tog, sc, sc2tog (3)
Row 10: sc2tog, sc (2)
Row 11: 2sc (2)
Row 12: sc2tog, ss in the same stitch, FO
Make 4 wing pieces. Connect the wing-pieces in the same way as you did the big wings.
Eyes
For the eyes you will need the following colors: black, light blue, white. You will change color every round. Start in black.
Rnd 1: 5sc in mr (5)
change color to light blue
Rnd 2: 5inc (10)
Change color to white
Rnd 3: sc around (10)
FO leaving tail for sewing.
Make 2 eyes.
Assembly of your crochet Venomoth
Start by adding the necessary embroidery to the wings and the body. Add lines on the wings in dark purple – I recommend looking up a picture of Venomoth to get the pattern of the lines right. Next add black zig-zag lines on the gray part of the body, and white lines along the purple part of the body.
Now we sew the pieces together. Start by attaching the antenna to the head. I added them around the magic ring of the head with the longest one in the front. Add the eyes on rounds 5-7 with approximately 4 stitches in between.
Now sew the head onto the body. Be sure to angle the head so it sits correctly. When sewed on, you will be able to see where you closed off the head. Embroider 2 small white lines to symbolise the fangs.
Next we add the wings. Start by pinning all wings to the back of the body and check the placement. The small wings are sewed onto the body first. The small wings sit on rounds 11-14 of the body – there should not be space between the wings on the back. The big wings are added after and sit on rounds 14-18. They are overlapping the small wings a bit. Be sure to take a break and check the placement from the front often as the wings can easily shift around when sewing.