
Hey you! Are you ready for a crochet project that’s equal parts cute and chill? Well, say hello to my Snorlax crochet pattern – and guess what? It’s absolutely free!
Imagine lazy afternoons, Netflix binges, and a crochet Snorlax buddy by your side. Sounds like the perfect vibe, right? With this crochet pattern, you can make your own crochet Snorlax plushie. Whether you’re a Pokémon fanatic or just love all things squishy, this free pattern is tailor-made for you.
I’ve made sure the instructions are as easy to follow as possible, and you need no fancy stitches, only a bit of patience. So grab your comfiest yarn, your go-to crochet hook, and let’s dive into the world of this free crochet Snorlax together.
Supplies you'll need to crochet Snorlax
General supplies:
- Crochet hook 2,5 mm for small version and 6 mm for large version, I always use clover amour hooks for my projects!
- Sewing needle
- Stuffing
- Stitch marker
With Amigurumi you guage doesn’t matter much. Using smaller hook and yarn will make you finished Snorlax smaller, and bigger hook and yarn will make him bigger. Just make sure that your yarn and hook fits together and makes a tight fabric so the stuffing won’t show through!
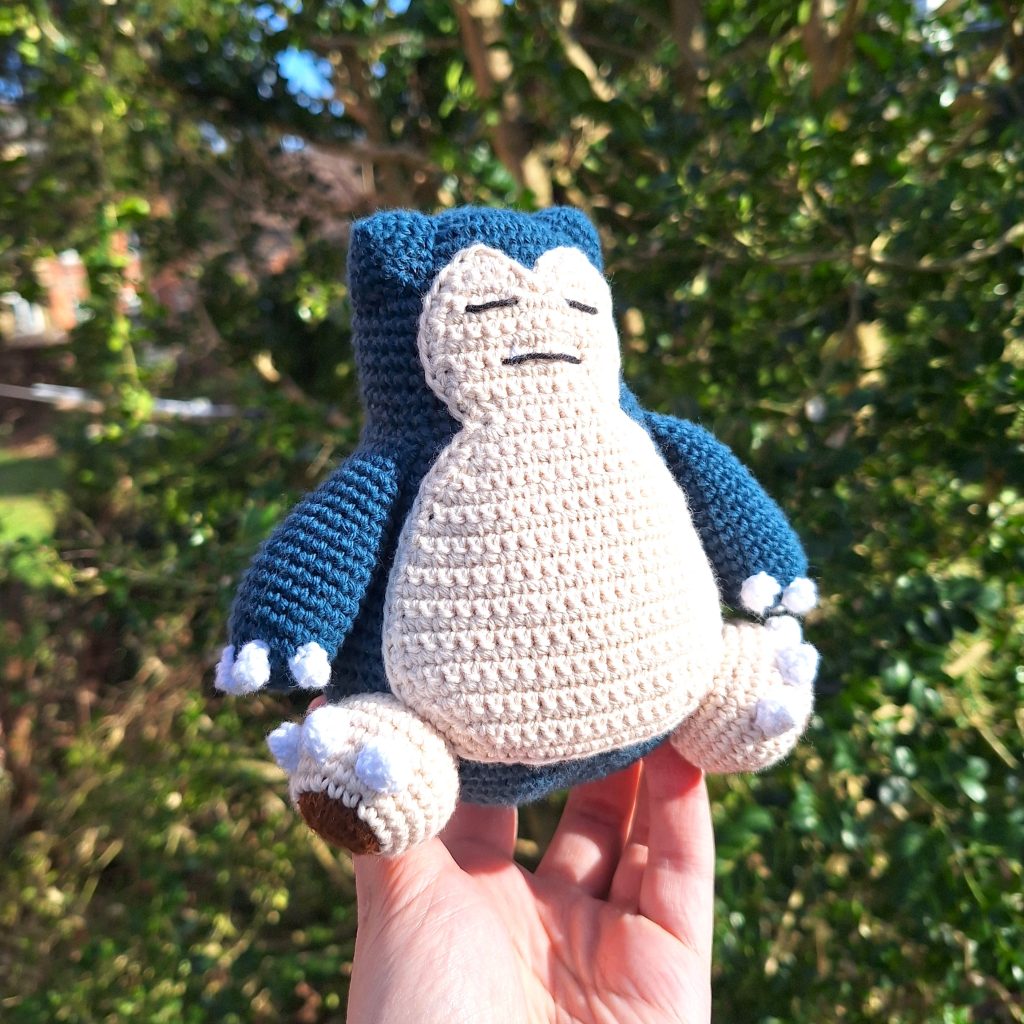
For a smaller version, about 15cm tall, or 6 inches, you will need the following yarn.
I reccomend Hobbii Rainbow cotton 8/4. This yarn is a 100% cotton and very nice to work with! With this yarn, I use a 2,5 mm hook (or a B-1 or C-2 should work too!). If Rainbow cotton is sold out, I can also recommend Friends cotton as a direct substitute.
- 2 x Navy blue (color 030) or 2 x Prussian Blue (092)
- 1 x Nude (003) or 1 x Natural White (002)
- A bit of white
- A bit of brown
- A bit of black or embroidery thread
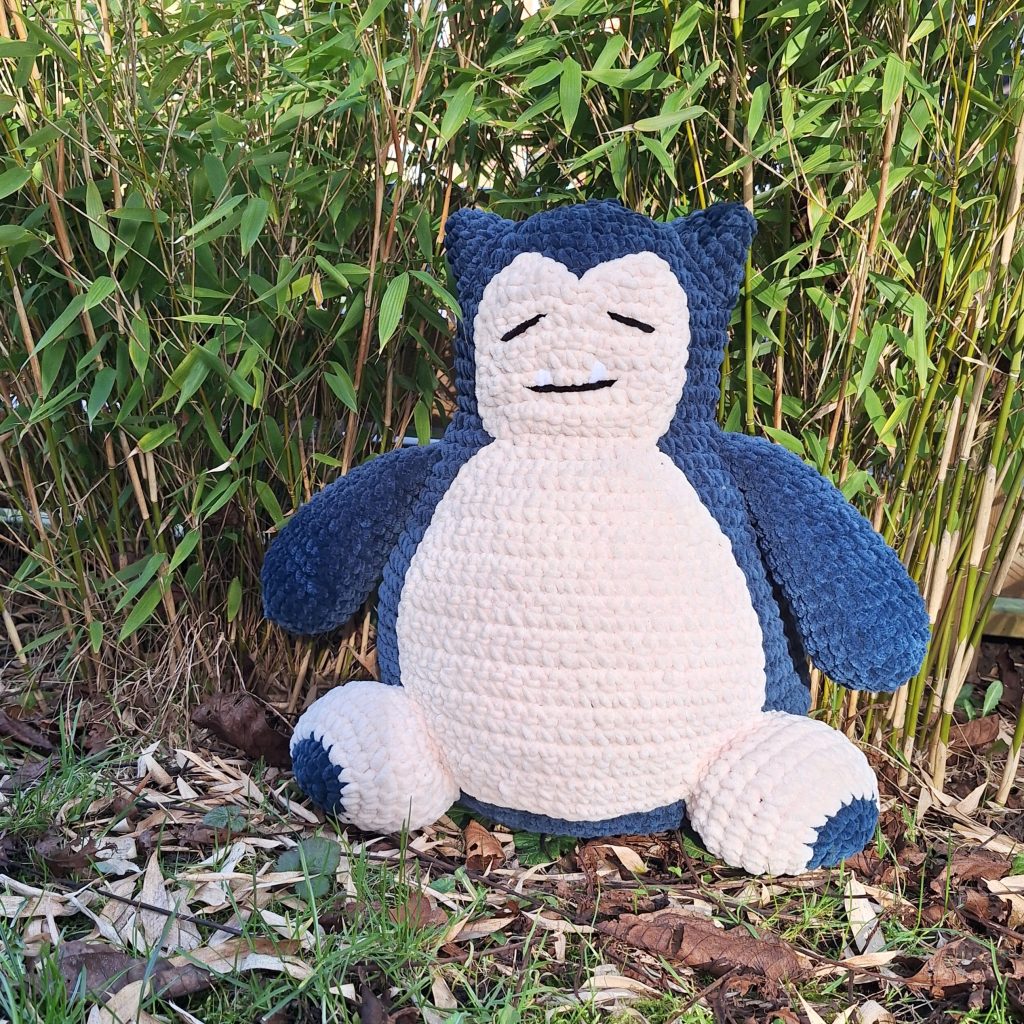
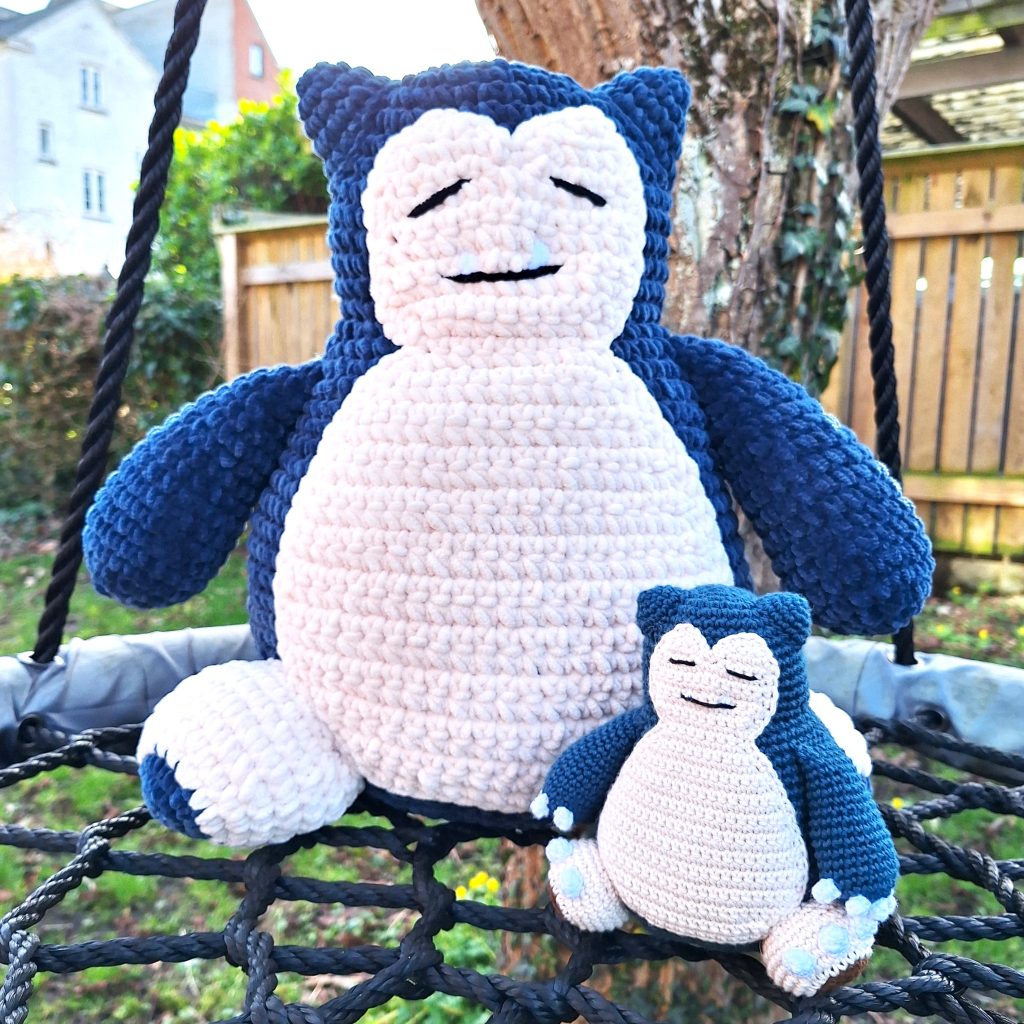
If you’d like a much bigger crochet Snorlax, I got you! I also made a large version og Snorlax! He is about 46 cm tall, or 18 inches.
To make a giant and soft Snorlax, you will need Hobbii Honey Bunny yarn. This yarn is a chenille yarn, which means your Snorlax will be huge and so fluffy! With this yarn i use a 6 mm hook (or a J-10 hook). You will need the following colors:
- 3 x prussian blue (82)
- 1 x Oatmilk (03)
- 1 x White (01) if you want to give him his claws
- Optional: 1 x chocolate for the feet. I just used the prussian blue for this instead.
- Optional: black for embroidering the face
If Honey Bunny is unavailable other chenille yarn in the same thickness, like Baby Snuggle, is a great substitute.
Abbreviations in this crochet pattern
Rnd = round
mr = magic ring
sc = single crochet
inc = increase, 2 sc in the same stitch
dec = decrease, make 2 stitches into 1
ss = slip stitch
FLO = Front Loop Only
FO = Finish Off chain
Snorlax crochet pattern
Body – in blue
Rnd 1: 6sc in mr (6)
Rnd 2: inc x 6 (12)
Rnd 3: (sc, inc) x 6 (18)
Rnd 4: (sc, inc, sc) x 6 (24)
Rnd 5: 6sc, (sc, inc) x 3, 6sc, (sc, inc) x 3 (30)
Rnd 6: 6sc, (sc, inc, sc) x 3, 6sc, (sc, inc, sc) x 3 (36)
Rnd 7: 6sc, (3sc, inc) x 3, 6sc, (3sc, inc) x 3 (42)
Rnd 8-14: sc around (42)
Rnd 15: 6sc, (3sc, dec) x 3, 6sc, (3sc, dec) x 3 (36)
Rnd 16: in FLO, 6sc, (3sc, inc) x 3, 6sc, (3sc, inc) x 3 (42)
Rnd 17: 6sc, (2sc, inc, 2sc) x 3, 6sc, (2sc, inc, 2sc) x 3 (48)
Rnd 18: 6sc, (5sc, inc) x 3, 6sc, (5sc, inc) x 3 (54)
Rnd 19: sc around (54)
Rnd 20: 6sc, (3sc, inc, 3sc) x 3, 6sc, (3sc, inc, 3sc) x 3 (60)
Rnd 21: sc around (60)
Rnd 22: 12sc, (5sc, inc) x 3, 12sc, (5sc, inc) x 3 (66)
Rnd 23: sc around (66)
Rnd 24: 12sc, (3sc, inc, 3sc) x 3, 12sc, (3sc, inc, 3sc) x 3 (72)
Rnd 25: sc around (72)
Rnd 26: 12sc, (7sc, inc) x 3, 12sc, (7sc, inc) x 3 (78)
Rnd 27-35: sc around (78)
Rnd 36: 21sc, (4sc, dec) x 3, 21sc, (4sc, dec) x 3 (72)
Rnd 37: 18sc, (4sc, dec) x 3. 18sc, (4sc, dec) x 3 (66)
Rnd 38: (9sc, dec) x 6 (60)
Rnd 39: (4sc, dec, 4sc) x 6 (54)
Rnd 40: (7sc, dec) x 6 (48)
Rnd 41: (3sc, dec, 3sc) x 6 (42)
Rnd 42: (5sc, dec) x 6 (36)
Rnd 43: (2sc, dec, 2sc) x 6 (30)
Rnd 44: (3sc, dec) x 6 (24)
Rnd 45: (sc, dec, sc) x 6 (18)
Stuff firmly.
Rnd 46: (sc, dec) x 6 (12)
Rnd 47: dec x 6 (6)
FO.
Ears – in blue. Make 2.
Rnd 1: 4sc in mr (4)
Rnd 2: inc x 4 (8)
Rnd 3: (sc, inc) x 4 (12)
Rnd 4: (sc, inc, sc) x 4 (16)
Rnd 5: (inc, 3sc) x 4 (20)
ss and FO leaving tail for sewing. Stuff and finish stuffing it firmly when attaching the piece.
Belly patch – in cream color
This piece is worked in rows. It is worked top to bottom. Every round is ended with (ch, turn) unless stated otherwise.
Start by chaining 3.
Row 1: sc in 2nd ch, inc (3)
Row 2: inc, sc, inc (5)
Cut the yarn and pull the loop through. This piece will be one of the top pieces of the patch. Make another piece following the pattern, but don’t cut the yarn. You now have two pieces, and one is still connected to the yarn.
Row 3: 4sc, inc, start working in the first piece you made, inc, 4sc (12)
Row 4-8: 12sc (12)
Row 9: dec, 8sc, dec (10)
Row 10: dec, 6sc, dec (8)
Row 11: 8sc (8)
Row 12: inc, 6sc, inc (10)
Row 13: inc, 8sc, inc (12)
Row 14: inc, 10sc, inc (14)
Row 15: inc, 12sc, inc (16)
Row 16: inc, 15sc (17)
Row 17: inc, 16sc (18)
Row 18: inc, 17sc (19)
Row 19: inc, 18sc (20)
Row 20: inc, 19sc (21)
Row 21: inc, 20sc (22)
Row 22-28: 22sc (22)
Row 29: dec, 18sc, dec (20)
Row 30: dec, 16sc, dec (18)
Row 31: dec, 14sc, dec (16)
Row 32: dec, 12sc, dec (14)
Don’t ch and turn on round 32. Put a marker in the last st of row 32. Continue to sc around the entire piece to give it a nice edge. Continue sc around until you reach the marker you placed in row 32.
To keep the shape of the piece, make sure to just make a ss where the piece has dips (like the neck and between the eyes) and make an inc when the piece makes a point (being the eyes).
Arms – in blue. Make 2.
Rnd 1: 6sc in mr (6)
Rnd 2: inc x 6 (12)
Rnd 3: (sc, inc) x 6 (18)
Rnd 4: (5sc, inc) x 3 (21)
Rnd 5-11: sc around (21)
Rnd 12: (5sc, dec) x 3 (18)
Rnd 13-14: sc around (18)
Rnd 15: (4sc, dec) x 3 (15)
Rnd 16-17: sc around (15)
Rnd 18: dec, 13 sc (14)
Stuff the bottom of the arm firmly. Leave the top un-stuffed.
Fold the piece and work through both layers to close the arm.
Rnd 19: sc through both layers, 7sc (7)
Claws for hands – in white.
Make 10 (5 for each hand)
Rnd 1: 3sc in mr (3)
Rnd 2: sc around (3)
FO.
(If you are struggling, make the sc in the magic ring very loose)
Feet – start in brown. Make 2.
Rnd 1: 6sc in mr (6)
Rnd 2: inc x 6 (12)
Rnd 3: (inc, sc) x 6 (18)
In the last stitch of rnd 3, change to cream color.
Rnd 4: (sc, inc, sc) x 6 (24)
Rnd 5: (7sc, inc) x 3 (27)
Rnd 6: (4sc, inc, 4sc) x 3 (30)
Rnd 7-8: sc around (30)
Rnd 9: (4sc, dec, 4sc) x 3 (27)
Rnd 10: (7sc, dec) x 3 (24)
ss, FO leaving tail for sewing. Stuff the foot and finish stuffing it firmly when attaching the piece.
Claws for feet – in white.
Make 6 (3 for each foot)
Rnd 1: 4sc in mr (4)
Rnd 2: (sc, inc) x 2 (6)
ss and FO leaving tail for sewing.
Assembly of your crochet Snorlax
The first step in assembling your Snorlax, is adding the claws to the arms. When doing this, remember to space out 4 claws in a line and the last claw slightly on the side as the thumb. It can help to pin the claws in place to ensure the correct placement.
Attach the belly-piece to the body first. This way, you can align everything else depending on the belly-piece. Pin the piece in place and remove pins as you go. My belly-patch is between round 6 and 34. Be sure to align the sinching of the neck on the belly with the neck of the body!
Next attach the ears. The ears should sit between round 4 and 9. There is approximately 1,5 stitches between the edge of the belly-patch and the ears.
The limbs of Snorlax can be attached in multiple poses. He can be in a sitting position like I have made, he can be standing or he can even be laying down. Pin the pieces to the body until you’re happy with the result. Below will be a guide to get a sitting Snorlax.
The flat edge of the arms are attached along round 18. The space between the belly-patch and the top of the arm is 2-3 stitches. If you want the arms to be closer to the body, add some stitches to secure the arm to the body around halfway down the arm. Moving the stuffing around making the side towards the body more flat can also help.
To achieve a sitting Snorlax, attach the feet between round 31 and 38. Remember to stuff the foot firmly before finishing the sewing. The feet should slightly overlap with the belly-patch. There are around 15 stitches between the feet. When the feet are attached, add the 3 claws to each foot. They should be placed at the top part of the foot and evenly spaced.
To embroider the face, you need black and white thread or yarn. I used the same type of yarn as the rest of the piece. Embroider 2 lines for the eyes and a longer line for the mouth. With white add 2 fangs at either side of the mouth