
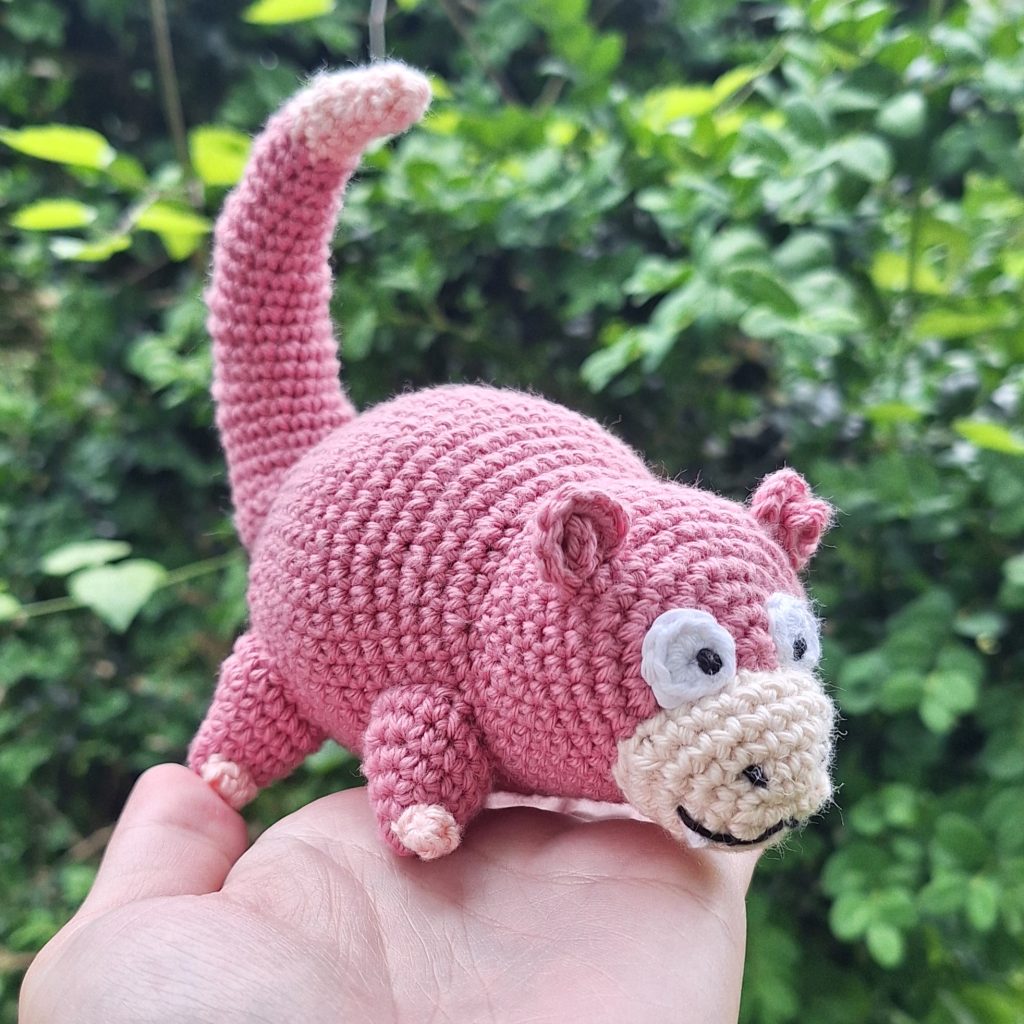
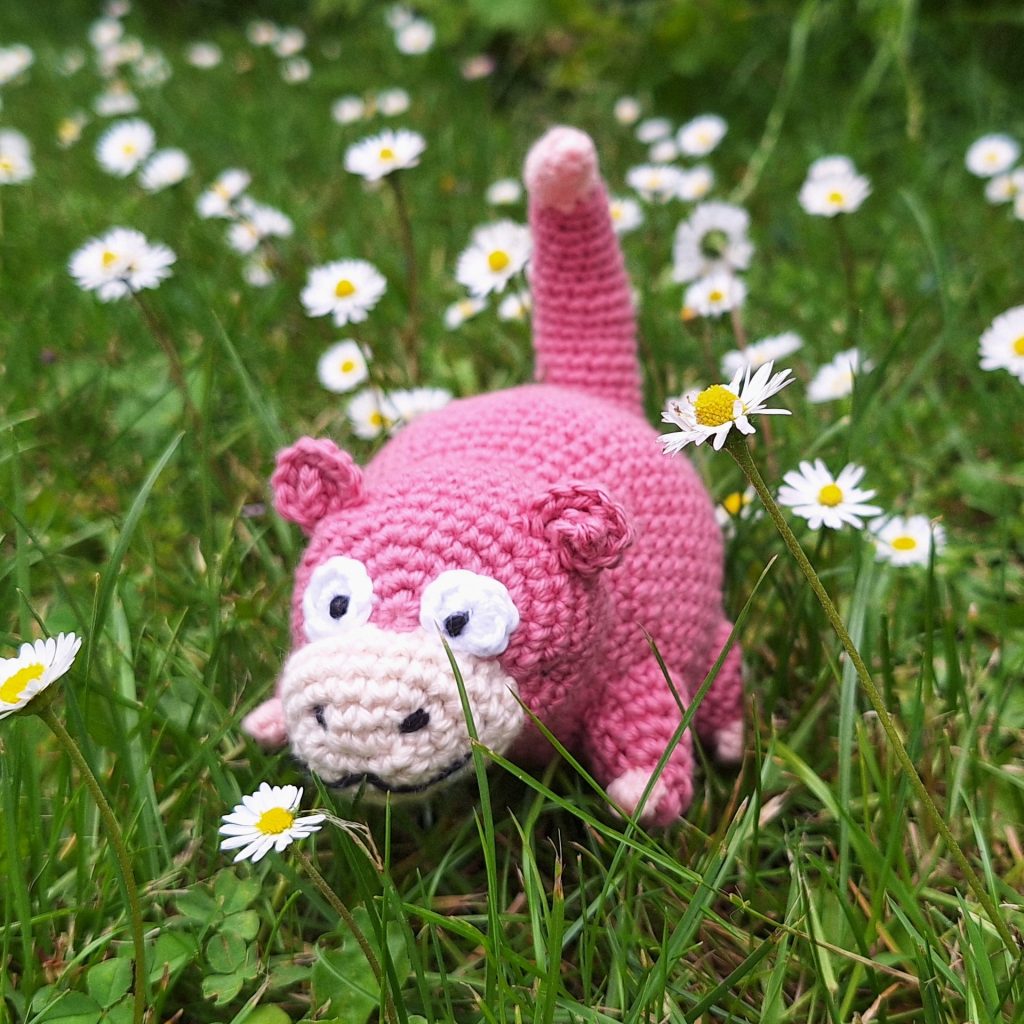
Get ready to crochet your very own Slowpoke, the lovable and laid-back Pokémon! This crochet pattern captures Slowpoke’s charming and easygoing nature with its adorable pink body, round face, and signature droopy expression. This amigurumi Slowpoke is sure to bring a smile to any Pokémon fan’s face with its delightful and relaxed demeanor.
Perfect for crocheters who have some experience with amigurumi, our Slowpoke pattern uses regular amigurumi terms and techniques. The clear, easy-to-follow instructions will guide you through each step. While this pattern is accessible, it’s recommended that you have completed a few amigurumi projects beforehand to ensure a smooth crafting experience.
Once completed, your crocheted Slowpoke will be the perfect companion to brighten any space or delight any Pokémon enthusiast. So grab your crochet hook, pink yarn, and let’s start crafting this lovable Pokémon together! With this Slowpoke crochet pattern, you can create a charming and serene Pokémon friend to add to your collection.
Supplies you'll need to crochet Slowpoke
General supplies:
- Crochet hook 2,5 mm. I always use clover amour hooks for my projects!
- Sewing needle
- Stuffing
- Stitch marker
With Amigurumi you guage doesn’t matter much. Using smaller hook and yarn will make you finished Piece smaller, and bigger hook and yarn will make him bigger. Just make sure that your yarn and hook fits together and makes a tight fabric so the stuffing won’t show through!
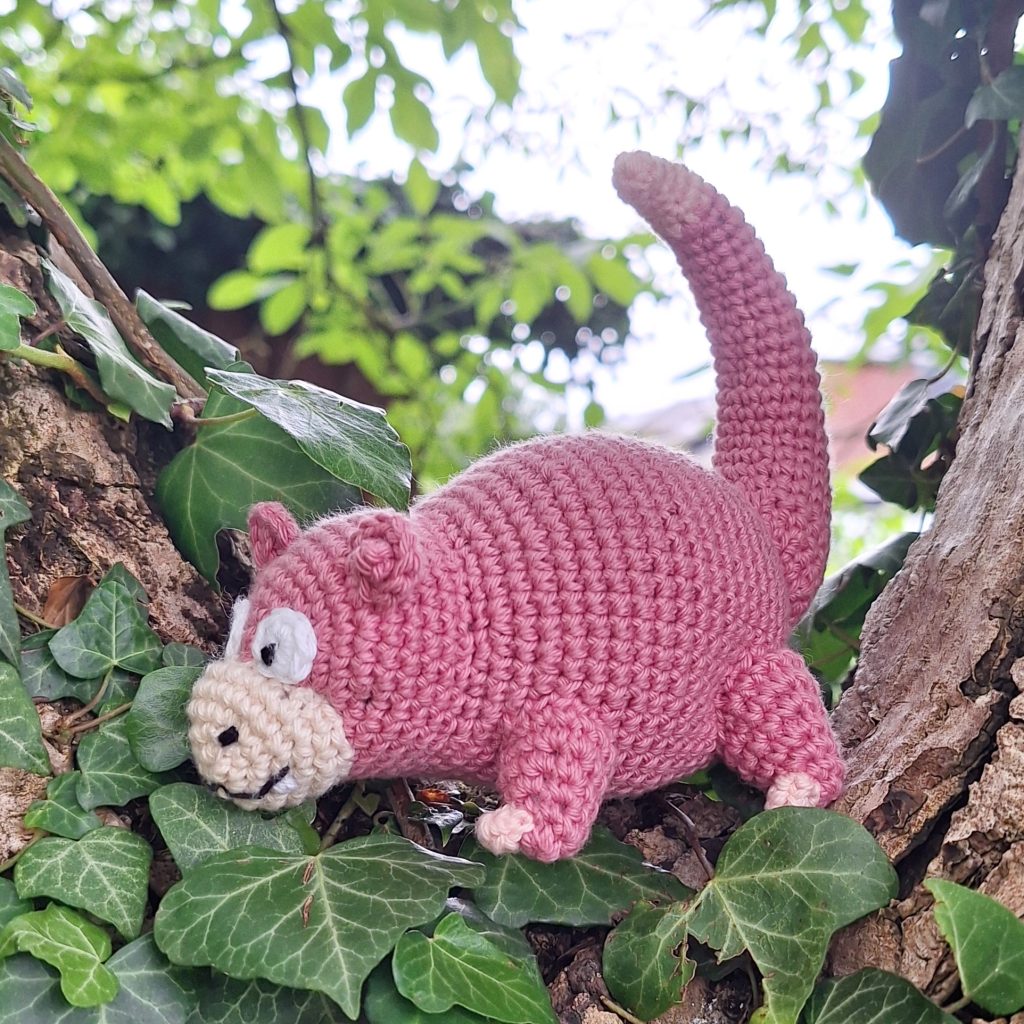
For a smaller version, about 10 cm tall including the tail, or 4 inches, you will need the following yarn.
I reccomend Hobbii Rainbow cotton 8/4. This yarn is a 100% cotton and very nice to work with! With this yarn, I use a 2,5 mm hook (or a B-1 or C-2 should work too!). If Rainbow cotton is sold out, I can also recommend Friends cotton from Hobbii as a direct substitute.
- 1 x pink
- Some light pink or white for claws and tip of tail
- Some beige for the muzzle
- A bit of black and white for face details
Abbreviations in this crochet pattern
Rnd = round
mr = magic ring
sc = single crochet
inc = increase, 2 sc in the same stitch
dec = decrease, make 2 stitches into 1
ss = slip stitch
BLO = Back Loop Only
FLO = Front Loop Only
FO = Finish Off
Slowpoke crochet pattern
Body
In pink
Rnd 1: 6sc in mr (6)
Rnd 2: inc x 6 (12)
Rnd 3: (sc, inc) x 6 (18)
Rnd 4: 2sc, (inc, sc) x 3, 3sc, (inc, sc) x 3, sc (24)
Rnd 5: 4sc, (inc, sc) x 3, 6sc, (inc, sc) x 3, 2sc (30)
Rnd 6: 8sc, inc, 4sc, inc, 3sc, inc, 4sc, inc, 7sc (34)
Rnd 7: 12sc, inc, 8sc, inc, 12sc (36)
Rnd 8-11: sc around (36)
make extra sc until you are at the bottom of the head (the flat side is the bottom). This is now the new start of the round.
Rnd 12: 6sc, (sc, dec, sc) x 6, 6sc (30)
Rnd 13: 6sc, in FLO (sc, inc, sc) x 6, work in both loops again, 6sc (36)
Rnd 14: 6sc, (3sc, inc) x 6, 6sc (42)
Rnd 15: sc around (42)
Rnd 16: 6sc, (2sc, inc, 2sc) x 6, 6sc (48)
Rnd 17: sc around (48)
Rnd 18:10sc, inc, 12sc, inc, 13sc, inc, 10sc (51)
Use a stitchmarker or a piece of scrap yarn to mark the center of the belly. You will need to recenter after the rounds with sc around, and this marker will make it easier to do so.
Rnd 19-26: sc around (51)
Make extra sc until you are at the center of the belly. Use your marker from earlier to align the piece.
Rnd 27: 10sc, dec, 12sc, dec, 13sc, dec, 10sc (48)
Rnd 28: sc around (48)
Rnd 29: 6sc, (2sc, dec, 2sc) x 6, 6sc (42)
Rnd 30: sc around (42)
Rnd 31: (5sc, dec) x 6 (36)
Rnd 32: (2sc, dec, 2sc) x 6 (30)
Rnd 33: (3sc, dec) x 6 (24)
Stuff the piece.
Rnd 34: (sc, dec, sc) x 6 (18)
Rnd 35: (sc, dec) x 6 (12)
Finish stuffing if needed.
Rnd 36: dec x 6 (6)
FO.
Tail
Start in light pink or white
Rnd 1: 6sc in mr (6)
Rnd 2-3: sc around (6)
Rnd 4: 2sc, inc x 2, 2sc (8)
Rnd 5: sc around (8)
Rnd 6: inc, 3sc, dec, 2sc (8)
Change to body color
Rnd 7: sc around (8)
Rnd 8: 3sc, inc x 2, 3sc (10)
Rnd 9: sc around (10)
Rnd 10: inc, 4sc, dec, 3sc (10)
Rnd 11: sc around (10)
1-2 extra sc to return to the middle of the piece if needed. This will be the new beginning of the round.
Rnd 12: 4sc, inc x 2, 4sc (12)
Rnd 13: sc around (12)
Rnd 14: inc, 5sc, dec, 4sc (12)
Rnd 15: sc around (12)
1-2 extra sc to return to the middle of the piece if needed. This will be the new beginning of the round.
Rnd 16: 5sc, inc x 2, 5sc (14)
Rnd 17: sc around (14)
Rnd 18: inc, 5sc, dec, 6sc (14)
Rnd 19: sc around (14)
Rnd 20: 6sc, inc x 2, 6sc (16)
Rnd 21: sc around (16)
Rnd 22: inc, 6sc, dec, 7sc (16)
Rnd 23: 7sc, inc x 2, 7sc (18)
Rnd 24: inc, 7sc, dec, 8sc (18)
1-2 extra sc to return to the middle of the piece if needed. This will be the new beginning of the round.
We start using short rows to make the curve of the tail more prominent. To make shortrows you will turn the work and essentially be working in rows to add height in a certain part of the piece. This is indicated by ‘turn’ in the pattern. When you see the word ‘turn’ simply turn the work so you can start working on the “wrong side” or inside part of the piece. Then work in the stitches like normally. Don’t make a chain when you turn, simply just start crocheting in the first stitch available (this is the stitch you just made before turning)
Rnd 25: 8sc, inc x 2, 6sc, turn, 16sc, turn, 14sc, turn, 12sc, turn, 10sc, turn, 8sc, turn, 8sc (this round will give you 20 regular stitches)
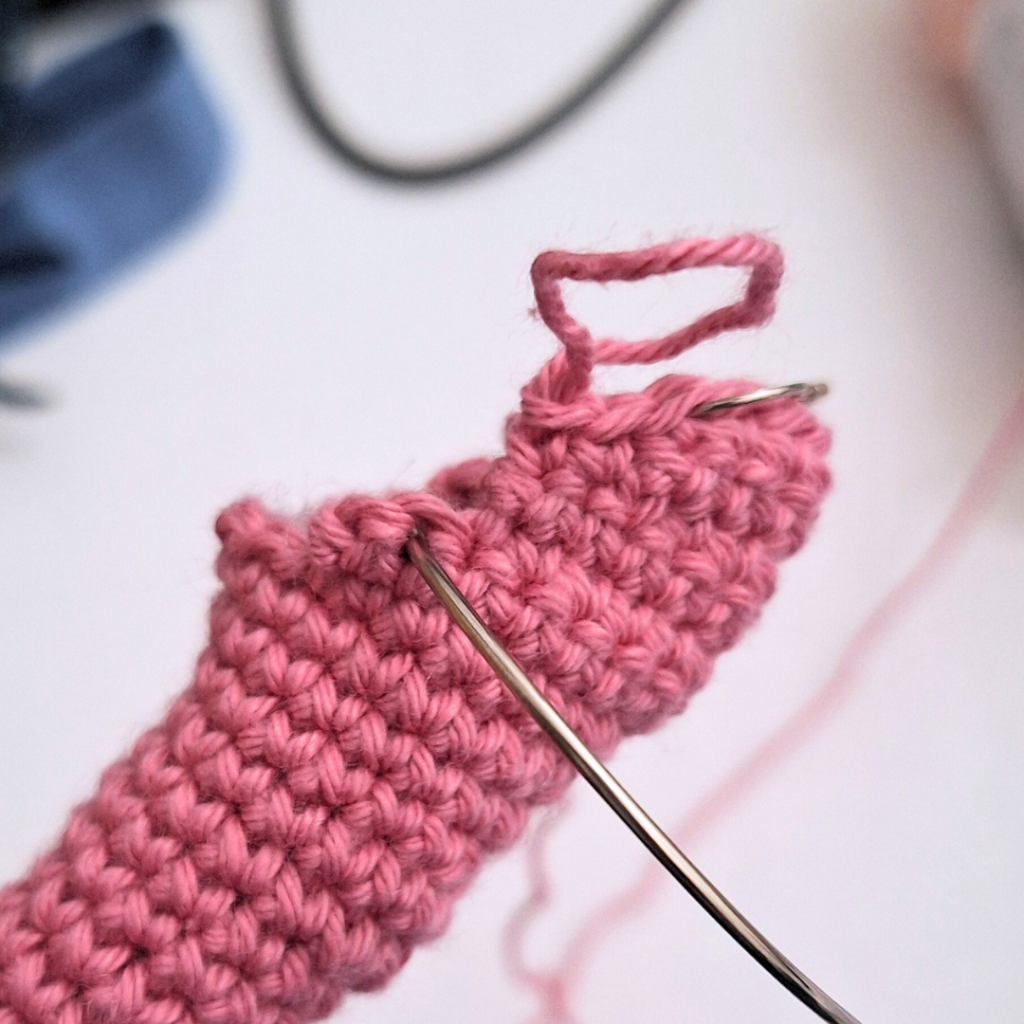

Round 25 will have given you a piece that looks pretty rough. We will fix this in the following round. To make the edge neat again, work only in the normal stitches. Ignore the edges completely and only work in the sc stitches you made. The pictures show you the first stitch you should work in, in each “layer”.
Rnd 26: 5sc, inc x 2, 13 sc (22)
ss and FO with a tail for sewing.
Front legs
In body color
Rnd 1: 6sc in mr (6)
Rnd 2: (sc, inc, sc) x 2 (8)
Rnd 3: 3sc, inc x 2, 3sc (10)
Rnd 4: 4sc, inc x 2, 4sc (12)
Rnd 5: 5sc, inc x 2, 5sc (14)
Rnd 6: 10sc, ss, FO with tail for sewing.
Make 2.
Hind legs
In body color
Rnd 1: 6sc in mr (6)
Rnd 2: (sc, inc, sc) x 2 (8)
Rnd 3: 3sc, inc x 2, 3sc (10)
Rnd 4: 4sc, inc x 2, 4sc (12)
Rnd 5: 5sc, inc x 2, 5sc (14)
Rnd 6: 6sc, inc x 2, 6sc (16)
Rnd 7: 12sc, ss, FO with tail for sewing.
Claws
In light pink or white
Rnd 1: 4sc in mr (4)
Rnd 2: 3sc, ss (4)
FO leaving tail for sewing.
Make 4.
Ears
In body color
We will be making both a left and a right ear.
First ear
Ch 9. Start working in 2nd chain from hook.
Row 1: inc x 7, sc, cut the yarn and pull it through the stitch.
Twist the ear together and add a few stitches to hold it in place. The sc is the base that lies toward the head.
Second ear
Ch 9. Start working in 2nd chain from hook.
Row 1: sc, inc x 6, (sc, ss) in the last st, cut the yarn and pull it through the stitch.
Twist the ear together and add a few stitches to hold it in place. The first sc is the base that lies toward the head.
Muzzle
In beige
This piece starts by working around a chain. Start by chaining 5. Start working in 2nd stitch from the hook.
Rnd 1: 3sc, 3sc in the last st, turn the piece and work on opposite side of the chain, 2sc, inc (10)
Rnd 2: (inc, 2sc, inc, sc) x 2 (14)
Rnd 3: (inc, 5sc, inc) x 2 (18)
Rnd 4: (8sc, inc) x 2 (20)
Rnd 5: inc, 8sc, inc, 10sc (22)
Rnd 6: 12sc, ss, FO with tail for sewing.
Eyes
In white
Rnd 1 8sc in mr (8)
FO with tail for sewing. Embroider black pupils. You can embroider the pupils before or after attaching the eyes, doing it after can make placement of the pupils easier.
Make 2.
Assembly of your crochet Slowpoke
Attach the muzzle between rnd 2-8 centered on the face. The eyes should be attached right over the muzzle on either side of the magic ring. The ears are attached at round 7-8 with around 7 stitches between them.
Front legs are placed on rounds 15-19 with around 10 stitches between them.
The hind legs are placed on rounds 26-30 with around 10-11 stitches between them.
The claws are attached to the bottom of each leg pointes forward.
The tail is attached at round 31 and covers the last round of the body.
Last step is embroidering the mouth, fangs and nose. Mouth and nose are made in black and a few stitches in white will make up the fangs. If you haven’t embroidered pupils earlier, also embroider them now.