
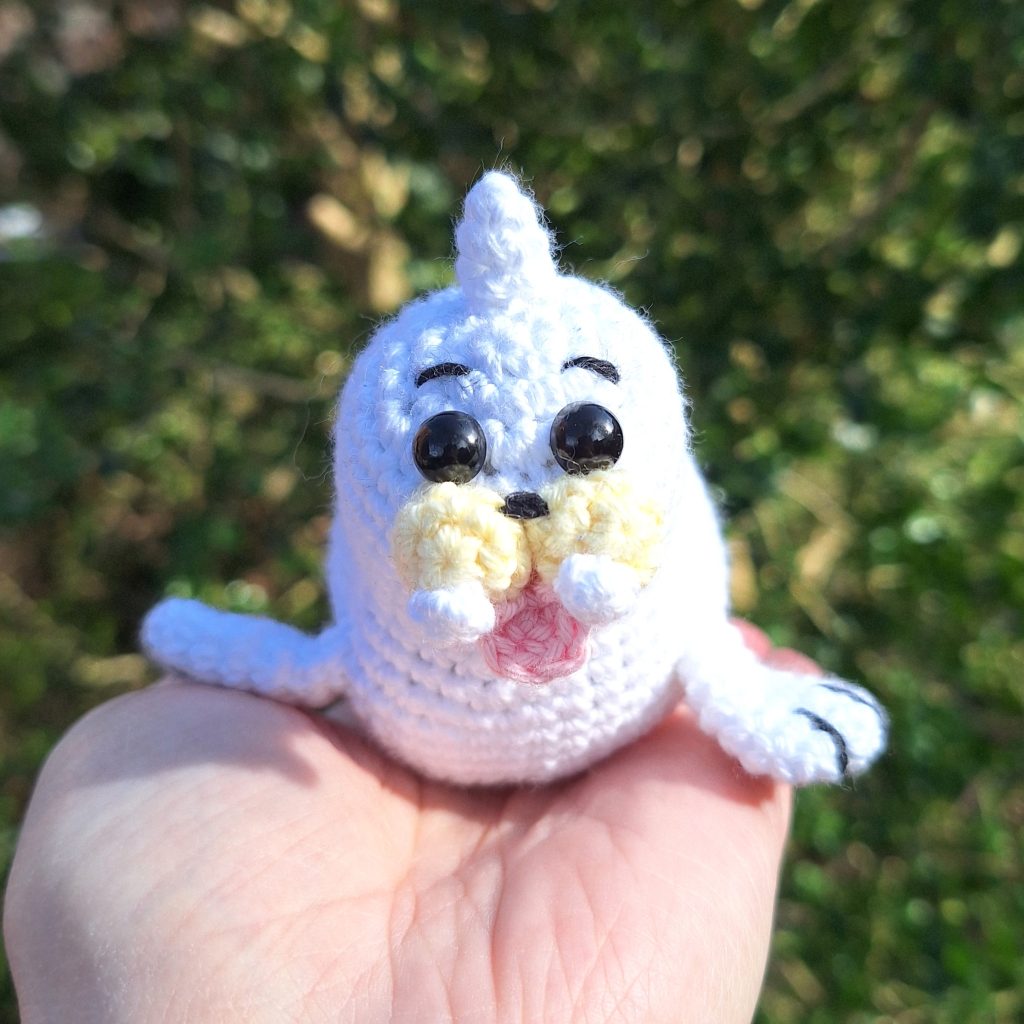
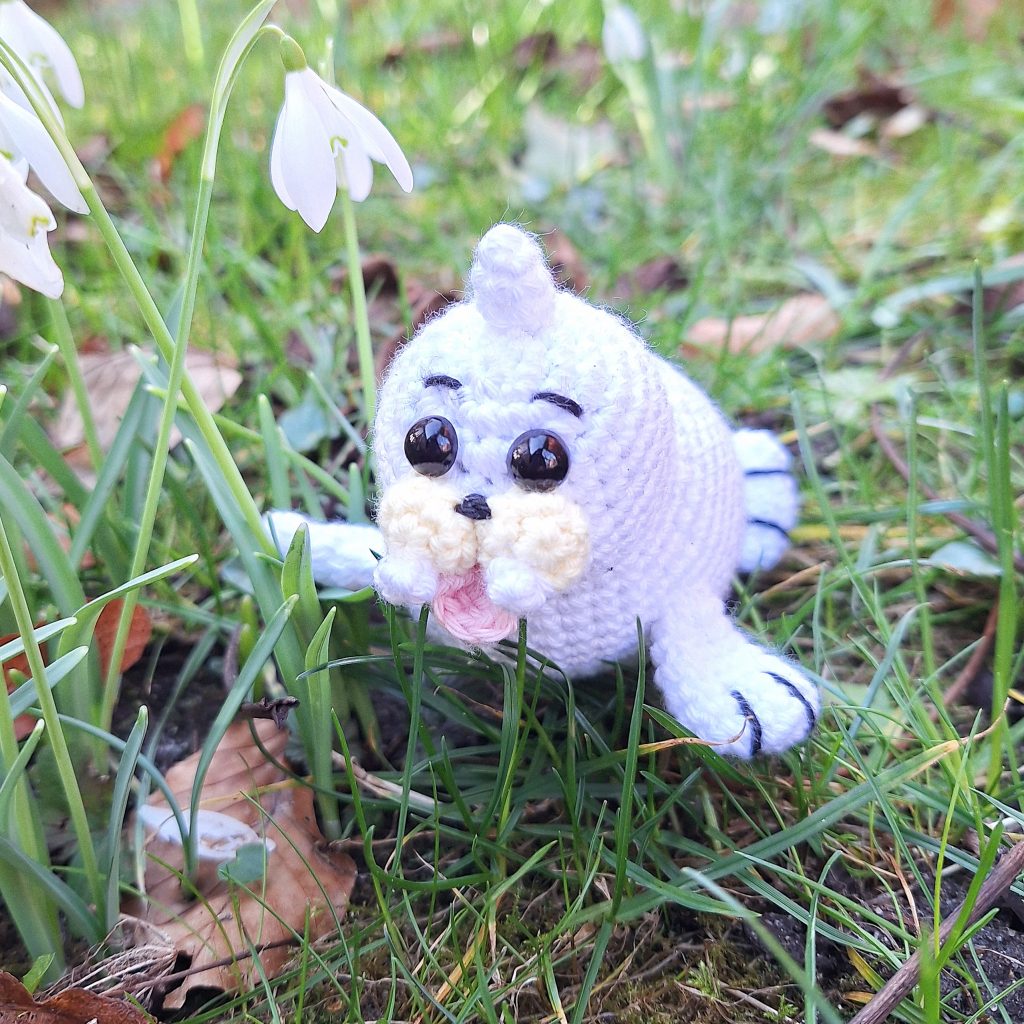
Get ready to bring the charming Seel to life with this cute crochet pattern! This amigurumi pattern captures the playful and adrobale nature of Seel, the Water-type Pokémon. With its sleek white body, adorable face, and cute little flippers, a crochet Seel is a delightful addition to your amigurumi colection.
Perfect for amigurumists of all skill levels, this Seel crochet pattern uses standard amigurumi terms and techniques. The instructions are clear and detailed, with helpful photos to guide you through each step. Whether you’re new to amigurumi or an experienced crocheter, you’ll find this pattern to be an enjoyable and rewarding project.
Creating Seel is a heartwarming journey, as you watch its lovable form come together stitch by stitch. The amigurumi pattern highlights Seel’s charming features, making it an excellent piece for any Pokémon fan or crochet enthusiast. So gather your crochet hook, white yarn, and embark on a crafting adventure with our Seel crochet pattern.
Supplies you'll need to crochet Seel
General supplies:
- Crochet hook 2,5 mm, I always use clover amour hooks for my projects!
- Sewing needle
- Stuffing
- Stitch marker
With Amigurumi you guage doesn’t matter much. Using smaller hook and yarn will make you finished Seel smaller, and bigger hook and yarn will make him bigger. Just make sure that your yarn and hook fits together and makes a tight fabric so the stuffing won’t show through!
For a smaller version, about 8 cm tall, or 3 inches, you will need the following yarn.
I reccomend Hobbii Rainbow cotton 8/4. This yarn is a 100% cotton and very nice to work with! With this yarn, I use a 2,5 mm hook (or a B-1 or C-2 should work too!). If Rainbow cotton is sold out, I can also recommend Friends cotton from Hobbii as a direct substitute.
- 1 x white
- A bit of light yellow and light pink for face-details
- A bit of black for details on the fins
- Safety eyes, I used 6mm
Abbreviations in this crochet pattern
Rnd = round
mr = magic ring
ch = chain
sc = single crochet
inc = increase, 2 sc in the same stitch
3-in-1-inc = 3sc in 1 stitch
dec = decrease, make 2 stitches into 1
ss = slip stitch
BLO = Back Loop Only
FO = Finish Off
Seel crochet pattern
Body
In white
Rnd 1: 6sc in mr (6)
Rnd 2: inc x 6 (12)
Rnd 3: (sc, inc) x 6 (18)
Rnd 4: (sc, inc, sc) x 6 (24)
Rnd 5: (7sc, inc) x 3 (27)
Rnd 6-10: sc around (27)
Rnd 11: (7sc, dec) x 3 (24)
Rnd 12: (3sc, inc) x 6 (30)
Rnd 13: 6sc, (3sc, inc) x 6 (36)
Rnd 14: 6sc, (2sc, inc, 2sc) x 6 (42)
Rnd 15: 12sc, (3sc, inc, 4sc) x 3, 6sc (45)
Rnd 16-18: sc around (45)
Rnd 19: (2sc, inc) x 3, 36sc (48)
Rnd 20: (dec, 3sc) x 2, 33sc, dec, 3sc (45)
Rnd 21: (dec, 3sc) x 2, 30sc, dec, 3sc (42)
Rnd 22: (dec, 3sc) x 2, 27sc, dec, 3sc (39)
Rnd 23: (dec, 3sc) x 2, 24sc, dec, 3sc (36)
Rnd 24: (2sc, dec, 2sc) x 2, 20sc, dec, 2sc (33)
Rnd 25: (dec, 3sc) x 2, 18sc, dec, 3sc (30)
Attach safety eyes between round 3-4, place them 4 st apart. The deceases in previous rounds is the belly of the seal, align the eyes with the placement of the belly. Stuff lightly and pin the facial features to the piece to make placement easier.
Rnd 26: (2sc, dec, 2sc) x 2, 14sc, dec, 2sc (27)
Rnd 27: (dec, 3sc) x 2,12sc, dec, 3sc (24)
Rnd 28: (2sc, dec, 2sc) x 2, 8sc, dec, 2sc (21)
Rnd 29: (dec, 3sc) x 2, 6sc, dec, 3sc (18)
Stuff.
Rnd 30: (dec, 4sc) x 3 (15)
Rnd 31: (sc, dec, 2sc) x 3 (12)
Rnd 32: 2 x dec, 6sc, dec) (9)
Finish stuffing
Rnd 33: 2 x dec, 3sc, dec (6)
Front fins
In white
First round is worked around a chain.
Chain 5
Rnd 1: sc in 2nd st, 2sc, 3-in-1-inc, turn and continue to work on other side of chain, 2sc, inc (10)
Rnd 2: (4sc, inc) x 2 (12)
Rnd 3-5: sc around (12)
Rnd 6: (4sc, dec) x 2 (10)
Rnd 7: (3sc, dec) x 2 (8)
Rnd 8: sc around (8)
FO leaving tail for sewing. Make 2.
Back fins
In white
First round is worked around a chain.
Chain 7.
Rnd 1: sc in 2nd ch, 4sc, 3-in-1-inc, turn and continue to work on other side of chain, 4sc, inc (14)
Rnd 2: (6sc, inc) x 2 (16)
Rnd 3: sc around (16)
Rnd 4: (6sc, dec) x 2 (14)
Rnd 5: sc around (14)
Rnd 6: (5sc, dec) x 2 (12)
Rnd 7: sc around (12)
Rnd 8: (dec, 4sc) x 2 (10)
Rnd 9: (dec, 3sc) x 2 (8)
Rnd 10: (dec, 2sc) x 2 (6)
FO leaving tail for sewing. Make 2.
Mouth/cheeks
In pale yellow
Rnd 1: 6sc in mr (6)
Rnd 2: (inc, sc) x 3 (9)
Rnd 3: sc around (9)
ss and FO with tail for sewing. Make 2.
Tongue
In light pink
Rnd 1: 4sc in mr, ch 1, turn (4)
Rnd 2: sc, inc x 2, sc (6)
FO leaving tail for sewing.
Fangs
In white
Rnd 1: 3sc in mr (3)
Rnd 2: sc around (3)
FO leaving tail for sewing. Make 2.
Spike for the head
In white
Rnd 1: 4sc in mr (4)
Rnd 2: inc, 3sc (5)
Rnd 3: 2sc, inc, 2sc (6)
Rnd 4: inc, 5sc (7)
ss, FO leaving tail for sewing.
Assembly of your crochet Seel
Start by attaching the face pieces. Start with the cheeks and make sure they are up against each other and the eyes. Then add the tongue in the middle and the fangs besides the tongue. Attach the spike at the top of his head. Embroider a few stitches between the mouth/cheeks to be the nose and eyebrows above the eyes.
Attach front and back fins. They should not be stuffed. Front fins should be placed so the tip lies flat on the table, so they help the balance of the piece. The back fins should be put on vertically, so you clearly see them when looking at Seel from the front. Embroider lines on the fins to make them more dimensional.