
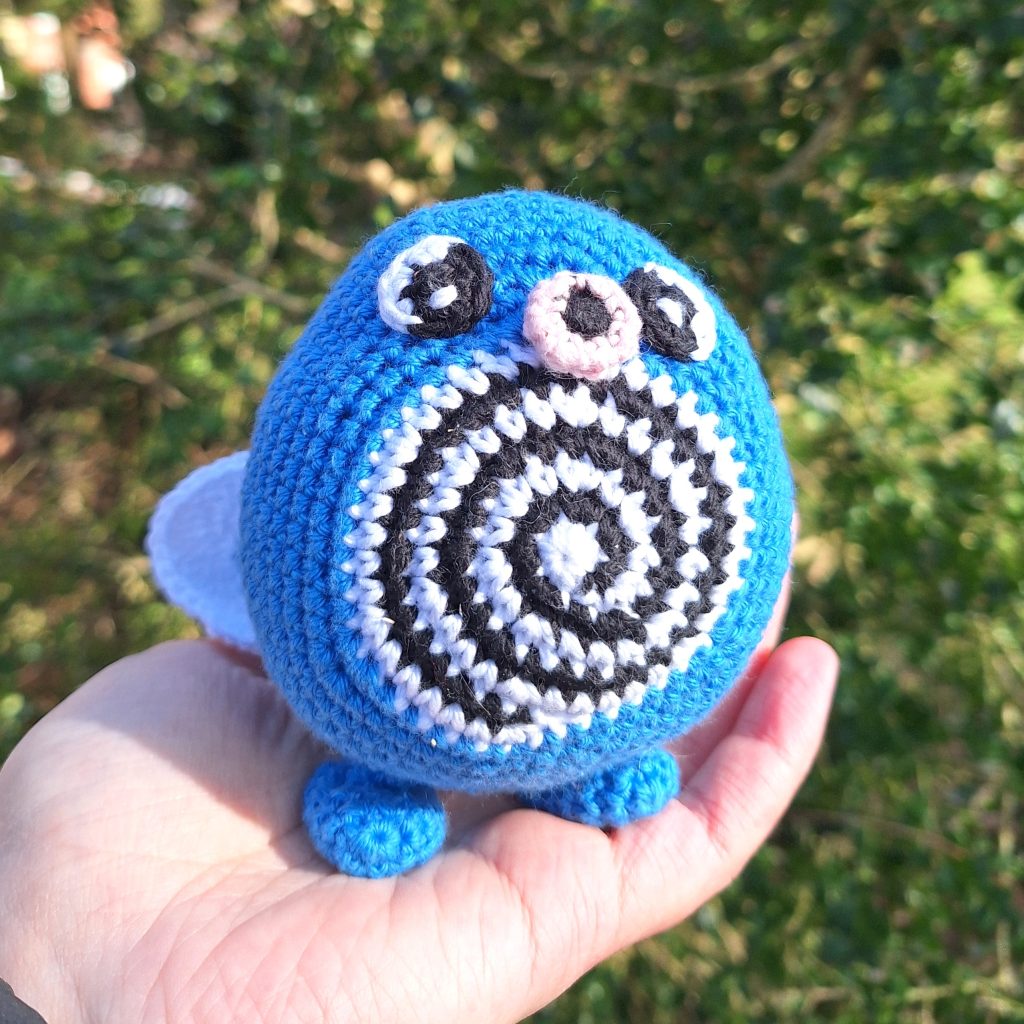
Hello, fellow crochet enthusiasts and Pokémon aficionados! Immerse yourself in the delightful world of crochet with our latest pattern – the adorable Poliwag crochet amigurumi! Whether you’re a seasoned crafter or still fairly new in the crochet amigurumi world, this pattern is perfect for bringing the charm of the Water-type Pokémon to life through your own handmade creation.
Join the growing community of Pokémon crochet fans and bring the iconic Tadpole Pokémon to life with this engaging and straightforward pattern. The pattern will go over all the steps to make a winderful Poliwag. This includes a very simple way to make up his iconic spiral without having a million ends to weave in – big win!
Supplies you'll need to crochet Poliwag
General supplies:
- Crochet hook 2,5 mm for small version and 6 mm for large version, I always use clover amour hooks for my projects!
- Sewing needle
- Stuffing
- Stitch marker
With Amigurumi you guage doesn’t matter much. Using smaller hook and yarn will make you finished Poliwag smaller, and bigger hook and yarn will make him bigger. Just make sure that your yarn and hook fits together and makes a tight fabric so the stuffing won’t show through!
For a smaller version, about 12 cm tall, or 4,5 inches, you will need the following yarn.
I reccomend Hobbii Rainbow cotton 8/4. This yarn is a 100% cotton and very nice to work with! With this yarn, I use a 2,5 mm hook (or a B-1 or C-2 should work too!). If Rainbow cotton is sold out, I can also recommend Friends cotton from Hobbii as a direct substitute.
- 1 x blue (31)
- 1 x white (01)
- 1 x black (09)
- A bit of light pink for the mouth
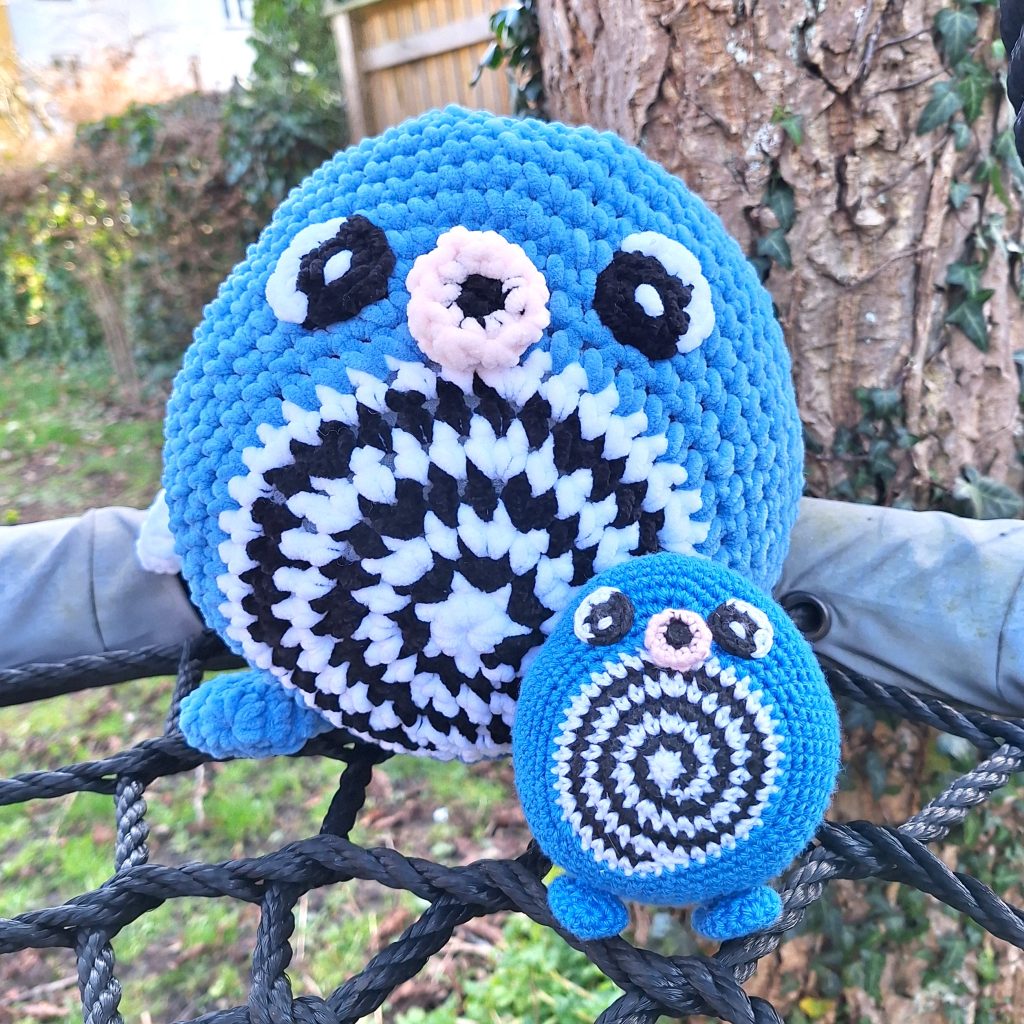
If you’d like a much bigger crochet Poliwag, I got you! I also made a large version of Poliwag! It is about 30 cm tall, or 12 inches.
To make a giant and soft Poliwag, you will need Hobbii Baby Snuggle yarn. This yarn is a chenille yarn, which means your Poliwag will be huge and so fluffy! With this yarn I use a 6 mm hook (or a J-10 hook). You will need the following colors:
- 1 x vivid blue (34)
- 1 x white (01)
- 1 x panther (09)
- A bit of light pink for the mouth
If Baby Snuggle is unavailable other chenille yarn in the same thickness, like Honey Bunny, also from Hobbii, is a great substitute.
Abbreviations in this crochet pattern
Rnd = round
mr = magic ring
sc = single crochet
hdc = half double crochet
inc = increase, 2 sc in the same stitch
dec = decrease, make 2 stitches into 1
dc-inc = 2 dc in 1 stitch
hdc-inc = 2 hdc in 1 stitch
ss = slip stitch
FLO = Front Loop Only
FO = Finish Off chain
Poliwag crochet pattern
The spiral of the body is worked simultaneously with white and black. You are not cutting any of the colors until you change to the blue color of the body. You will start in white.
Spiral
Rnd 1: (white) 6sc in mr (6)
Rnd 2: Attach the black yarn in the next stitch, don’t cut the white. (In black) inc x 6 (12). The last inc is in the last white stitch where the white yarn is still attached. Now let go of the black and continue with the white instead. This you will be doing at every round. This process is shown in this video.
Rnd 3: (white) (sc, inc) x 6 (18)
Rnd 4: (black) (sc, inc, sc) x 6 (24)
Rnd 5: (white) (3sc, inc) x 6 (30)
Rnd 6: (black) (2sc, inc, 2sc) x 6 (36)
Rnd 7: (white) (5sc, inc) x 6 (42)
Make a ss with the black and cut the black yarn. Make an additional sc and ss with the white and FO the white too.
The spiral is now done, and you will move on to the blue of the body in the next step.
Attach the blue yarn at the opposite side of where you finished off the white and black. The place you attach the yarn will be the top of your piece and therefore also where you will attach the mouth later on.
Rnd 8: (inc, 12sc, inc) x 3 (48)
Rnd 9: (inc, 14sc, inc) x 3 (54)
Rnd 10: (inc, 3sc) x 3, 30sc, (3sc, inc) x 3 (60)
Rnd 11: (inc, 3sc) x 3, 36sc, (3sc, inc) x 3 (66)
Rnd 12-19: sc around (66)
Make 2sc. Now move the beginning of the round to keep the allignment of the piece. The next stitch is the new beginning of the round.
Rnd 20: (dec, 3sc) x 3, 36sc, (3sc, dec) x 3 (60)
Rnd 21: (dec, 3sc) x 3, 30sc, (3sc, dec) x 3 (54)
Rnd 22: (dec, 14sc, dec) x 3 (48)
Rnd 23: (dec, 12sc, dec) x 3 (42)
Rnd 24: (5sc, dec) x 6 (36)
Rnd 25: (2sc, dec, 2sc) x 6 (30)
Rnd 26: (3sc, dec) x 6 (24)
Rnd 27: (sc, dec, sc) x 6 (18)
Rnd 28: (sc, dec) x 6 (12)
Rnd 29: dec x 6 (6)
Stuff and FO.
Mouth
Start in black.
Rnd 1: 8sc in mr (8).
FO the black.
Connect light pink in a front loop.
Rnd 2: In FLO, 8sc (8)
Rnd 3-4: sc around (8)
Rnd 5: This round is crocheted through both the normal stitch and the back loops from rnd 2. This will create the look of Poliwags “lips”. Going through both normal stitch and back loop of rnd 2, slip stitch in every stitch (8)
FO leaving tail for sewing.
Eyes
Start in black.
Rnd 1: 5 sc in mr (5)
Rnd 2: inc x 3, in last st, change to white, inc x 2 (10)
Make an additional sc and FO.
Make 2.
Feet (in blue)
Rnd 1: 6 sc in mr (6)
Rnd 2: inc x 6 (12)
Rnd 3-8: sc around (12)
Rnd 9: dec x 6 (6)
Don’t stuff. FO.
Make 2
Legs (in blue)
Rnd 1: 6 sc in mr (6)
Rnd 2-4: sc around (6)
Stuff firmly. Make 2.
Attach the open end to the foot and then attach the closed end of the leg to the body. Make additional stitches to tighten it so Poliwag can stand on his own.
Tail
Start with blue and chain 21. You will crochet around the chain in the first rnd.
Rnd 1: sc in 2nd chain from the hook, 18 sc, in last chain make 3 sc and continue on other side of chain, 19 sc. (41)
Cut the blue yarn. Connect white yarn at the beginning (in the first blue sc you made in last round)
Rnd 2: 10sc, 8hdc, dc, dc-inc x 3, dc, 8hdc, 10sc, ch 1, turn (44)
Rnd 3: 5sc, (hdc, hdc-inc) x 4, (dc, dc-inc) x 3, dc-inc x 6, (dc-inc, dc) x 3, (hdc-inc, hdc) x 4, 5sc (64)
FO.
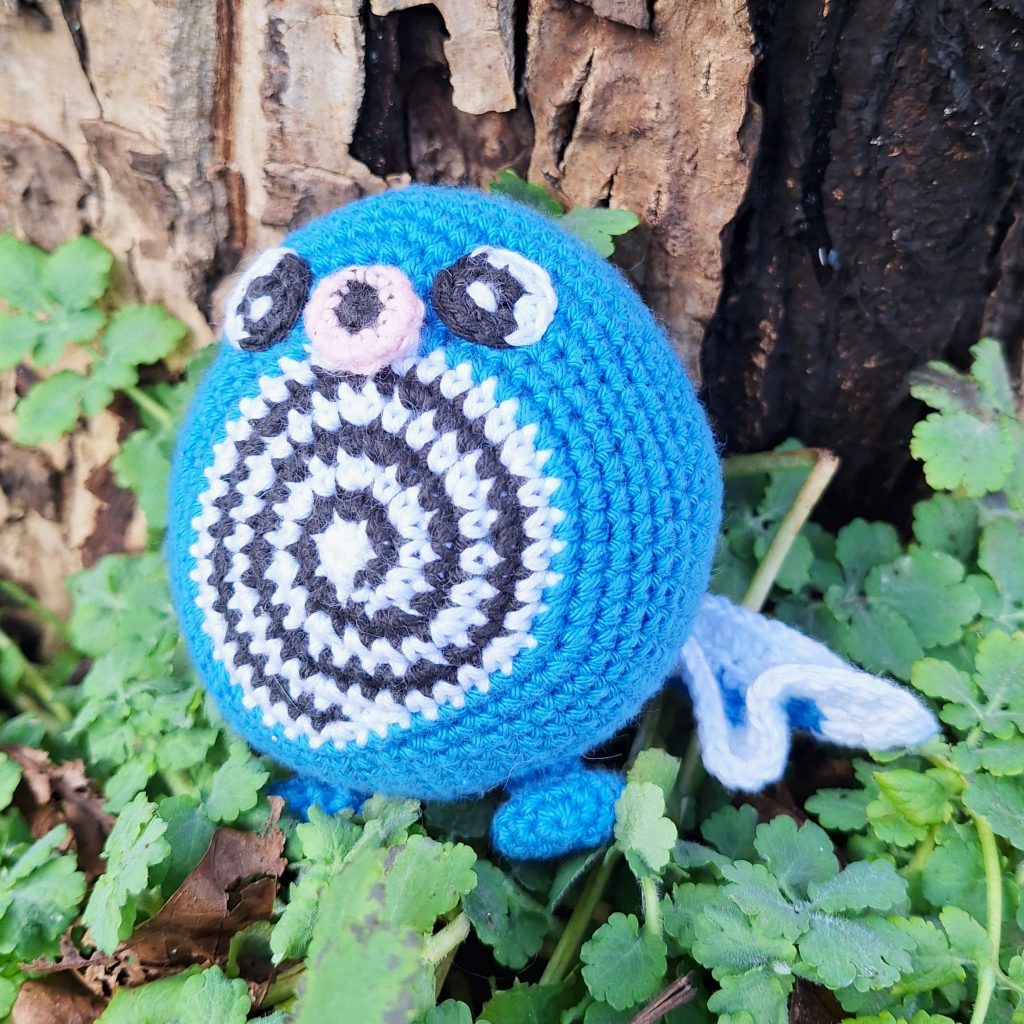
Assembly of your crochet Poliwag
The assembly part of Poliwag is fairly simple.
Start by attaching the mouth on top of the spiral. This is where you attached the blue yarn to your spiral when making the body. The mouth should cover a bit of the spiral and the blue of the body.
For the eyes, add a little highlight with some white. Then attach the eyes on either side of the mouth. They should be with about 1 stitch between the eye and the mouth and between the eye and the spiral.
Attach the legs to the bottom of Poliwag. Make stitches tight enough so the legs are sturdy enough for Poliwag to stand. The yarn you use will affect Poliwags ability to stand, softer yarn, like chenille, is not usually strong enough to hold the piece standing. You can add a small bit of wiring for this purpose if you’d like. In my piece the legs are 4-5 stitches apart.
Lastly attach the tail. I folded the white parts of the tail together; this makes the shape of the tail more rounded and easier to attach. The tail can also help the balance of the piece a bit, so Poliwag will stand more easily.