Get ready to dive into the world of amigurumi with this delightful Magnemite crochet pattern! Magnemite floats around with its electromagnets, attracting metal objects and zapping foes with its electric powers. Despite its metallic exterior, Magnemite has a charming and endearing quality that captures the hearts of trainers everywhere. So, watch out for this little spark plug – it may be small, but it’s definitely mighty!
The pattern is made using regular stitches. For the more intricate parts, such as the magnets or screws, you’ll need to read the instructions carefully and you will find no trouble. Magnemite is for anyone with a basic knowledge of amigurumi to make!
Once completed, your crochet Magnemite will make a delightful addition to your Pokémon collection or even a gift for fellow trainers. Display it proudly on your desk, shelf, or anywhere you need a touch of electrifying cuteness. So grab your yarn and crochet hook, and embark on a crafting adventure to create your very own Magnemite companion!
Supplies you'll need to crochet Magnemite
General supplies:
- Crochet hook 2,5 mm, I always use clover amour hooks for my projects!
- Sewing needle
- Stuffing
- Stitch marker
With Amigurumi you guage doesn’t matter much. Using smaller hook and yarn will make you finished piece smaller, and bigger hook and yarn will make him bigger. Just make sure that your yarn and hook fits together and makes a tight fabric so the stuffing won’t show through!
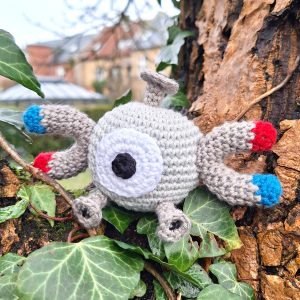
With the suggested yarn your Magnemite will be about 8 cm or 3 inces tall.
I reccomend Hobbii Rainbow cotton 8/4. This yarn is a 100% cotton and very nice to work with! With this yarn, I use a 2,5 mm hook (or a B-1 or C-2 should work too!). If Rainbow cotton is sold out, I can also recommend Friends cotton from Hobbii as a direct substitute.
- 1 x light gray for body
- 1 x darker grey
- A bit of black and white for eyes
- A bit of red and blue for the magnet poles
Abbreviations in this crochet pattern
Rnd = round
mr = magic ring
sc = single crochet
inc = increase, 2 sc in the same stitch
dec = decrease, make 2 stitches into 1
ss = slip stitch
BLO = Back Loop Only
FLO = Front Loop Only
FO = Finish Off chain
Magnemite crochet pattern
Body
in light gray
Rnd 1: 6 sc in mr (6)
Rnd 2: inc x 6 (12)
Rnd 3: (sc, inc) x 6 (18)
Rnd 4: (sc, inc, sc) x 6 (24)
Rnd 5: (3sc, inc) x 6 (30)
Rnd 6: (2sc, inc, 2sc) x 6 (36)
Rnd 7: (5sc, inc) x 6 (42)
Rnd 8-15: sc around (42)
Rnd 16: (5sc, dec) x 6 (36)
Rnd 17: (2sc, dec, 2sc) x 6 (30)
Rnd 18: (3sc, dec) x 6 (24)
Rnd 19: (sc, dec, sc) x 6 (18)
Stuff.
Rnd 20: (sc, dec) x 6 (12)
Rnd 21: dec x 6 (6)
Finish stuffing and FO the piece.
Eye
For the eye you have 2 options for the pupil. You can make the entire eye in white and later embroider or sew on a separate pupil or you can make rnd 1 in black yarn and then change to white.
In my version, I made a separate pupil and sewed it on to get a sharper distinction between eye and pupil.
In white
Rnd 1: 6 sc in mr (6)
Rnd 2: inc x 6 (12)
Rnd 3: (sc, inc) x 6 (18)
Rnd 4: (sc, inc, sc) x 6 (24)
ss and FO.
(optional) Pupil
in black
Rnd 1: 6sc in mr (6)
ss and FO.
Screws for the front of the body
In dark gray
The screws are made in 2 separate parts. One flat part for the head of the screw and a long part for the body of the screw.
Head of small screw
Rnd 1: 5sc in mr (5)
Rnd 2: inc x 5 (10)
ss and FO.
Body of small screw
Rnd 1: 5sc in mr (5)
Rnd 2-4: sc around (5)
ss and FO leaving tail for sewing.
Attach the head and body of the screw together. The mr of the body should be attached to the screw. You can use the remaining tail of the mr of the screw-head to attach. Weave in the visible ends, but leave the yarntail from the body so you can sew the screw to the body.
Embroider an x on the head of the screw.
Make 2 screws in this size.
Screw for top of head
In dark gray.
The same assembly-method as stated with the smaller screws, is used here.
Head of big screw
Rnd 1: 5sc in mr (5)
Rnd 2: inc x 5 (10)
Rnd 3: (inc, sc) x 5 (15)
ss and FO
Body of big screw
Rnd 1: 5sc in mr (5)
Rnd 2-4: sc around (5)
ss and FO leaving the tail for sewing.
You should also embroider an x on this screw.
Magnets
The two magnets on the sides of Magnemite are made in two different parts that are attached to form the base of the magnet. The crochet piece begins at each of the different magnet-poles, meaning one of the following pieces should start with red and the other should start with blue. If you need visuals on connecting the pieces, here is a video of that step!
Start with red.
Rnd 1: 8sc in mr (8)
Rnd 2: in FLO, sc around (8)
Rnd 3: sc around (8)
In the last stitch, change to dark gray yarn.
Rnd 4-6: sc around (8)
Rnd 7: inc, 6sc, inc (10)
Rnd 8: inc, 2sc, 2dec, 2sc, inc (10)
Cut the yarn on the piece with red, Now make another piece like it, but use blue instead of red.
Don’t cut the yarn on the blue piece! You will be connecting the pieces in the next rnd. The pieces are referred to as the blue and the red piece. You are going to continue working with the yarn still attached to the blue piece. For both the red and blue piece, the first stitch made in that piece, should be in the natural first stitch of the piece. This means that the first stitch would be the stitch you would naturally work into if you weren’t attaching the pieces but just crocheting around. You can mark these stitches to make it easier to see your first stitch.
Rnd 9: Make the following stitches in the RED piece, 3sc, 2dec, 3sc (this is using all 10 stitches of the piece), continue working in the blue piece, 3sc, 2dec, 3sc (16 stitches total)
The pieces are now connected and you can work in the round as normal from here.
Stuff the “legs” of the magnet firmly.
Rnd 10: 2sc, 2dec, 4sc, 2dec, 2sc (12)
Rnd 11: 2sc, dec, 4sc, dec, 2sc (10)
Finish stuffing.
Rnd 12: dec x 4 (6) [the last rnd finishes early!]
FO the magnet leaving a tail for attaching it to the body. Make 2 magnets.
Assembly of your crochet Magnemite
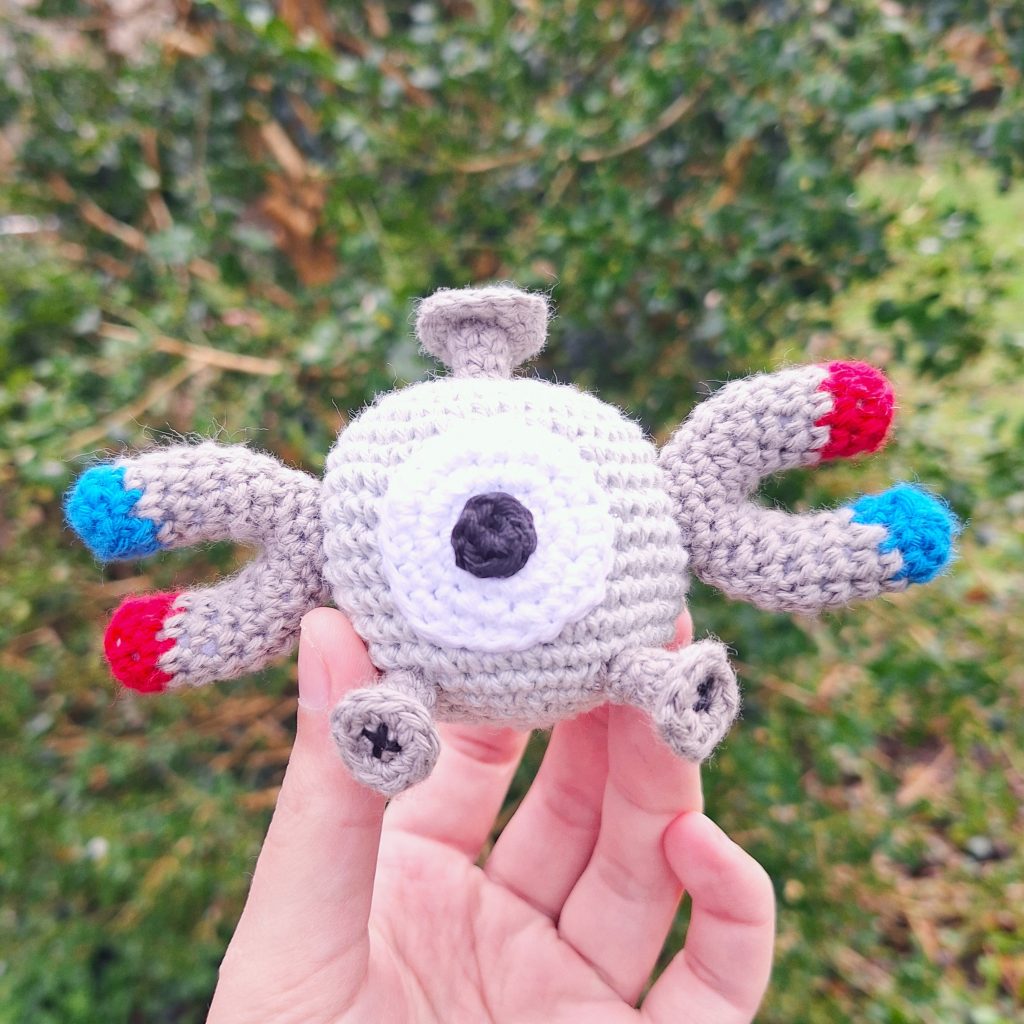
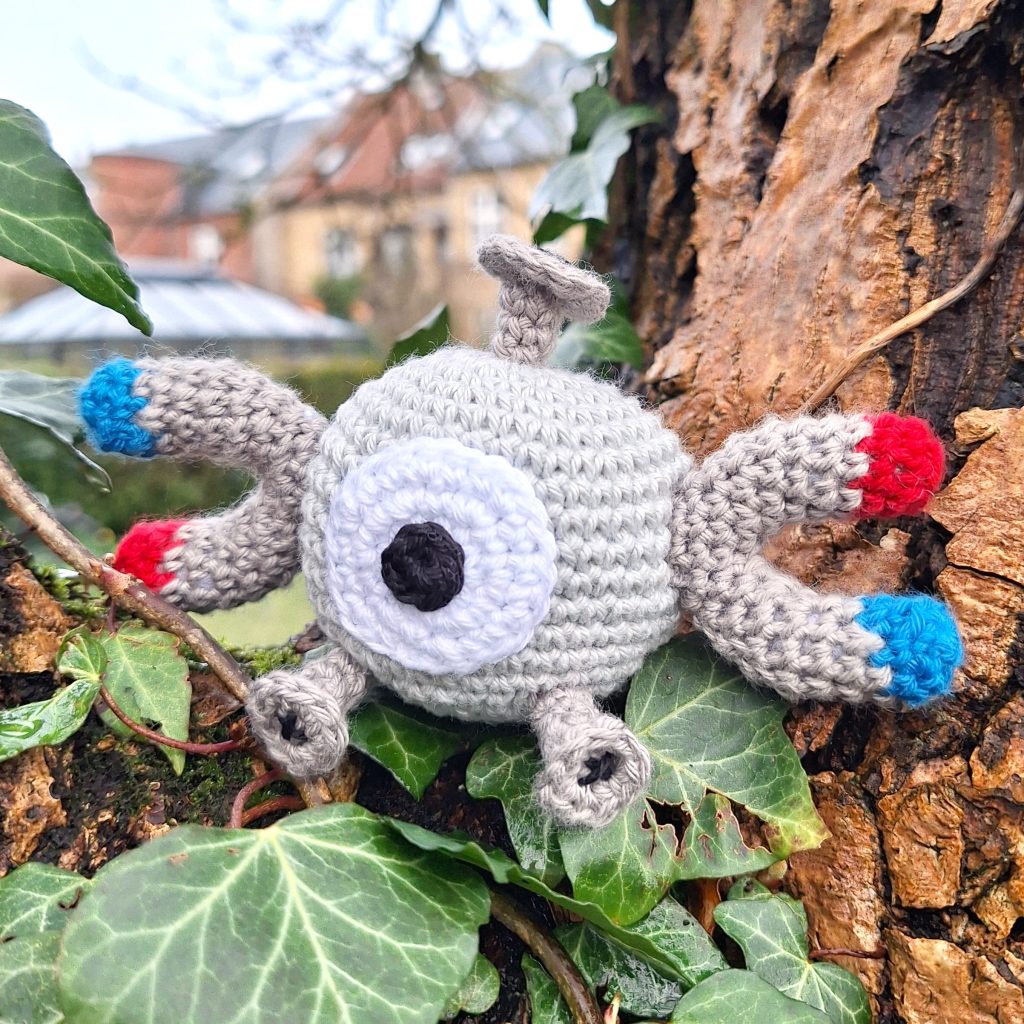
Start by attaching the eye in the center of the round body. Mine is between rnd 7-14. If you have a separate pupil, attach that to the center of the eye now.
Attach the big screw at the top of the head on top of your magic ring from the beginning of the body.
Attach the small screws one rnd below the eye and about 7 stitches apart.
Attach the magnets to each side of the body with opposite magnetic poles pointing up and down. If left side has blue on top, the right side should have red on top. There are 4-5 stitches between a magnet and the eye. They are attached between rnd 9-11 of the body.