
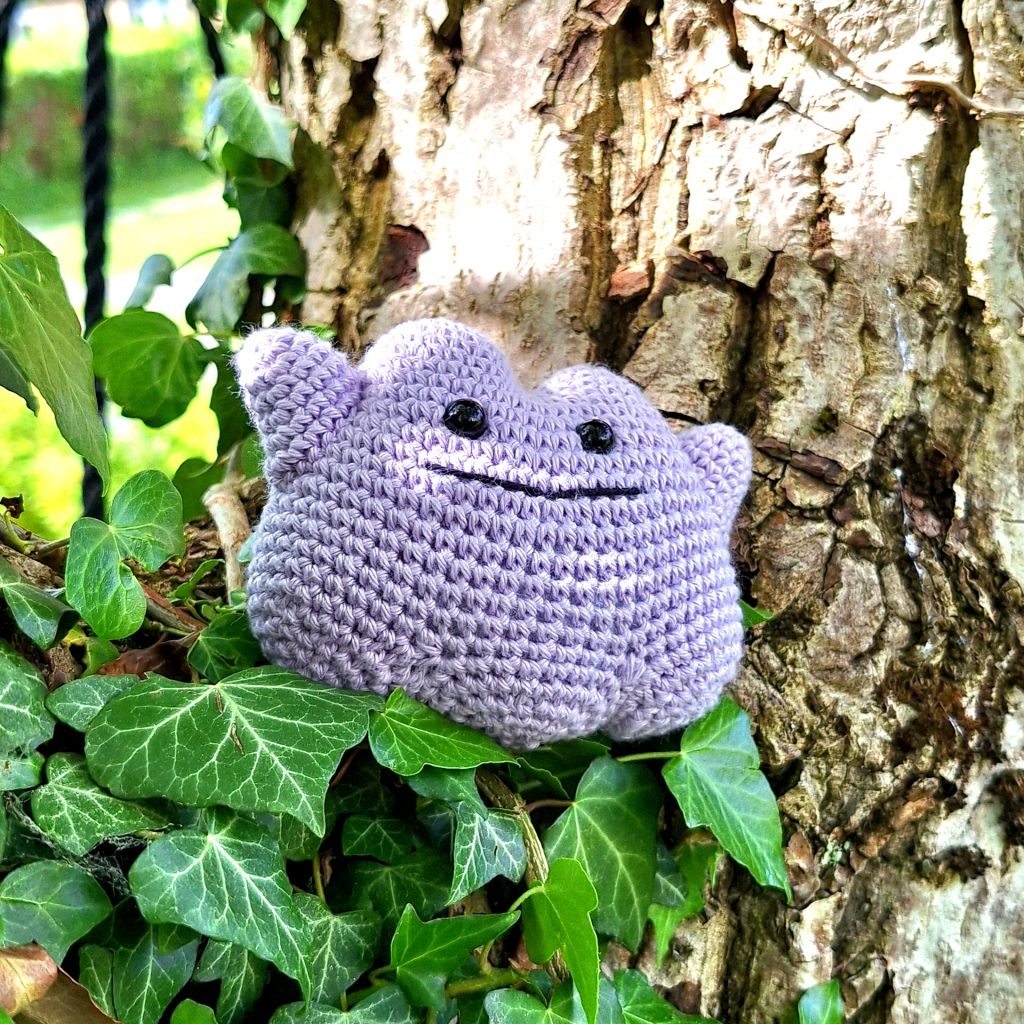
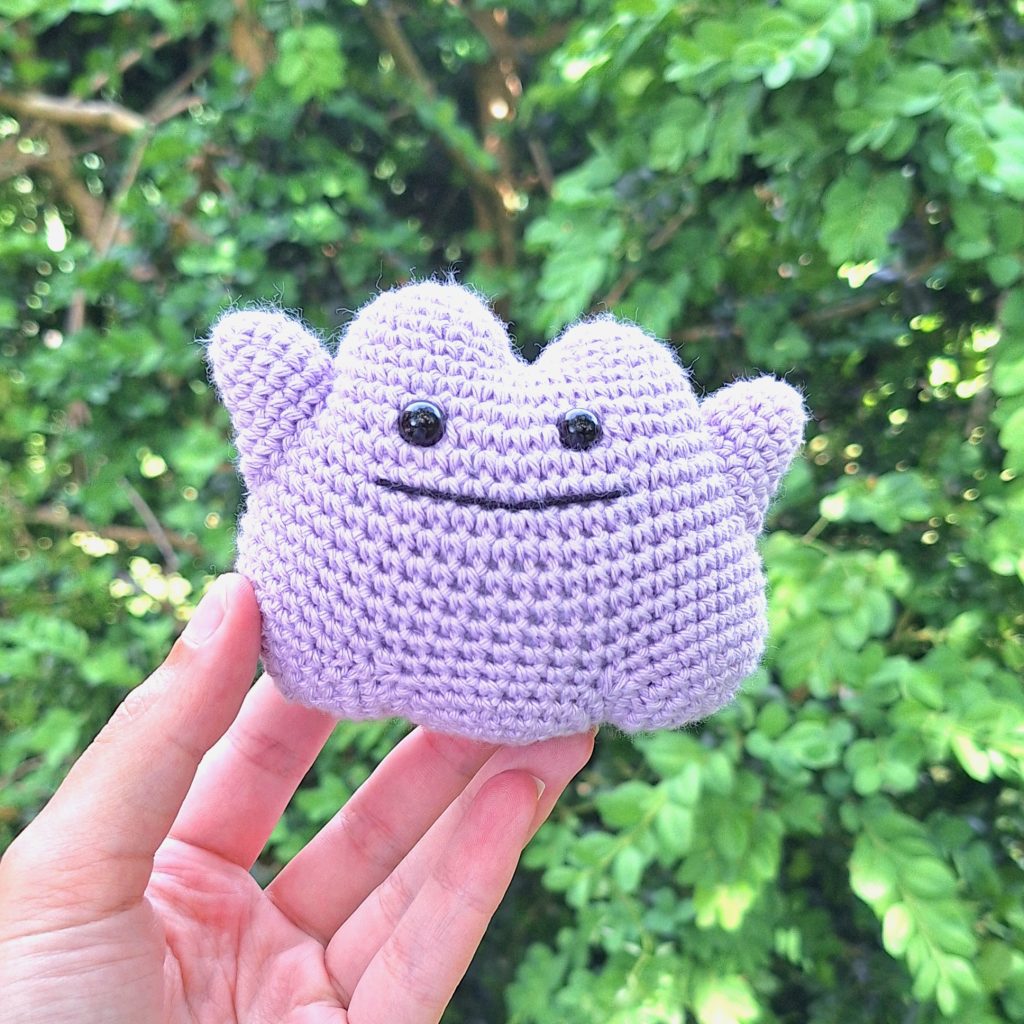
Get ready to crochet your very own Ditto, the versatile Transform Pokémon! With its simple, blob-like shape and endearing smile, Ditto is a fun and unique addition to your amigurumi collection. This crochet pattern allows you to bring Ditto to life, capturing its playful and mysterious charm stitch by stitch.
Known for its unique ability to transform into any other Pokémon, Ditto brings a touch of mystery and fun to the Pokémon world. With its simple, blob-like appearance and cheerful expression, Ditto may look unassuming, but its transformative powers make it one of the most intriguing Pokémon out there. And even though this crochet Ditto might not be able to physically make a transformation, it is still adorable!
This Ditto crochet pattern is very low sew – only the arms are sewed onto the piece. This means the body, or the main blob of Ditto is crochet together. This can be a bit complicated, but it is doable for crocheters who have made a few amigurumi before. I have done my absolute best to provide clear instructions and pictures.
Once completed, your crochet Ditto will be a charming companion, ready to transform any space with its adorable presence. So grab your crochet hook and yarn, and let’s start crafting this iconic Pokémon together!
Supplies you'll need to crochet Ditto
General supplies:
- Crochet hook 2,5 mm, I always use clover amour hooks for my projects!
- Sewing needle
- Stuffing
- Stitch marker
- For Ditto I recommend using safety eyes. I used 5 or 6 mm eyes.
With Amigurumi you guage doesn’t matter much. Using smaller hook and yarn will make you finished Ditto smaller, and bigger hook and yarn will make him bigger. Just make sure that your yarn and hook fits together and makes a tight fabric so the stuffing won’t show through!
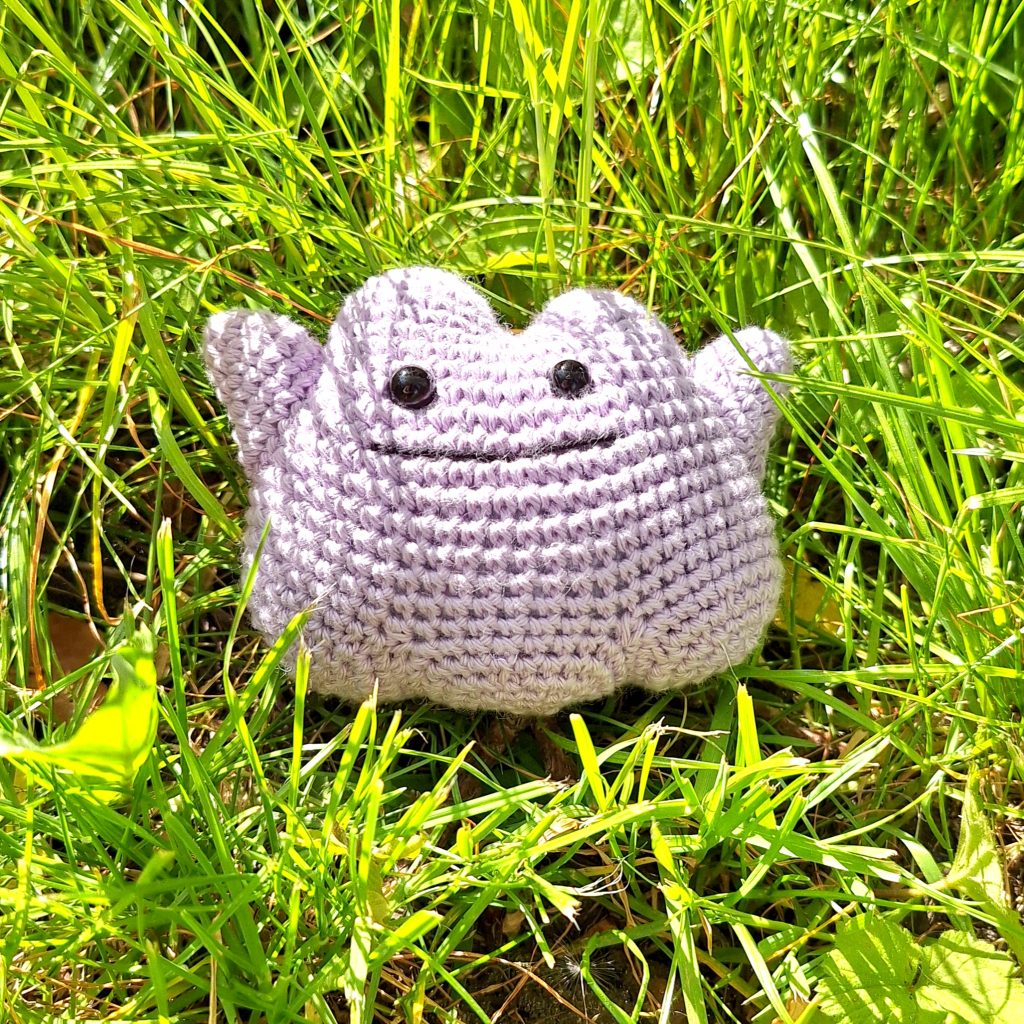
With the recommended yarn below, your Ditto will be about 7-8 cm tall or about 3 inches.
I reccomend Hobbii Rainbow cotton 8/4. This yarn is a 100% cotton and very nice to work with! With this yarn, I use a 2,5 mm hook (or a B-1 or C-2 should work too!). If Rainbow cotton is sold out, I can also recommend Friends cotton from Hobbii as a direct substitute.
- 1 x a lavender color. In Rainbow cotton it could be Wisteria (94) or Baby Purple (67)
- A bit of black for the mouth
Abbreviations in this crochet pattern
Rnd = round
mr = magic ring
sc = single crochet
inc = increase, 2 sc in the same stitch
dec = decrease, make 2 stitches into 1
ss = slip stitch
FO = Finish Off chain
Ditto crochet pattern
Body
The body of Ditto is worked from the top. You will therefore need to start with his 2 “top-blobs” and connect them to make the rest of the body.
Biggest blob
Rnd 1: 6 sc in mr (6)
Rnd 2: inc x 6 (12)
Rnd 3: (3sc, inc) x 3 (15)
Rnd 4: (2sc, inc, 2sc) x 3 (18)
Rnd 5: sc around (18)
ss and FO. Cut the yarn on this piece and continue making the next blob.
Smallest blob
Rnd 1: 6 sc in mr (6)
Rnd 2: inc x 6 (12)
Rnd 3: (3sc, inc) x 3 (15)
Rnd 4: sc around (15)
Now we will connect the two pieces with the yarn that is still connected to the small blob (start-point in illustration). You will start crocheting around the bigger blob first and then continue to crochet around the small blob to get back to your starting point.
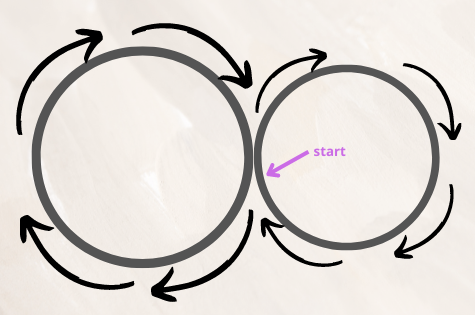
Rnd 5: Make the following in the big blob, (5sc, inc) x 3, now continue working around the smal blob as follows, (4sc, inc) x 3 (39 st in total)
The pieces are now connected and you can continue around as normal.
Rnd 6: (6sc, inc, 6sc) x 3 (42)
Rnd 7: (13sc, inc) x 3 (45)
Rnd 8: (7sc, inc, 7sc) x 3 (48)
Rnd 9:sc around (48)
Rnd 10: (15sc, inc) x 3 (51)
Rnd 11: sc around (51)
Rnd 12: (8sc, inc, 8sc) x 3 (54)
Rnd 13-17: sc around (54)
This is a good time to add safety eyes if you wish to use them. I added mine between rounds 8 and 9. They sit 7 or 8 stitches apart.
Now we are going to work on the lower blobs. His leg-blobs if you will. This Ditto has 3 of these blobs. To make them, we are splitting the working stitches with chains and working in smaller rounds 1 at a time. We start by making 1 side, then the other side and finish with the middle blob.

Star by folding the piece and make sc until you are at the side/outer edge of Ditto when seen from the front. For me this was around 14 sc, but it depends on your tension. You might need more or less stitches to get to the side of the piece.
Rnd 18: 10sc, chain 9, skip 34 stitches, 10 sc (20 sc and 9 chains in your new little circle)
Work in the little circle you have made. Crochet into the chain when you get to it.
Rnd 19: sc around (29)
Rnd 20: (3sc, dec) x 5, 4sc (24)
Rnd 21: (sc, dec, sc) x 6 (18)
Rnd 22: (sc, dec) x 6 (12)
Rnd 23: dec x 6 (6)
FO.
Now we work on the blob on the opposite side. There are 34 stitches left of round 17. We will be using 20 of these stitches. Connect your yarn at the outer edge of the piece and make sure it is centered. To make sure it is centered, you should count 17 sc in the crochet direction and make your beginning sc in the 18th stitch.
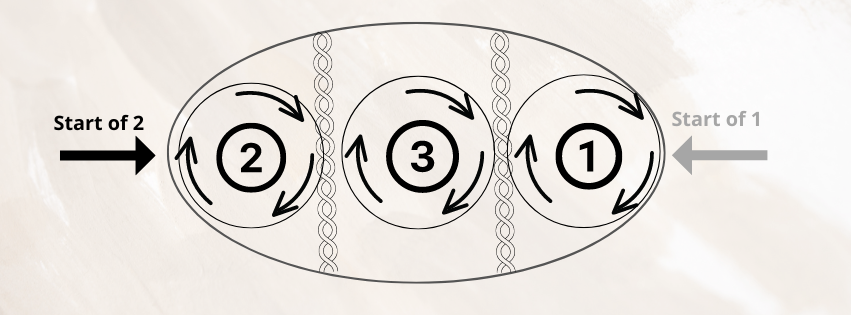
Rnd 1: 10sc, chain 9, skip to the other side, leaving 7sc free on either side for the middle, 10 sc (29 st including 9 chains)
Now continue to work in the new smaller round like before. This blob is identical to the first one you made.
Rnd 2: sc around (29)
Rnd 3: (3sc, dec) x 5, 4sc (24)
Rnd 4: (sc, dec, sc) x 6 (18)
Rnd 5: (sc, dec) x 6 (12)
Rnd 6: dec x 6 (6)
FO.
Now we have a Ditto that looks something like this. You can start to stuff the Ditto lightly here.
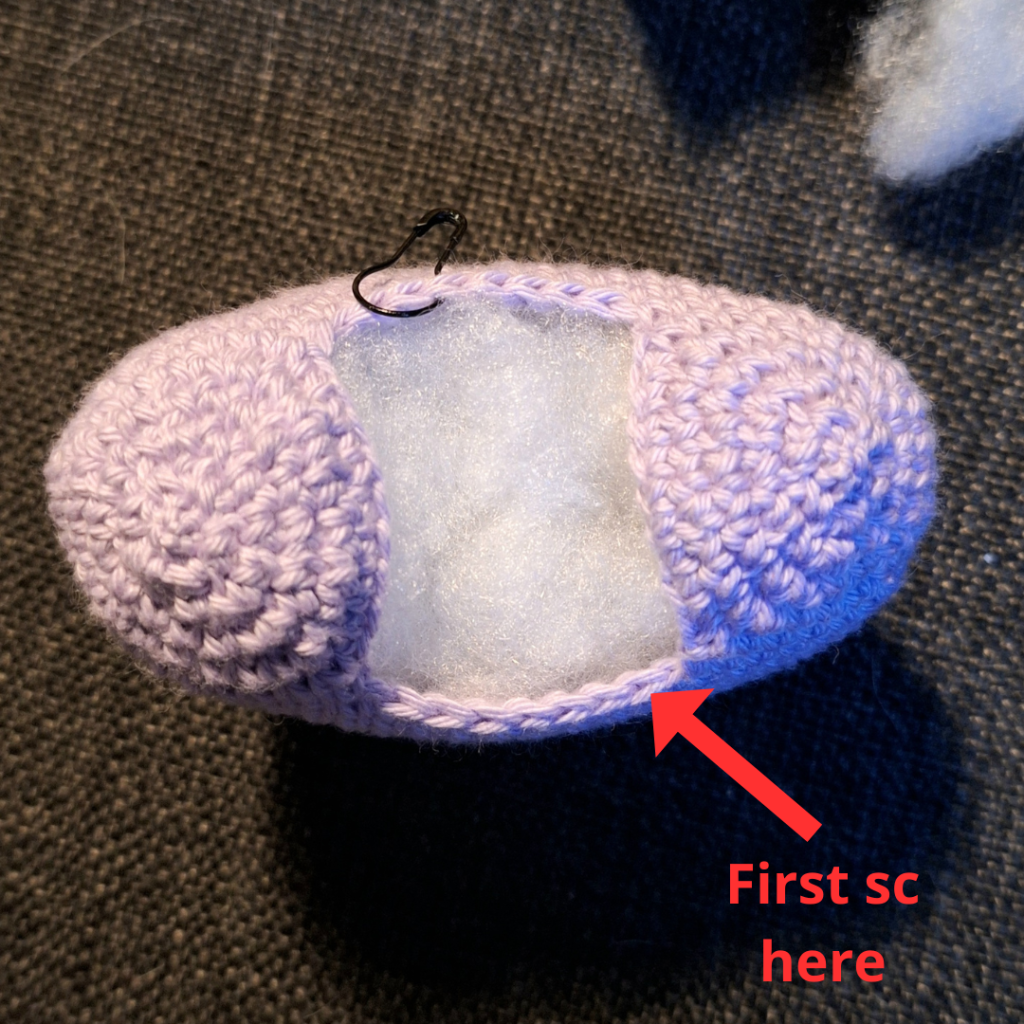
Connect your yarn in a corner so you will start crocheting in the available stitches from round 17 first.
Rnd 1: 7sc in regular stitches, 9sc in the chain, 7sc in regular stitches, 9sc in the chain (32)
Rnd 2: sc around (32)
Rnd 3: (14sc, dec) x 2 (30)
Rnd 4: (3sc, dec) x 6 (24)
Rnd 5: (sc, dec, sc) x 6 (18)
Stuff the Ditto firmly.
Rnd 6: (sc, dec) x 6 (12)
Rnd 7: dec x 6 (6)
FO and hide the ends.
Arms
Rnd 1: 6sc in mr (6)
Rnd 2: 2sc, 2inc, 2sc (8)
Rnd 3: 3sc, 2inc, 3sc (10)
Rnd 4: 4sc, 2inc, 4sc (12)
Rnd 5: 5sc, 2inc, 5sc (14)
Rnd 6: 6sc, 2inc, 6sc (16)
Rnd 7: dec, 5sc, 2inc, 5sc, dec (16)
ss and FO with tail for sewing.
Assembly of your crochet Ditto
Sew the arms onto each side of the Ditto. Mine are placed at each side roughly around round 9-14.
Embroider a mouth for Ditto and you’re done.