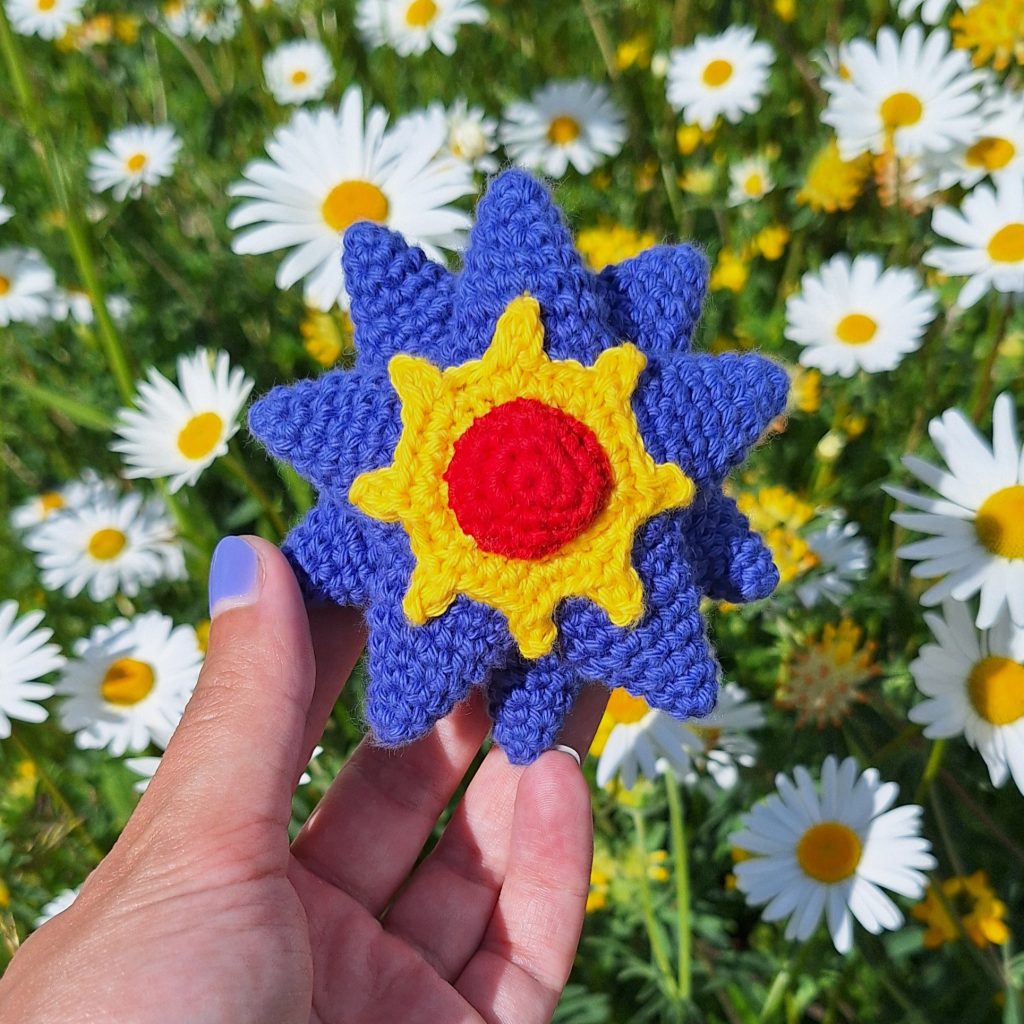

Get ready to crochet your very own amigurumi Starmie, the mystical Star Shape Pokémon with this free crochet pattern! With its elegant, star-shaped design and radiant core, Starmie is a stunning and unique addition to your amigurumi collection. This crochet pattern allows you to bring Starmie to life, capturing its cosmic beauty and serene charm stitch by stitch.
Perfect for crocheters of with a few amigurumi pieces made, our Starmie pattern features clear, easy-to-follow instructions and helpful photos to guide you through the more advanced steps of the process. Whether you’re fairly new to amigurumi but looking for an exciting project or an experienced crafter seeking a celestial new creation, crocheting Starmie will be an enjoyable and rewarding experience.
Once completed, your crocheted Starmie will be a dazzling companion, ready to add a touch of cosmic wonder to any space. So grab your crochet hook and yarn, and let’s embark on this enchanting crochet adventure together! With our Starmie crochet pattern, you can create a beautiful and otherworldly Pokémon friend to brighten your collection.
Supplies you'll need to crochet Starmie
General supplies:
- Crochet hook 2,5 mm, I always use clover amour hooks for my projects!
- Sewing needle
- Stuffing
- Stitch marker
With Amigurumi you guage doesn’t matter much. Using smaller hook and yarn will make you finished Starmie smaller, and bigger hook and yarn will make him bigger. Just make sure that your yarn and hook fits together and makes a tight fabric so the stuffing won’t show through!
With the recommended yarn and hook, Starmie will be about 10 cm or 4 inches.
I reccomend Hobbii Rainbow cotton 8/4. This yarn is a 100% cotton and very nice to work with! With this yarn, I use a 2,5 mm hook (or a B-1 or C-2 should work too!). If Rainbow cotton is sold out, I can also recommend Friends cotton from Hobbii as a direct substitute.
- 1 x lavender (38)
- a bit of yellow
- a bit of red
Abbreviations in this crochet pattern
Rnd = round
mr = magic ring
sc = single crochet
hdc = half double crochet
inc = increase, 2 sc in the same stitch
dec = decrease, make 2 stitches into 1
ss = slip stitch
ch = chain
FO = Finish Off
Starmie crochet pattern
Starfish-arms
Rnd 1: 4sc in mr (4)
Rnd 2: (sc, inc) x 2 (6)
Rnd 3: (sc, inc, sc) x 2 (8)
Rnd 4: (3sc, inc) x2 (10)
Rnd 5: (2sc, inc, 2sc) x 2 (12)
Rnd 6: (5sc, inc) x 2 (14)
Rnd 7: (3sc, inc, 3sc) x 2 (16)
ss and FO. Make 10 pieces total.
Body
Rnd 1: 8sc in mr (8)
Rnd 2: inc x 8 (16)
Rnd 3: (sc, inc) x 8 (24)
Rnd 4: (sc, inc, sc) x 8 (32)
Rnd 5: (3sc, inc) x 8 (40)
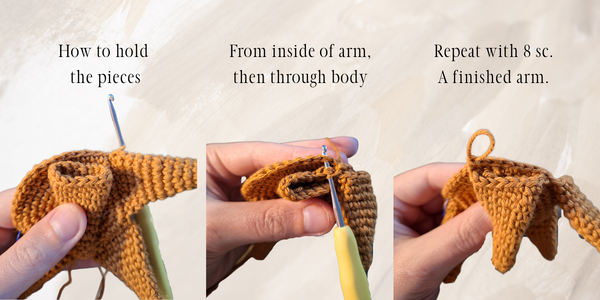
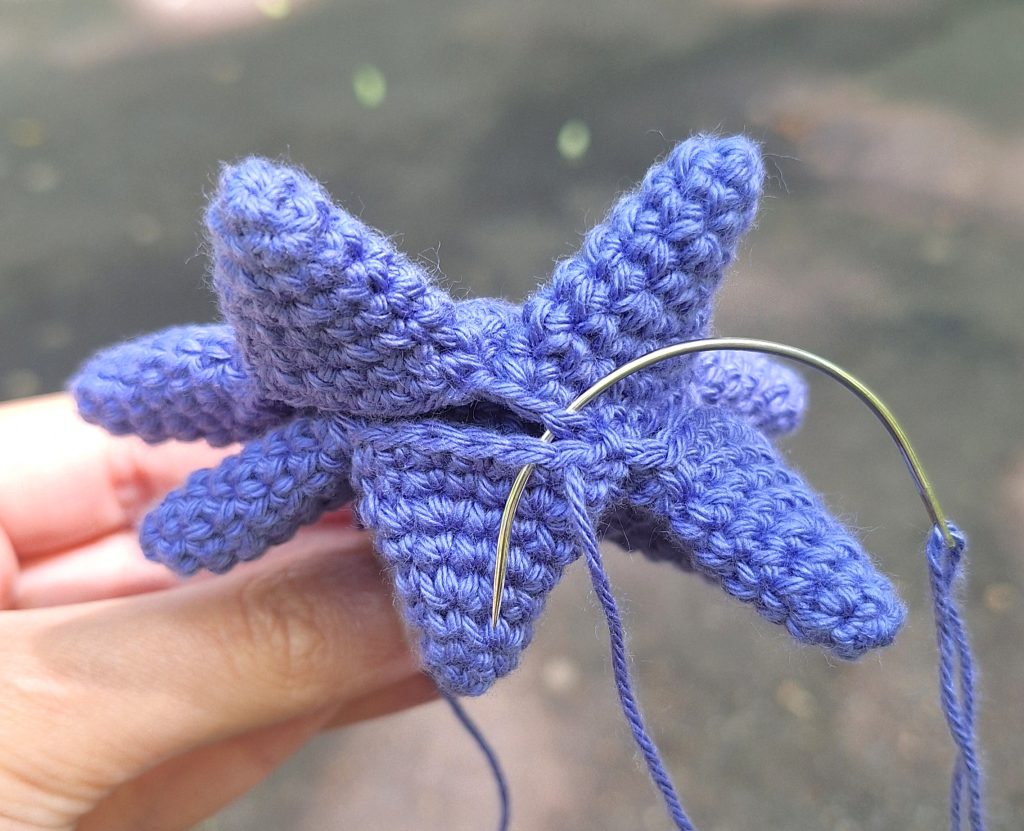
Rnd 6: You will connect the starfish-arms to the body in the sixth round. To connect an arm to the body, you need 8 stitches from the arm and the body. Lay the first arm against the body piece, these should have the right-sides touching each other, and the arm piece facing you. You will now crochet through 2 stitches, 1 from the arm and one from the body. Place your hook through a stitch of the arm (this stitch is going from the inside of the piece to the outside) and the next available stitch of the body, and make a sc. Continue to do this 8 times for a total of 8sc for the first starfish arm. This leaves 8 stitches of the arm unused. If you fold up the arm piece, you should see that the starfish is forming. Place the remaining 5 arms the same way around the body with 8 stitches for each.
Rnd 7: Here you will finish the connection of the arms. Rather than continuing to work in the stitches you made in rnd 6, you will only be using the remaining stitches from the arms. Therefore you will make 8sc in each of the arms for a total of 40 stitches in this round. Make a ss and FO.
Make 2 body pieces. The pieces should be identical.
Yellow plate
Rnd 1: 8sc in mr (8)
Rnd 2: inc x 8 (16)
Rnd 3: (sc, inc) x 8 (24)
In round 4 we will add spikes to the plate. To make a spike do the following; (sc, ch 3, sc in 2nd ch, sc in next ch, sc in the same base-stitch). The spike is only using 1 stitch of the previous round.
Rnd 4: (2sc, spike) x 8 (giving you 8 spikes in total)
ss and FO with long tail for sewing.
Red gem
Rnd 1: 6sc in mr (6)
Rnd 2: inc x 6 (12)
Rnd 3: (sc, inc) x 6 (18)
ss and FO
Assembly of your crochet Starmie
To assemble your Starmie you start with the body-pieces. These are sewn together using the last round that was crocheted. Make sure to position the arms so they are alternating and are all visible from the front. Sew around the piece using one stitch from each piece. When around half way, stop to stuff the starfish-arms as it can be a bit tricky with a smaller opening. Stop again before closing fully to finish stuffing. Be sure to check that all arms are stuffed equally and firmly.
Next sew on the yellow plate to one side of the body. Don’t stuff under the plate.
Lastly attach the gem. You can lightly stuff before closing fully to give it more dimension.