

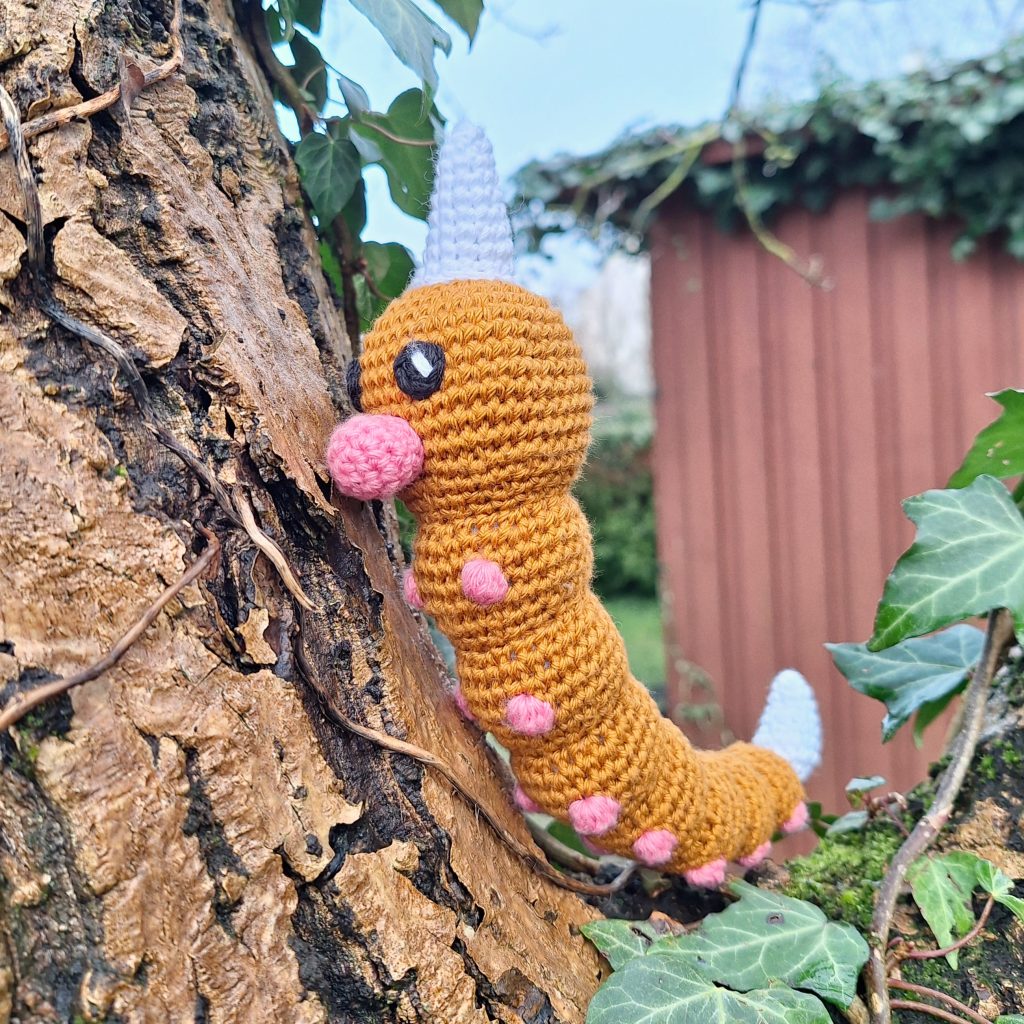
Get ready to crochet your very own Weedle, the adorable Bug Pokémon! With its round body and distinctive stinger, Weedle is a delightful addition to any crochet collection. This crochet pattern allows you to bring Weedle to life stitch by stitch, capturing its cute expression and insect-like features in a cute amigurumi!
Designed to be accessible for crocheters of all skill levels, our Weedle crochet pattern features clear instructions, but might include new techniques for newer amigurumi-enthusiasts!
Once completed, your crocheted Weedle will make a charming companion, perfect for displaying on your desk, shelf, or as part of your Pokémon amigurumi collection. So, grab your crochet hook and brown yarn, and let’s embark on this fun crochet adventure with Weedle!
Supplies you'll need to crochet Weedle
General supplies:
- Crochet hook 2,5 mm, I always use clover amour hooks for my projects!
- Sewing needle
- Stuffing
- Stitch marker
With Amigurumi you guage doesn’t matter much. Using smaller hook and yarn will make you finished Weedle smaller, and bigger hook and yarn will make him bigger. Just make sure that your yarn and hook fits together and makes a tight fabric so the stuffing won’t show through!
With the recommended yarn below, your Weedle will be about 20 cm / 8 inches tall.
I reccomend Hobbii Rainbow cotton 8/4. This yarn is a 100% cotton and very nice to work with! With this yarn, I use a 2,5 mm hook (or a B-1 or C-2 should work too!). If Rainbow cotton is sold out, I can also recommend Friends cotton from Hobbii as a direct substitute. For this pattern I have used a mix of the two kinds.
- 1 x Friends Cotton in Ochre (13)
- 1 x Rainbow Corron in Light Pink (62)
- 1 x Rainbow Cotton in White (01)
- A bit of black for the eyes
Abbreviations in this crochet pattern
Rnd = round
mr = magic ring
sc = single crochet
inc = increase, 2 sc in the same stitch
dec = decrease, make 2 stitches into 1
ss = slip stitch
BLO = Back Loop Only
FO = Finish Off chain
BO = Bobble stitch (how to make the stitch is explained further down)
Weedle crochet pattern
For each of Weedles feet there will be a bobble stitch (BO) in the pattern. This stitch is always made in pink. This means that you should change to the pink color while finishing the stitch right before the bobble stitch and change back to the brown color when finishing the bobble stitch. The placement of the bobble stitch is aligned in my version, but your tension or yarn can make the curve of the amigurumi different. Therefore the bobble stitches might not line up perfectly – feel free to move them back or forth a stitch if that aligns the legs better in your version! Do keep the number of stitches between the bobble stitches the same.
In the Stitch before a bobble stitch, finish the sc with the pink yarn to get the best result.
The following describes how to do a bobble stitch (BO): (yarn over, insert hook into stitch, yarn over, pull through the stitch, yarn over, pull through 2 loops). Repeat the parentheses a total of 5 times. After 5 repetitions, you have 6 loops on your hook. Yarn over (with brown) and pull through all 6 loops to finish the stitch. Work the stitch like normal on the next rnd.
Stuff the piece as you go. If you want the Weedle to stand on its own and not roll forward, add some heavier material to the bottom half (plastic pellets or other) to weigh it down, as the head and top half is bigger than the bottom.
Body
In brown color and accents (BO) in pink.
Rnd 1: 6 sc in mr (6)
Rnd 2: inc x 6 (12)
Rnd 3: (sc, inc) x 6 (18)
Rnd 4: (sc, inc, sc) x 6 (24)
Rnd 5: (3sc, inc) x 6 (30)
Rnd 6: (2sc, inc, 2sc) x 6 (36)
Rnd 7: (11sc, inc) x 3 (39)
Rnd 8-13: sc around (39)
Rnd 14: (11sc, dec) x 3 (36)
Rnd 15: (2sc, dec, 2sc) x 6 (30)
Rnd 16: (3sc, dec) x 6 (24)
Rnd 17: (sc, dec, sc) x 6 (18)
Rnd 18: in FLO, (2sc, inc) x 6 (24)
Rnd 19: (3sc, inc) x 6 (30)
Rnd 20: sc around (30)
Rnd 21:11sc, BO, 6sc, BO, 11sc (30)
Rnd 22: sc around (30)
Rnd 23: 2sc, (sc, dec, sc) x 6, 4sc (24)
Rnd 24: (sc, dec, sc) x 6 (18)
Rnd 25: in FLO, (2sc, inc) x 6 (24)
Rnd 26: 2sc, (2sc, inc, 2sc) x 4, 2sc (28)
Rnd 27: sc around (28)
Rnd 28:11sc, BO, 6sc, BO, 9sc (28)
Rnd 29:7sc, (sc, dec, sc) x 4, 5sc (24)
Rnd 30: (sc, dec, sc) x 6 (18)
Rnd 31: in FLO, 6sc, (sc, inc) x 4, 4sc (22)
Rnd 32: 6sc, (sc, inc, sc) x 4, 4sc (26)
Rnd 33: sc around (26)
Rnd 34: 11sc, BO, 5sc, BO, 8sc (26)
Rnd 35: 6sc, (2sc, dec, sc) x 4 (22)
From here on and forward, some stitches are worked in BLO. All stitches worked in BLO will be slip stitches. When this is done, it is to create the curve of Weedle. After a rnd where some stitches are worked in BLO, on the next rnd you should ONLY work in the remaining front loops and not the slip stitch made in the back loops. The stitch made in the back loops will be hidden on the inside of Weedle and not seen in the final piece.
Rnd 36: 5ss in BLO, (2sc, dec) x 4, sc (18)
As stated above, for the first 5 stitches, work in the remaining front loops of rnd 35. Use the front loops as normal stitches and follow the pattern instructions.
Rnd 37: (sc, inc, sc) x 6 (24)
Rnd 38: sc around (24)
Rnd 39: 6ss in BLO, 6sc, BO, 4sc, BO, 6sc (24)
Rnd 40: sc around (24)
Rnd 41: (sc, dec) x 8 (16)
Rnd 42: in FLO, 2sc, inc, 3sc, (inc, sc) x 4, 2sc (21)
Rnd 43: 6ss in BLO, 15sc (21)
Rnd 44:12sc, BO, 3sc, BO, 4sc (21)
Rnd 45: sc around (21)
Rnd 46: (sc, dec) x 7 (14)
Rnd 47: in FLO, (2sc, inc, 3sc, inc) x 2 (18)
Rnd 48: sc around (18)
Rnd 49: 11sc, BO, 2sc, BO, 3sc (18)
Rnd 50: sc around (18)
Rnd 51: 9dec (9)
Rnd 52: in FLO, (sc, 2inc) x 3 (15)
Rnd 53: sc around (15)
Rnd 54: 9sc, BO, 2sc, BO, 2sc (15)
Rnd 55: sc around (15)
Rnd 56: (3sc, dec) x 3 (12)
Rnd 57: dec x 6 (6)
FO
Horn
In white
Rnd 1: 6sc in mr (6)
Rnd 2: sc around (6)
Rnd 3: (inc, 2sc) x 2 (8)
Rnd 4: sc around (8)
Rnd 5: (inc, 3sc) x 2 (10)
Rnd 6: sc around (10)
Rnd 7: (inc, 4sc) x 2 (12)
Rnd 8: sc around (12)
Rnd 9: (inc, 5sc) x 2 (14)
Rnd 10: sc around (14)
ss and FO with a tail for sewing.
Tail
In white
Rnd 1: 6sc in mr (6)
Rnd 2: sc around (6)
Rnd 3: (inc, 2sc) x 2 (8)
Rnd 4: sc around (8)
Rnd 5: 3sc, 2inc, 3sc (10)
Rnd 6: sc around (10)
Rnd 7: 4sc, 2inc, 4sc (12)
Rnd 8: sc around (12)
Stuff.
Rnd 9: dec x 6 (6)
FO with a tail for sewing.
Nose
In pink
Rnd 1: 6sc in mr (6)
Rnd 2: (sc, 2inc) x 2 (10)
Rnd 3: (2sc, 2inc, sc) x 2 (14)
Rnd 4: sc around (14)
Rnd 5: (2sc, 2dec, sc) x 2 (10)
Eyes
In black
Rnd 1: 6sc in mr (6)
ss and FO with tail for sewing.
Make 2.
Assembly of your crochet Weedle
Attach the horn at the top of the head, covering the magic ring of the head and roughly in the center or a bit towards the back.
Now attach the nose. Place the nose with the increases to the sides so it’s a bit wider than it is tall. It should be placed in the center (compared to the legs) about 8 rounds below where the horn is attached and end around 3 rounds before the first indent of the body.
The eyes are placed 1-2 rounds above the nose and to the side of the nose. Embroider white highlights in the eyes.
Lastly attach the tail-piece to the end of your Weedle. The tail should point slightly upwards.