
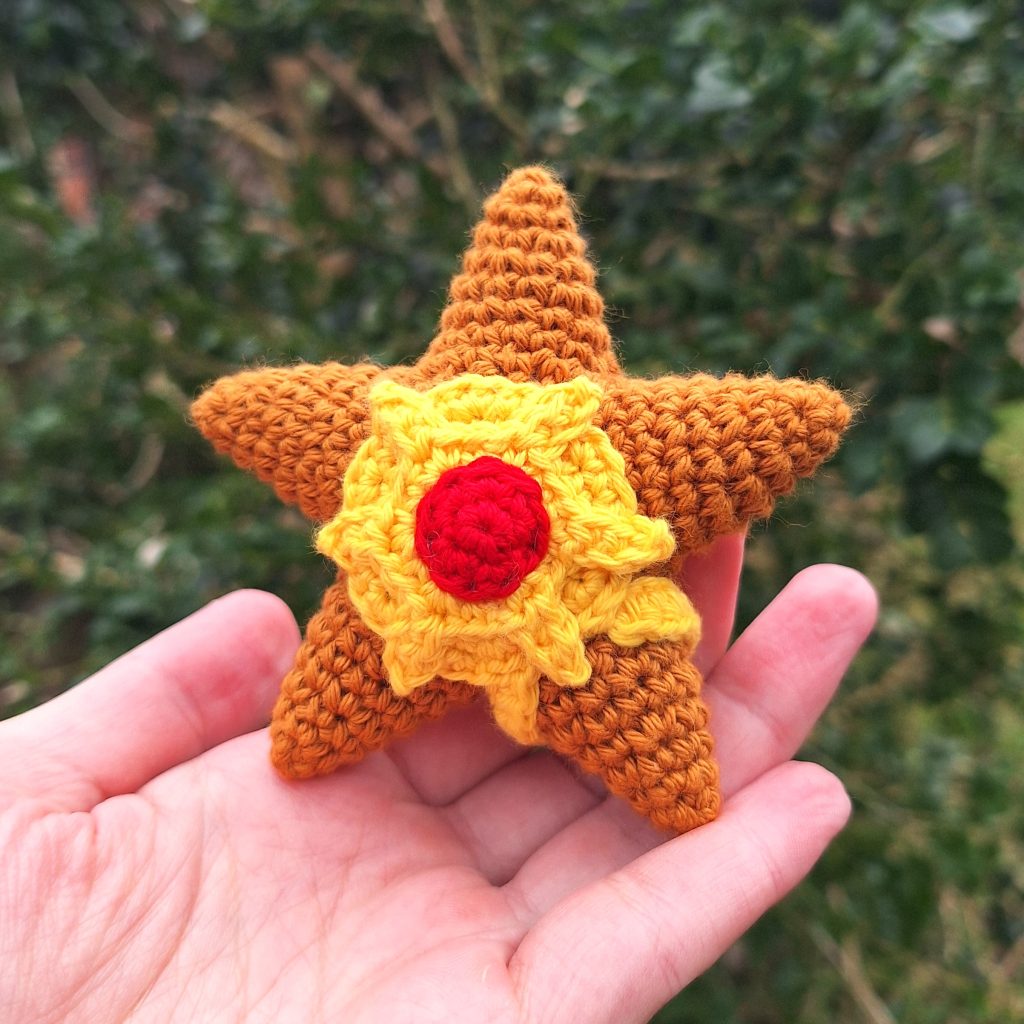
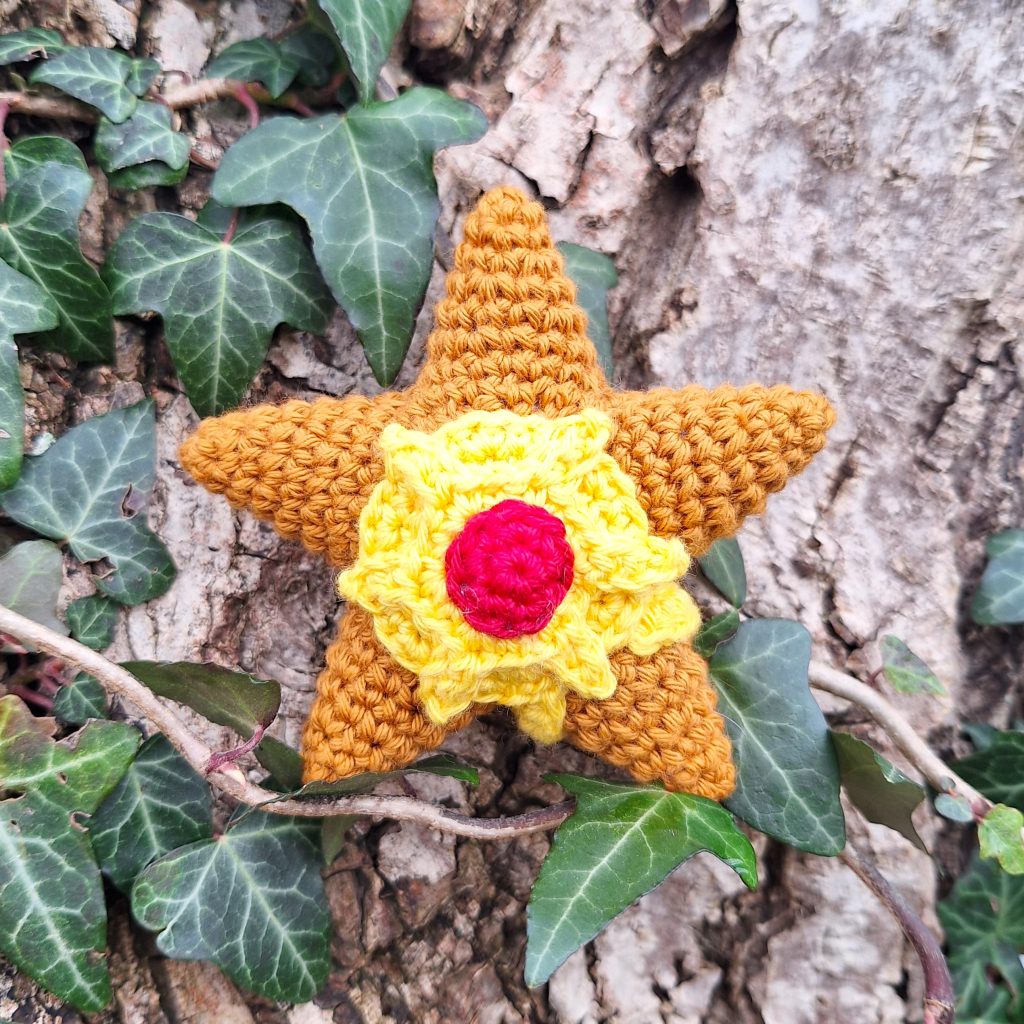
Meet this cute amigurumi Staryu, the mesmerizing Water-type Pokémon that glimmers like a star in the vast ocean! With its celestial appearance resembling a starfish, Staryu captivates trainers and adventurers alike with its enchanting beauty. At the heart of its design lies a radiant core, emitting a gentle glow that guides Staryu through the depths of the sea. With this free crochet pattern you can make your own version of the loved Pokémon!
The starfish-type body of Staryu is made with a no-sew technique, so there is less sewing than you might expect in this pattern! There are both written and pictures throughout the pattern, making it doable for all wanting to make a fun crochet Staryu.
So, join in as we embark on a journey to uncover the secrets of the sea with Staryu by our side. With its celestial charm and boundless spirit, Staryu promises an unforgettable adventure filled with wonder and enchantment!
Supplies you'll need to crochet Staryu
General supplies:
- Crochet hook 2,5 mm I always use clover amour hooks for my projects!
- Sewing needle
- Stuffing
- Stitch marker
With Amigurumi you guage doesn’t matter much. Using smaller hook and yarn will make you finished piece smaller, and bigger hook and yarn will make him bigger. Just make sure that your yarn and hook fits together and makes a tight fabric so the stuffing won’t show through!
This Staryu will be about 10 cm tall with the recommended yarn.
I reccomend Hobbii Rainbow cotton 8/4. This yarn is a 100% cotton and very nice to work with! With this yarn, I use a 2,5 mm hook (or a B-1 or C-2 should work too!). If Rainbow cotton is sold out, I can also recommend Friends cotton from Hobbii as a direct substitute.
- 1 x orange-brown color (I used Friends Cotton from Hobbii in the color Ochre (13))
- 1 x golden yellow (I used Rainbow cotton Sunny Yellow (55))
- A bit of bright red for the center
Abbreviations in this crochet pattern
Rnd = round
mr = magic ring
sc = single crochet
hdc = half double crochet
inc = increase, 2 sc in the same stitch
dec = decrease, make 2 stitches into 1
ss = slip stitch
ch = chain
FO = Finish Off
Staryu crochet pattern
Starfish-arms
Rnd 1: 4sc in mr (4)
Rnd 2: (sc, inc) x 2 (6)
Rnd 3: (sc, inc, sc) x 2 (8)
Rnd 4: (3sc, inc) x2 (10)
Rnd 5: (2sc, inc, 2sc) x 2 (12)
Rnd 6: (5sc, inc) x 2 (14)
Rnd 7: (3sc, inc, 3sc) x 2 (16)
ss and FO. Make 5 pieces.
Body
Rnd 1: 8sc in mr (8)
Rnd 2: inc x 8 (16)
Rnd 3: (sc, inc) x 8 (24)
Rnd 4: (sc, inc, sc) x 8 (32)
Rnd 5: (3sc, inc) x 8 (40)
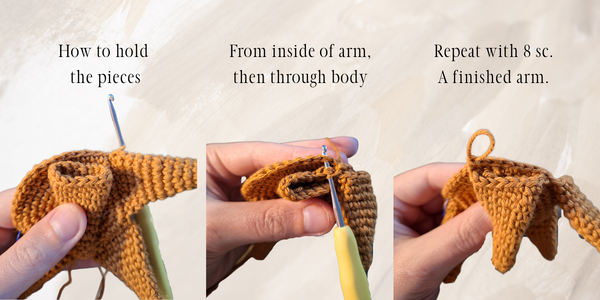
Rnd 6: You will connect the starfish-arms to the body in the sixth round. To connect an arm to the body, you need 8 stitches from the arm and the body. Lay the first arm against the body piece, these should have the right-sides touching each other, and the arm piece facing you. You will now crochet through 2 stitches, 1 from the arm and one from the body. Place your hook through a stitch of the arm (this stitch is going from the inside of the piece to the outside) and the next available stitch of the body, and make a sc. Continue to do this 8 times for a total of 8sc for the first starfish arm. This leaves 8 stitches of the arm unused. If you fold up the arm piece, you should see that the starfish is forming. Place the remaining 5 arms the same way around the body with 8 stitches for each. See photo-guide below for visuals.
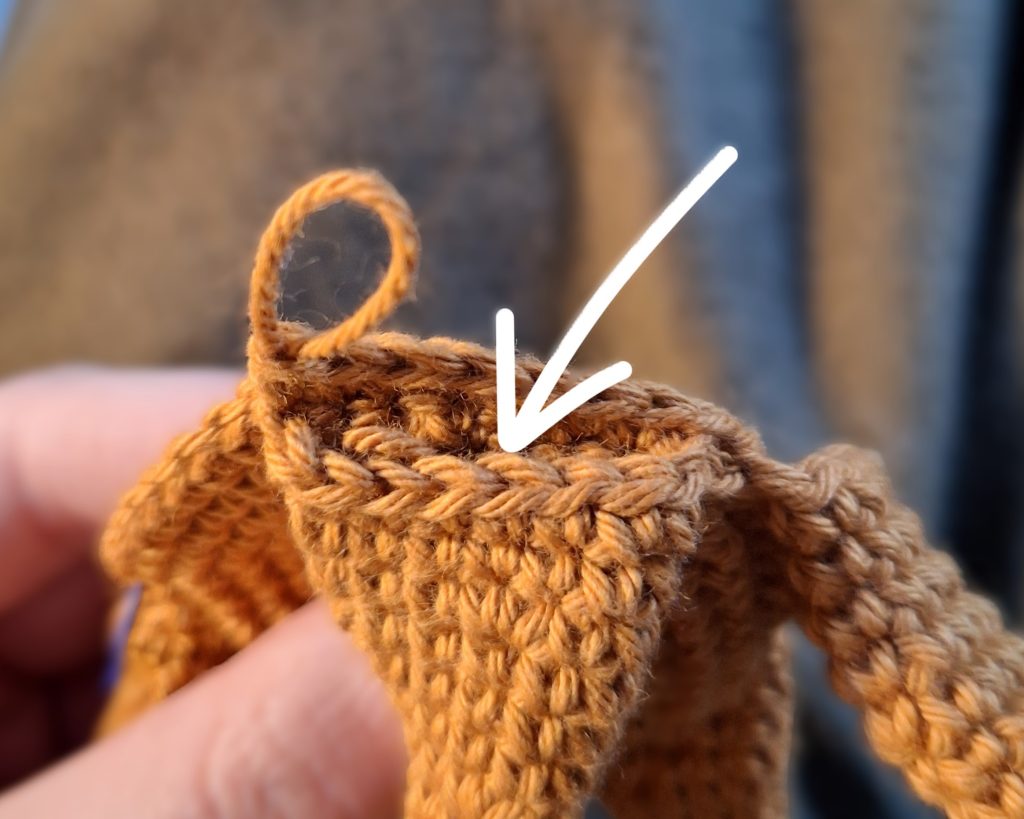
Rnd 7: Here you will finish the connection of the arms. Rather than continuing to work in the stitches you made in rnd 6, you will only be using the remaining stitches from the arms. Therefore you will make 8sc in each of the arms for a total of 40 stitches in this round. The picture below points to the stitches you are using for this round.
Rnd 8: (3sc, dec) x 8 (32)
Rnd 9: (sc, dec, sc) x 8 (24)
When you crochet pieces together like we have done for the arms, this usually leaves a small hole. Make a couple stitches to close up each of the holes from the inside, you can use the yarntails from each of the starfish-arms before securing them on the inside.
Start stuffing the piece. Focus on getting stuffing out in every arm and make them even with stuffing.
Rnd 10: (sc, dec) x 8 (16)
Rnd 11: dec x 8 (8)
Finish stuffing firmly and FO the piece.
Yellow details
The yellow detailing of Staryu is made in 2 separate pieces. These are referred to as top- and bottom pieces. The bottom piece goes onto the Staruy first, and the top-piece goes on afterwards followed by the “eye” or gem in the center.
Bottom yellow plate
Rnd 1: 6 sc in mr (6)
Rnd 2: inc x 6 (12)
Rnd 3: (sc, inc) x 6 (18)
Rnd 4: (sc, inc, sc) x 6 (24)
Rnd 5: (3sc, inc) x 6 (30)
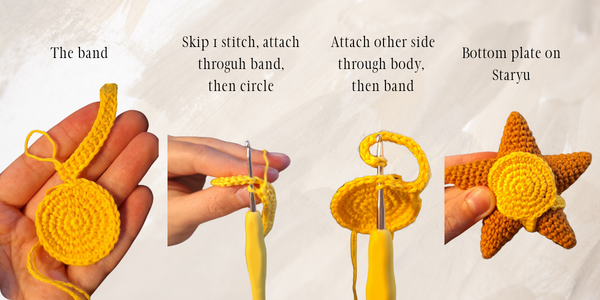
ss and chain 18, turn, make a hdc in the 2nd chain, continue by making 16 hdc along the remaining of the chain. You now have a band going out from the plate. Skip 1 stitch of the round plate piece, ss in the next stitch to secure the band. Make 2 ss like normal and connect the un-attached end of the strap by going through both the round plate piece and the end of the band and make a ss. Do this 2 times total to secure the band. Make sure to check that the band will go around the arm of Staruy without twisting! Make an additional ss as normal to finish off. Cut the yarn leaving a tail for sewing.
Top yellow plate
Rnd 1: 6sc in mr (6)
Rnd 2: inc x 6 (12)
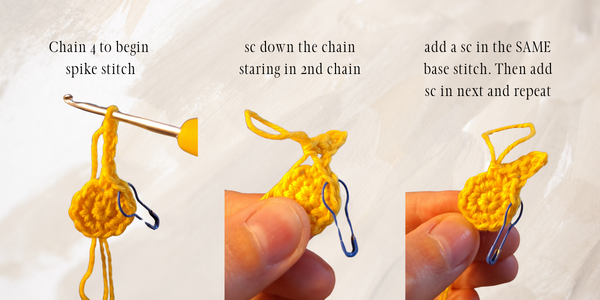
In the next round you will be making little “spikes” around the piece. One of these spikes are made as follows: (sc in base, ch 4, sc in 2nd ch, 2 sc in rem chain, sc in the same base stitch). Everything in the parentheses only uses 1 stitch of round 2. It will be noted as Spike in the following round.
Rnd 3: (spike, sc) x 6
FO leaving tail for sewing.
Crystal/eye
In red
Rnd 1: 5sc in mr (5)
Rnd 2: inc x 5 (10)
ss and FO. You can stuff a little when attaching the crystal to make it a bit more dimensional.
Assembly of your Staryu
As we have crocheted the arms into the piece, there is little sewing in this piece. Start by attaching the bottom plate first. Attach it on the side of the starfish that is the least pretty – for me this is the side with decreases – as it will therefore be covered by the plate. Place it in the center with the band going around one of the starfish-arms. You can make some stitches attaching the band too. No stuffing should be going under this piece, it is flat against the body.
Then add the top plate next. It goes in the center of the top piece. No stuffing with this piece either.
Lastly add on the crystal/eye piece in the center. This can be stuffed a little to give it more dimension.