
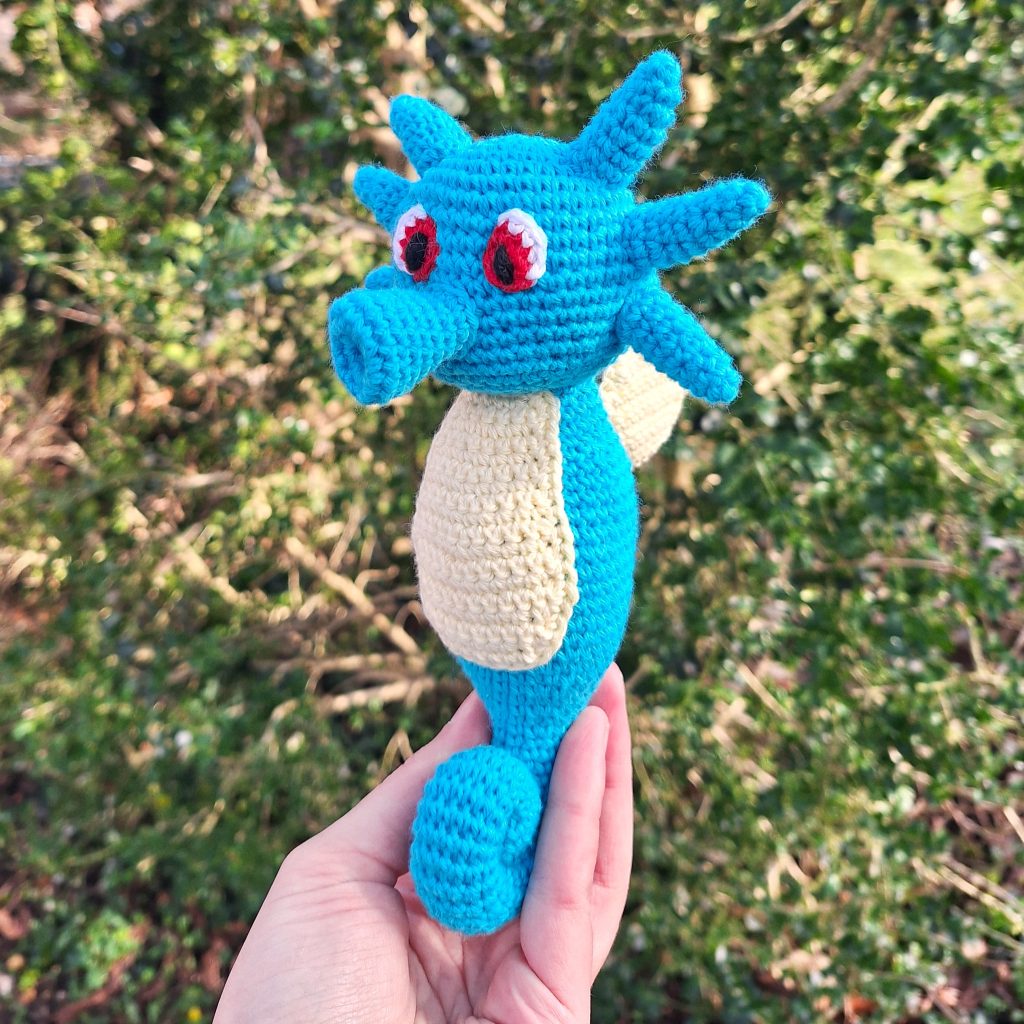

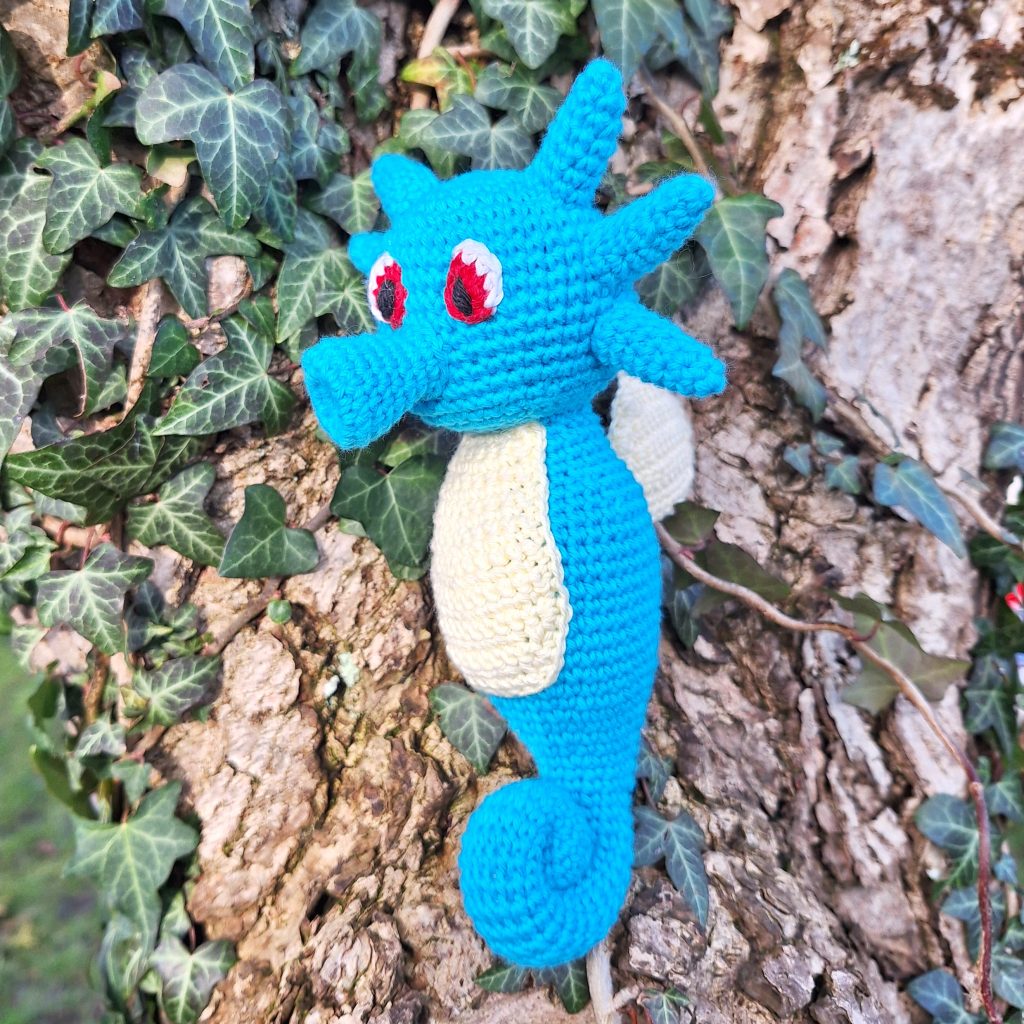
Let’s venture under the sea and find a cute Horsea pokémon! Horsea embodies the charm of the aquatic world with its endearing seahorse appearance! Cloaked in azure scales, Horsea sports a curled tail and a singular dorsal fin, showcasing the elegance of these underwater creatures.
This Horsea is made up of simple crochet terms, and will be a good project for someone new to amigurumi. And this Horsea crochet pattern is free!
I hope you enjoy the horsea crochet pattern and I’m excited to see your finished Horsea.
Supplies you'll need to crochet Horsea
General supplies:
- Crochet hook 2,5 mm, I always use clover amour hooks for my projects!
- Sewing needle
- Stuffing
- Stitch marker
With Amigurumi your guage doesn’t matter much. Using smaller hook and yarn will make you finished Horsea smaller, and bigger hook and yarn will make it bigger. Just make sure that your yarn and hook fits together and makes a tight fabric so the stuffing won’t show through!
With the recommended yarn your Horsea will be around 20 cm / 8 inches.
I reccomend Hobbii Rainbow cotton 8/4. This yarn is a 100% cotton and very nice to work with! With this yarn, I use a 2,5 mm hook (or a B-1 or C-2 should work too!). If Rainbow cotton is sold out, I can also recommend Friends cotton from Hobbii as a direct substitute.
- 1 x blue/turquoise (033)
- 1 x pastel yellow (052/053)
- A bit of black, white and red for eyes
Abbreviations in this crochet pattern
Rnd = round
mr = magic ring
sc = single crochet
inc = increase, 2 sc in the same stitch
dec = decrease, make 2 stitches into 1
ch = chain
ss = slip stitch
Body
In turquoise. The body is made from the tip of the tail and towards the neck.
Rnd 1: 6sc in mr (6)
Rnd 2: inc x 6 (12)
Rnd 3: (3sc, inc) x 3 (15)
Rnd 4-6: sc around (15)
Rnd 7: dec x 3, 9sc (12)
Rnd 8-28: sc around (12)
Rnd 29: inc x 2, 9sc, inc (15)
Rnd 30: sc around (15)
Rnd 31: (2sc, inc, 2sc) x 3 (18)
Rnd 32: (5sc, inc) x 3 (21)
Rnd 33: (3sc, inc, 3sc) x 3 (24)
Rnd 34: (7sc, inc) x 3 (27)
Rnd 35: (4sc, inc, 4sc) x 3 (30)
Rnd 36: (9sc, inc) x 3 (33)
Rnd 37: (5sc, inc, 5sc) x 3 (36)
Rnd 38: 16sc, (inc, 4sc) x 3, 5sc (39)
Rnd 39-46: sc around (39)
Rnd 47: 20sc, (dec, 4sc) x 3, sc (36)
Rnd 48: 14sc, (dec, 5sc) x 3, sc (33)
Rnd 49: (9sc, dec) x 3 (30)
Rnd 50: (4sc, dec, 4sc) x 3 (27)
Rnd 51: (7sc, dec) x 3 (24)
Rnd 52-53: sc around (24)
Rnd 54: 12sc, (sc, dec, sc) x 3 (21)
Rnd 55: sc 9. Pull loop through and FO leaving long tail.
Roll up the tail and sew it in place.
Head
In turquoise.
Rnd 1: 6 sc in mr (6)
Rnd 2: inc x 6 (12)
Rnd 3: (sc, inc) x 6 (18)
Rnd 4: (sc, inc, sc) x 6 (24)
Rnd 5: (3sc, inc) x 6 (30)
Rnd 6: (2sc, inc, 2sc) x 6 (36)
Rnd 7: (5sc, inc) x 6 (42)
Rnd 8-16: sc around (42)
Rnd 17: (5sc, dec) x 6 (36)
Rnd 18: (2sc, dec, 2sc) x 6 (30)
Rnd 19: (3sc, dec) x 6 (24)
Rnd 20: (sc, dec, sc) x 6 (18)
Rnd 21: (sc, dec) x 6 (12)
Rnd 22: dec x 6 (6)
FO
Snout
In turquoise.
The snout will start as a rough diamond shape and be folded in place to create the hollow look.
Rnd 1: 6sc in mr (6) (leave the starting tail, you will be using it to shape the snout later)
Rnd 2: sc around (6)
Rnd 3: (sc, inc, sc) x 2 (8)
Rnd 4: sc around (8)
Rnd 5: (3sc, inc) x 2 (10)
Rnd 6: (2sc, inc, 2sc) x 2 (12)
Rnd 7: (sc, inc) x 6 (18)
Rnd 8: sc around (18)
Rnd 9: (7sc, dec) x 2 (16)
Rnd 10: (3sc, dec, 3sc) x 2 (14)
Rnd 11: sc around (14)
Rnd 12: (5sc, dec) x 2 (12)
Rnd 13-14: sc around (12)
ss and cut yarn with tail for sewing.
Pull the starting tail from the mr through the piece to make a semi-cone shape. Secure the tail with a few stitches to keep it in place and FO. Make sure the right side is on the outside.
Spikes on head
In turquoise.
Rnd 1: 4sc in mr (4)
Rnd 2: (sc, inc) x 2 (6)
Rnd 3: sc around (6)
Rnd 4: (sc, inc, sc) x 2 (8)
Rnd 5-6: sc around (8)
Rnd 7: (3sc, inc) x 2 (10)
Rnd 8: sc around (10)
FO leaving tail for sewing.
Make 6 spikes.
Eyes
The eyes are worked around a chain. Make it in red.
Ch 4
Rnd 1: sc in 2nd ch, sc, 3sc in last chain, turn and continue working on the other side of chain, sc, inc (8)
Cut the red yarn and FO.
Connect white yarn to the side of the eye and sc 4. Add the white on the opposite side of the other eye. The white is on the outer part of the eye. Embroider a black pupil.
Belly
In pastel yellow
The belly is worked in rows.
Ch 7
Row 1: sc in 2nd ch, 5 sc, ch, turn (6)
Row 2: 6sc, ch, turn (6)
Row 3: 3sc, inc, 2sc, ch, turn (7)
Row 4-5: 7sc, ch, turn (7)
Row 6: 3sc, inc, 3sc, ch, turn (8)
Row 7: 8sc, ch, turn (8)
Row 8: 3sc, inc, 4sc, ch, turn (9)
Row 9: 9sc, ch, turn (9)
Row 10: 4sc, inc, 4sc, ch, turn (10)
Row 11: 4sc, inc, 5sc, ch, turn (11)
Row 12-13: 11sc, ch, turn (11)
Row 14: 9sc, dec, ch, turn (10)
Row 15: 8sc, dec, ch, turn (9)
Row 16: 7sc, dec, ch, turn (8)
Row 17: 6sc, dec (7)
FO.
Connect yarn at row 1 and sc around the edge to neaten the shape. When done, cut yarn leaving long tail for sewing.
Fin
In yellow.
Worked in rows.
Ch 11
Row 1: sc in 2nd ch, 9sc, ch, turn (10)
Row 2: 9sc, inc, ch, turn (11)
Row 3: inc, 10sc, ch, turn (12)
Row 4: 11sc, inc, ch, turn (13)
Row 5: inc, 10sc, ss, ch, turn (13) (the row stops early!)
Row 6: ss, 11sc, inc, ch, turn (14)
Row 7: 11sc, ss, ch, turn (12) (row stops early)
Row 8: ss, 10sc, ss, ch, turn (12)
Row 9: ss, 7sc, ss, ch, turn (9) (row stops early)
Row 10: ss, 5sc, ss (7)
FO.
Make 2 pieces. Put them together and sc through both layers around the piece. This creates one very stable fin.
Assembly of your crochet Horsea
Attach the body to the head. Stuff the body a bit more before finishing. If you haven’t already, roll up the tail and attach it to secure the curl of the tail.
Attach the bellypatch right below the connection between the head and body. This is a flat piece, so don’t use any stuffing here.
Attach the fin to the center of the back 5 rows below the head.
Add spikes, snout and eyes with pins, and sew them on.
The eyes are between rnd 7-11 and have 3 stitches between them. The snout is between rnd 11-15 and placed in the middle of the face between the eyes.
The spikes are at the side of the head. 3 on each side. The top spike is between rnd 5-7, second in between rnd 9-11, third is between rnd 13-15.