
Have you ever dreamt of snuggling to the sweet tunes of Jigglypuff? This is very soon a reality for you with this free Jigglypuff crochet pattern!
Follow the step-by-step crochet pattern to choose the perfect yarns and colors. This Jigglypuff crochet pattern is a delightful and engaging project that captures the essence of this iconic Pokémon.
Join the ever-growing community of Pokémon crochet enthusiasts and create your very own Jigglypuff companion. From its characteristic round shape to its endearing facial features, this pattern allows you to replicate every detail, ensuring your handmade creation is as charming as the original.
Unleash your creativity, crochet a Jigglypuff, and let the magic of this musical Pokémon fill your crafting space. This pattern is your ticket to crafting a lovable and whimsical friend – get ready to crochet, create, and fall in love with your very own Jigglypuff Amigurumi!
Supplies you'll need to crochet Jigglypuff
General supplies:
- Crochet hook 2,5 mm for small version and 6 mm for large version, I always use clover amour hooks for my projects!
- Sewing needle
- Stuffing
- Stitch marker
With Amigurumi you guage doesn’t matter much. Using smaller hook and yarn will make you finished Jigglypuff smaller, and bigger hook and yarn will make him bigger. Just make sure that your yarn and hook fits together and makes a tight fabric so the stuffing won’t show through!
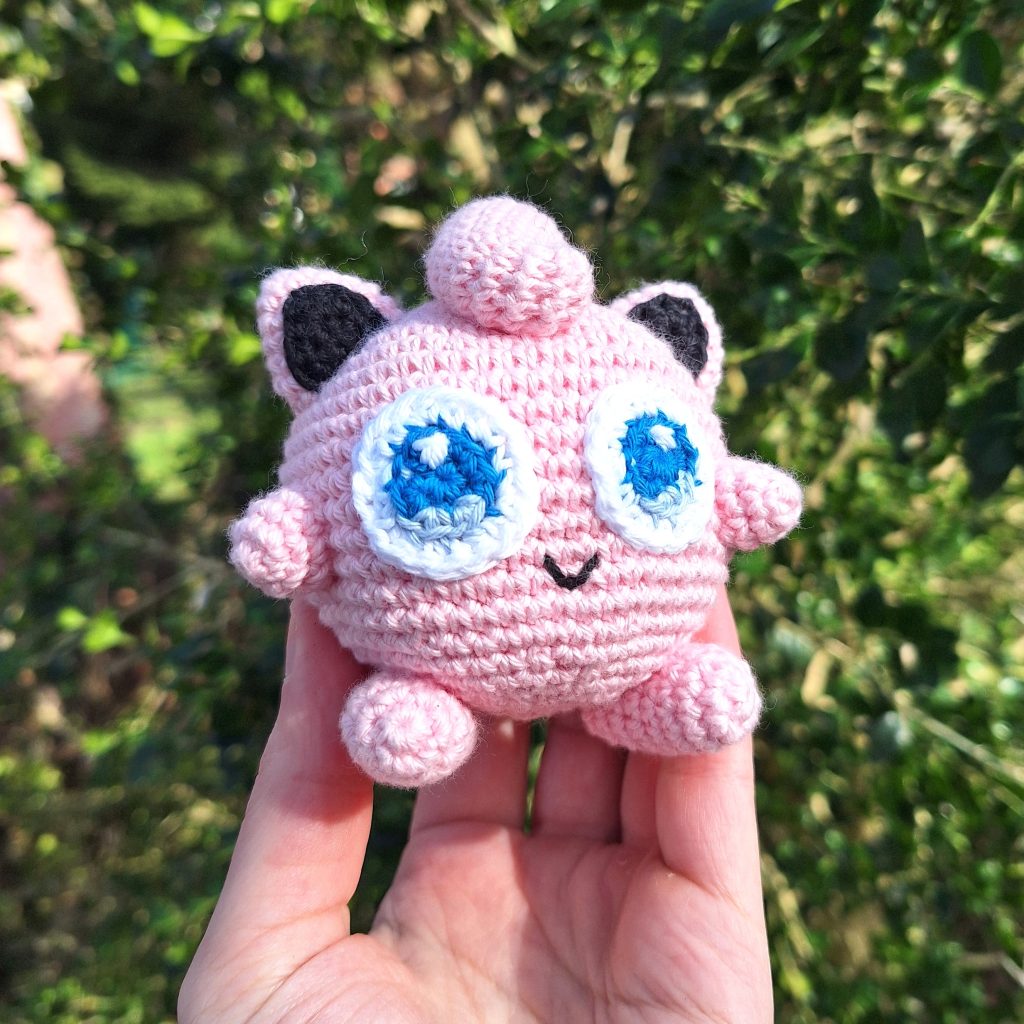
For a smaller version, about 10 cm tall, or 4 inches, you will need the following yarn.
I reccomend Hobbii Rainbow cotton 8/4. This yarn is a 100% cotton and very nice to work with! With this yarn, I use a 2,5 mm hook (or a B-1 or C-2 should work too!). If Rainbow cotton is sold out, I can also recommend Friends cotton from Hobbii as a direct substitute.
- 1 x baby pink (43)
- A bit of black for ears and mouth
- A bit of 2 shades of blue, one light and one dark for the eyes
- A bit of white for the eyes
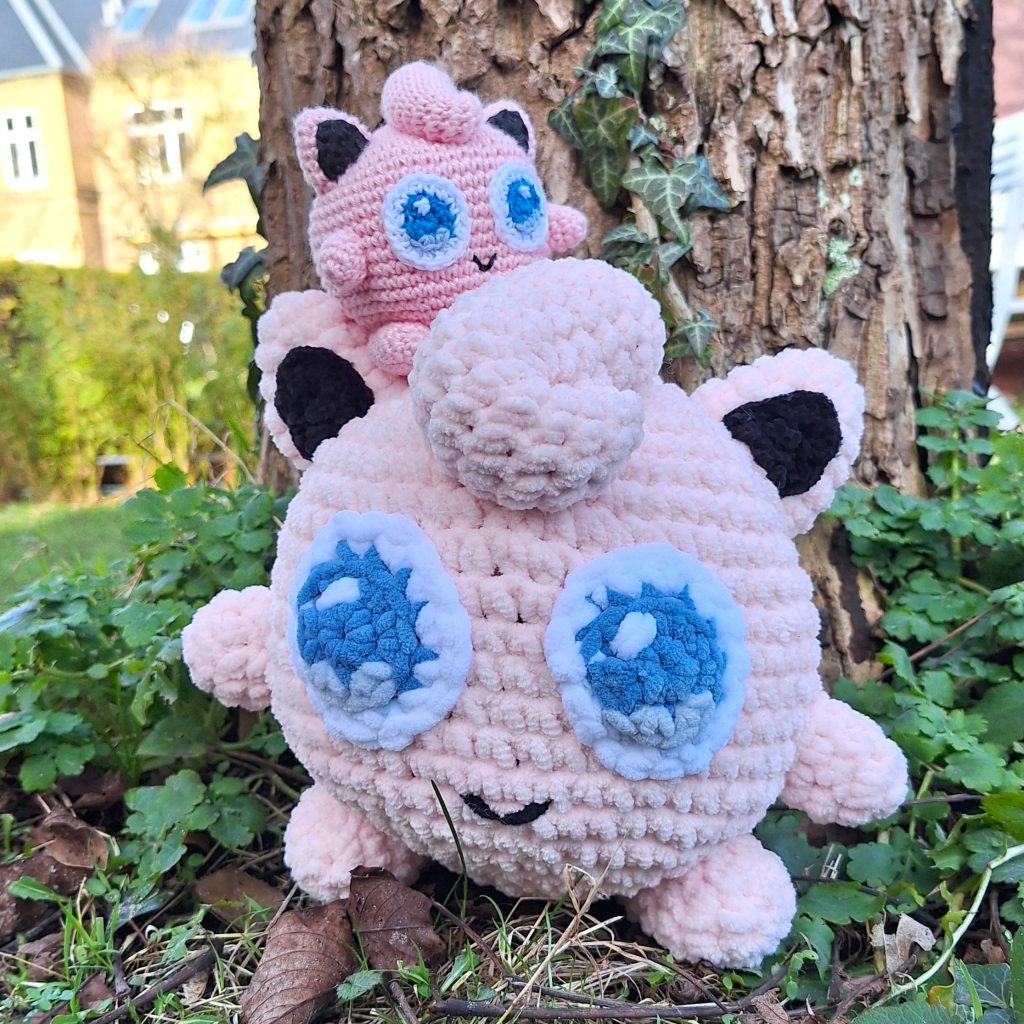
If you’d like a much bigger crochet Jigglypuff, I got you! I also made a large version of Jigglypuff! She is about 25 cm tall, or 10 inches.
To make a giant and soft Jigglypuff, you will need Hobbii Baby Snuggle yarn. This yarn is a chenille yarn, which means your Jigglypuff will be huge and so fluffy! With this yarn I use a 6 mm hook (or a J-10 hook). You will need the following colors:
- 1 x Baby pink (03)
- A bit of black for ears and mouth
- A bit of 2 shades of blue, one light and one dark for the eyes
- A bit of white for the eyes
If Baby Snuggle is unavailable other chenille yarn in the same thickness, like Honey Bunny, also from Hobbii, is a great substitute.
Abbreviations in this crochet pattern
Rnd = round
mr = magic ring
sc = single crochet
inc = increase, 2 sc in the same stitch
dec = decrease, make 2 stitches into 1
hdc = half double crochet
ss = slip stitch
ch = chain
BLO = Back Loop Only
FO = Finish Off chain
Jigglypuff crochet pattern
Body (in pink)
Rnd 1: 6 sc in mr (6)
Rnd 2: inc x 6 (12)
Rnd 3: (sc, inc) x 6 (18)
Rnd 4: (sc, inc, sc) x 6 (24)
Rnd 5: (3sc, inc) x 6 (30)
Rnd 6: (2sc, inc, 2sc) x 6 (36)
Rnd 7: (5sc, inc) x 6 (42)
Rnd 8: (3sc, inc, 3sc) x 6 (48)
Rnd 9: (7sc, inc) x 6 (54)
Rnd 10-19: sc around (54)
Rnd 20: (7sc, dec) x 6 (48)
Rnd 21: (3sc, dec, 3sc) x 6 (42)
Rnd 22: (5sc, dec) x 6 (36)
Rnd 23: (2sc, dec, 2sc) x 6 (30)
Rnd 24: (3sc, dec) x 6 (24)
Stuff the piece.
Rnd 25: (sc, dec, sc) x 6 (18)
Rnd 26: (sc, dec) x 6 (12)
Finish stuffing and
Rnd 27: dec x 6 (6)
FO
Arms (in pink)
Rnd 1: 6sc in mr (6)
Rnd 2: (sc, inc) x 3 (9)
Rnd 3: sc around (9)
Rnd 4: (inc, 2sc) x 3 (12)
Stuff lightly. FO leaving tail for sewing
Feet (in pink)
Rnd 1: 6sc in mr (6)
Rnd 2: inc x 2 (12)
Rnd 3-9: sc around (12)
Rnd 10: dec x 6 (6)
Stuff lightly. FO leaving tail for sewing
Swirl for the head (in pink)
Rnd 1: 6sc in mr (6)
Rnd 2: inc x 6 (12)
Rnd 3: (3sc, inc) x 3 (15)
Rnd 4-7: sc around (15)
Rnd 8: dec, 13sc (14)
Rnd 9: dec, 12sc (13)
Rnd 10: dec, 11sc (12)
Rnd 11: dec, 10sc (11)
Rnd 12: dec, 9sc (10)
Rnd 13: dec, 8sc (9)
Rnd 14: dec, 7sc (8)
Rnd 15: dec, 6sc (7)
Rnd 16: dec, 5sc (6)
Stuff and FO with long tail. Use the yarn tail to secure the tip of the piece to create the swirl. Afterwards you can use the yarntail to connect the piece later.
Ears (in pink)
Rnd 1: 6sc in mr (6)
Rnd 2: (sc, inc) x 3 (9)
Rnd 3: (2sc, inc) x 3 (12)
Rnd 4: (3sc, inc) x 3 (15)
Rnd 5: (4sc, inc) x 3 (18)
Rnd 6: (5sc, inc) x 3 (21)
Make a ss and FO. Stuff when attaching to the body.
Inside of ears (in black)
Rnd 1: 5sc in mr, tighten the ring, ch 1, turn (5)
Rnd 2: 2sc, 3 hdc in same stitch, 2sc (7)
FO.
Sew the piece into the ears. I find it easiest to do after the ears are attached to the body.
Eyes (white, light blue and dark blue)
You need white and 2 shades of blue. Start with the darker shade of blue.
Rnd 1: 6sc in mr (6)
Rnd 2: inc, change to light blue, inc x 2, change to dark blue, inc x 3 (12)
ss and change to white in the ss.
Rnd 3: in BLO, (inc, sc) x 6 (18)
FO leaving a tail for sewing. Don’t stuff when attaching the piece.
Assembly of your crochet Jigglypuff
For Jigglypuff it is not important in which order you attach the pieces. I recommend attaching the pieces with pins before sewing. This way you can arrange the limbs and see how it will look in the end.
The following guide is where I have attached the limbs.
Attach ears between rnd 5-11 on either side of the head. The ears are folded a bit to be more flat or triangular rather than round. Sew the black insides of the ears. Start by attaching the bottom, this way you are sure the inside reached the body piece.
Next attach the swirl on top of the head. I strongly recommend having the eyes pinned to assure the right placement for these. My swirl goes from the magic ring to around rnd 8 of the body.
The eyes are between rnd 10-16 with 2 stitches between them.
Arms are between rnd 13-16 with 2 stitches between eye and arm.
The feet are placed at the bottom of the body with the toes pointed slightly outwards. If you want Jigglypuff to be able to stand, check regularly that you get the placement right.