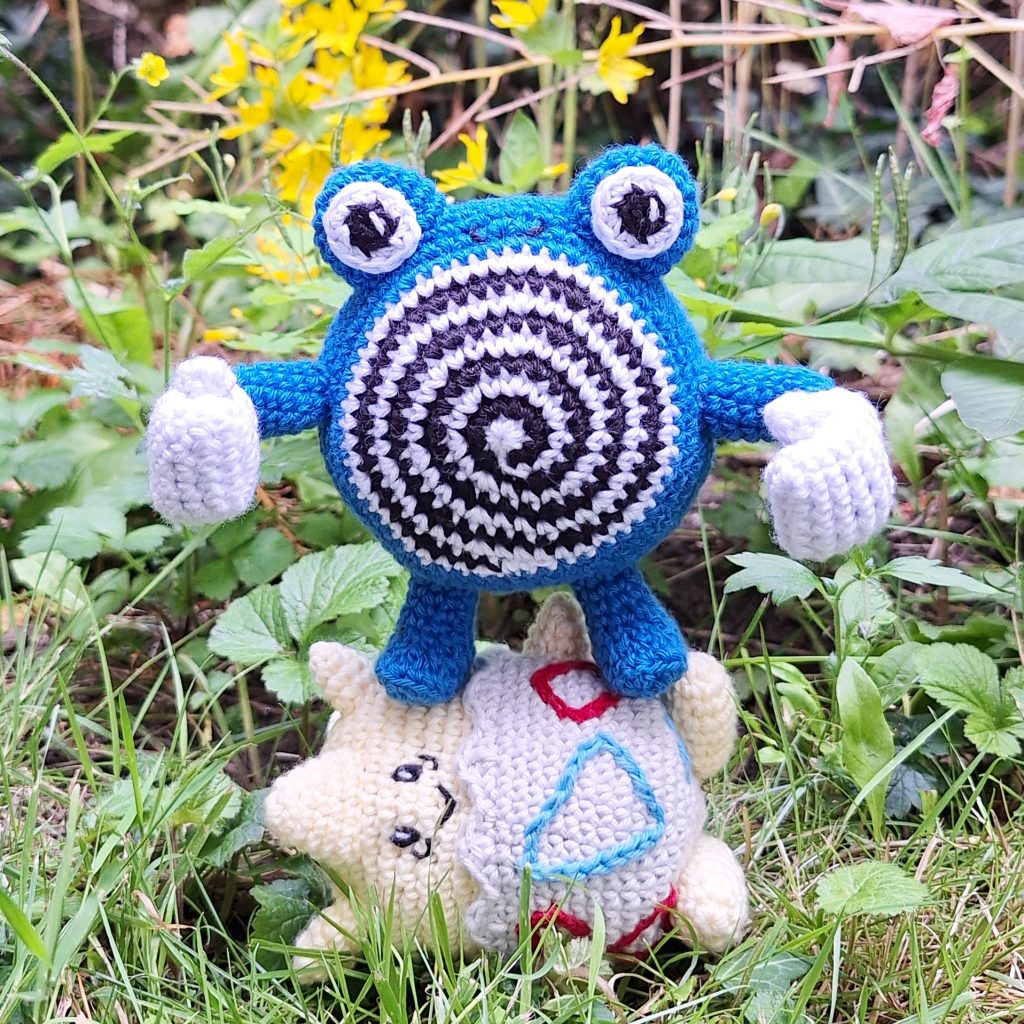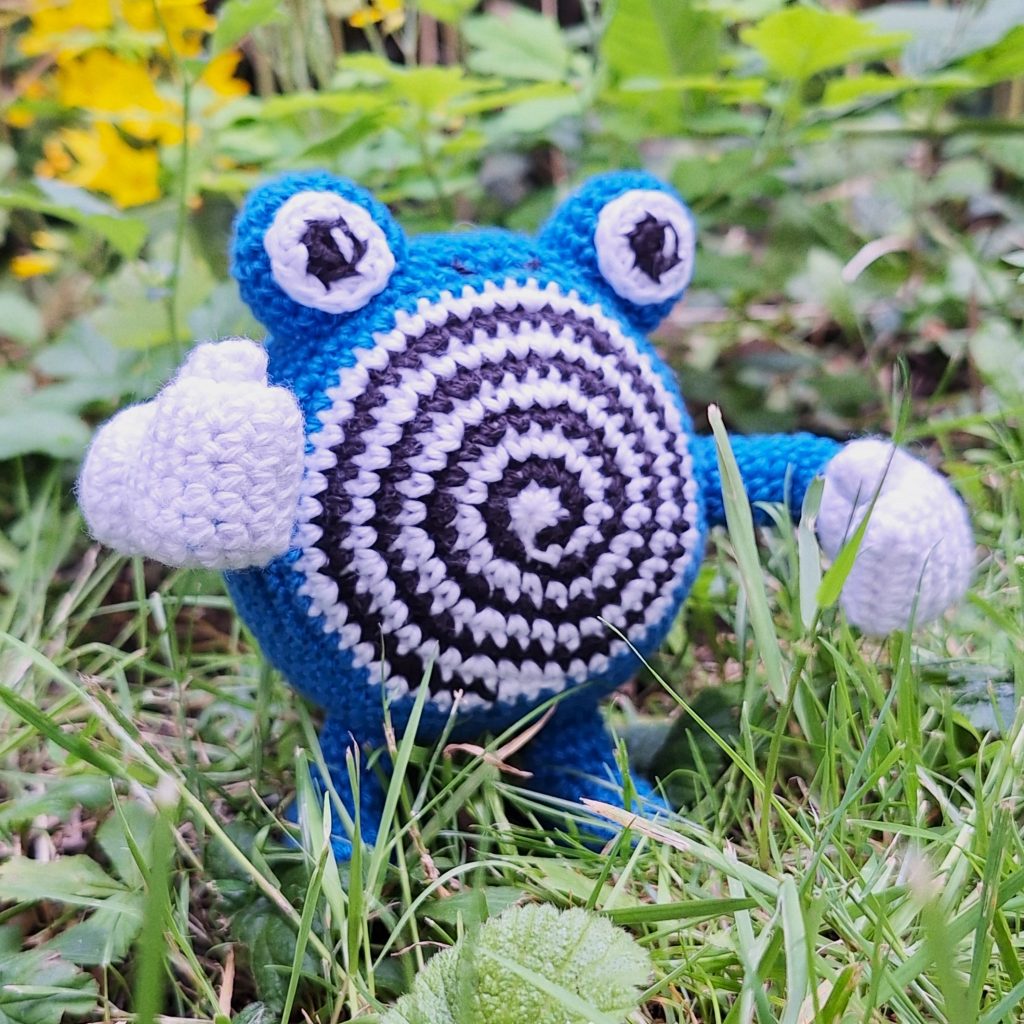
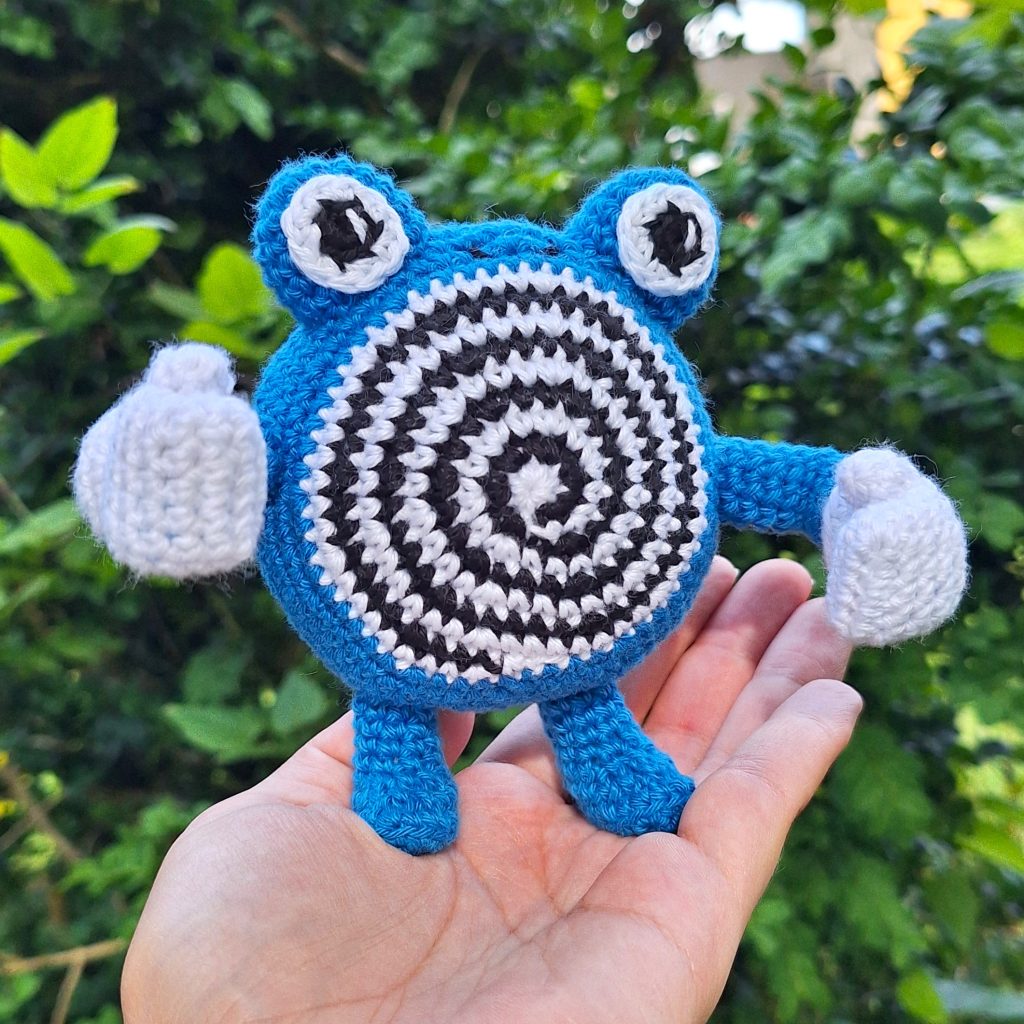
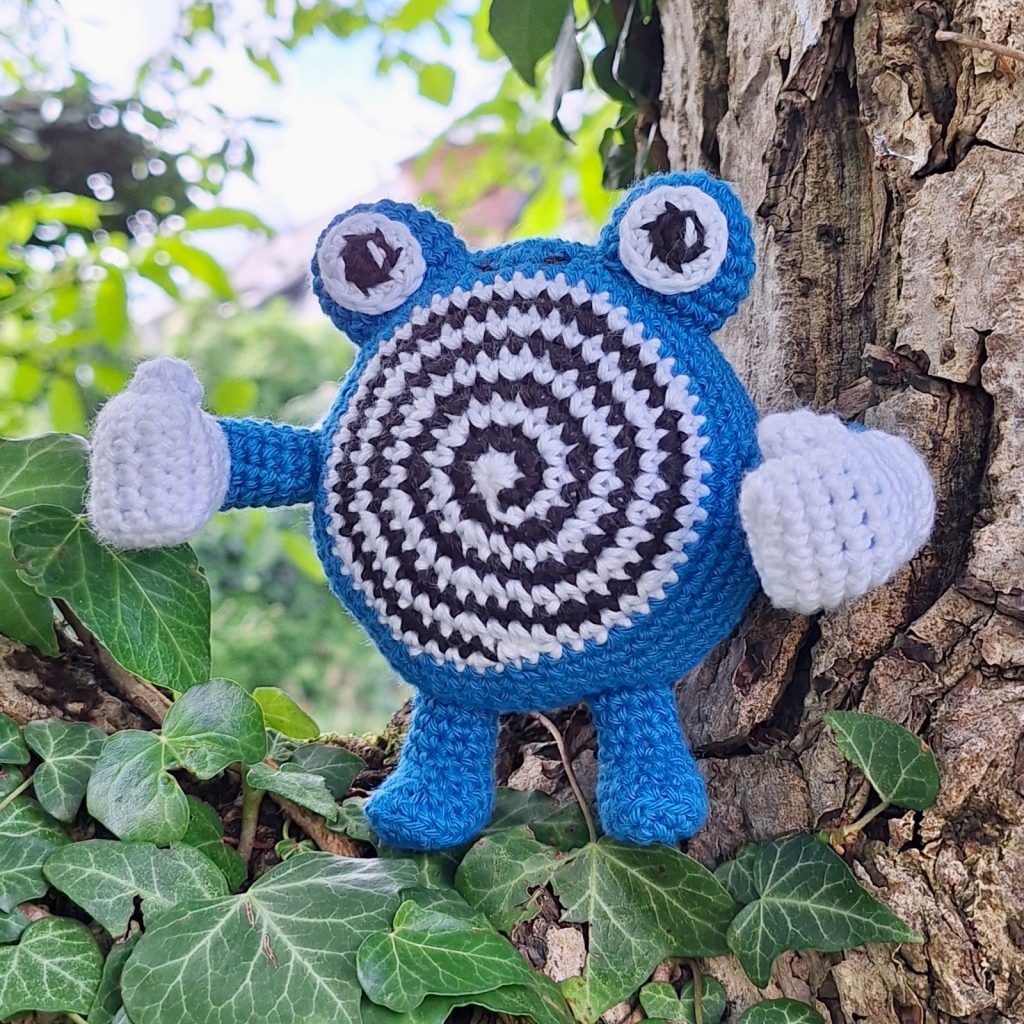
Get ready to dive into the world of water Pokémon with our Poliwhirl crochet pattern! This pattern captures the lively and dynamic essence of Poliwhirl in a cute amigurumi piece. Poliwhirl is a Water-type Pokémon known for its spiral pattern and playful demeanor. As the evolution of Poliwag (find the crochet pattern for Poliwag here), Poliwhirl carries forward its charm with added features and personality.
This crochet pattern is perfect for crocheters who have some experience, the Poliwhirl pattern is designed to be fun and accessible while offering a bit of a challenge. The difficulty is a bit above beginner-level, and you should be familiar with starting pieces by crocheting around a chain. This crochet pattern is also pretty low sew, making it a streamlined and enjoyable amigurumi project.
Creating your own crochet Poliwhirl is an engaging journey as you watch its iconic form take shape stitch by stitch. The pattern beautifully highlights Poliwhirl’s signature features, from its large, expressive eyes to its distinctive spiral belly. So, gather your crochet hook, blue and white yarn, and embark on a crafting adventure to create your very own Poliwhirl masterpiece!
Supplies you'll need to crochet Poliwhirl
General supplies:
- Crochet hook 2,5 mm , I always use clover amour hooks for my projects!
- Sewing needle
- Stuffing
- Stitch marker
With Amigurumi you guage doesn’t matter much. Using smaller hook and yarn will make you finished Poliwhirl smaller, and bigger hook and yarn will make him bigger. Just make sure that your yarn and hook fits together and makes a tight fabric so the stuffing won’t show through!
For a smaller version, about 10 cm tall, or 4 inches, you will need the following yarn.
I reccomend Hobbii Rainbow cotton 8/4. This yarn is a 100% cotton and very nice to work with! With this yarn, I use a 2,5 mm hook (or a B-1 or C-2 should work too!). If Rainbow cotton is sold out, I can also recommend Friends cotton from Hobbii as a direct substitute.
You need the following colors
- Blue
- White
- Black
Abbreviations in this crochet pattern
Rnd = round
mr = magic ring
sc = single crochet
inc = increase, 2 sc in the same stitch
dec = decrease, make 2 stitches into 1
ss = slip stitch
ch = chain
BLO = Back Loop Only
FLO = Front Loop Only
FO = Finish Off
Poliwhirl crochet pattern
Body
The spiral of the body is worked simultaneously with white and black. You are not cutting any of the colors until you change to the blue color of the body. You will start in white. I have a video of the spiral being made that might help you out, check it out here!
Spiral
Rnd 1: (white) 6sc in mr (6)
Rnd 2: Attach the black yarn in the next stitch, don’t cut the white. (In black) inc x 6 (12). The last inc is in the last white stitch where the white yarn is still attached. Now let go of the black and continue with the white instead. This you will be doing at every round.
Rnd 3: (white) (sc, inc) x 6 (18)
Rnd 4: (black) (sc, inc, sc) x 6 (24)
Rnd 5: (white) (3sc, inc) x 6 (30)
Rnd 6: (black) (2sc, inc, 2sc) x 6 (36)
Rnd 7: (white) (5sc, inc) x 6 (42)
Rnd 8: (black) (3sc, inc, 3sc) x 6 (48)
Rnd 9: (white) (inc, 7sc) x 6 (54)
Make a ss with the black and cut the black yarn. Make an additional sc and ss with the white and FO the white too.
The spiral is now done, and you will move on to the blue of the body in the next step.
Attach the blue yarn to the spiral. I attached it to the bottom of the spiral to have it in the least visible place.
Rnd 10: (4sc, inc, 4sc) x 6 (60)
Rnd 11: (9sc, inc) x 6 (66)
Rnd 12: (5sc, inc, 5sc) x 6 (72)
Rnd 13-18: sc around (72)
Rnd 19: (5sc, dec, 5sc) x 6 (66)
Rnd 20: (9sc, dec) x 6 (60)
Rnd 21: (4sc, dec, 4sc) x 6 (54)
Rnd 22: (7sc, dec) x 6 (48)
Rnd 23: (3sc, dec, 3sc) x 6 (42)
Rnd 24: (5sc, dec) x 6 (36)
Rnd 25: (2sc, dec, 2sc) x 6 (30)
Rnd 26: (3sc, dec) x 6 (24)
Rnd 27: (sc, dec, sc) x 6 (18)
Stuff firmly.
Rnd 28: (sc, dec) x 6 (12)
Rnd 29: dec x 6 (6)
FO the body.
Hands/arms
The glove and the arm of Poliwhirl is made in 1 piece. We start by making the glove, later we make the arm as an extension of the glove.
Start in white.
We start by working around a chain. Start by chaining 7. Work starts in the 2nd chain from your hook.
Rnd 1: 5sc, 3sc in the last stitch, turn the chain and continue working on the other side of the chain, 4sc, inc (14)
Rnd 2-7: sc around (14)
Rnd 8: (dec, 5sc) x 2 (12)
Rnd 9: (dec, 4sc) x 2 (10)
Rnd 10: in FLO, (inc, sc) x 5 (15)
Rnd 11: sc around (15)
ss and FO the white color.
To continue the arm, attach blue yarn in the remaining back loops of round 9 on the inside of the glove.
Rnd 1: sc around in the back loops inside the glove (10)
Rnd 2-11: sc around (10)
ss and FO with a tail for sewing. You have two options for shaping the hand/arm. Either stuff the piece and sew along the inside of the hand and the elbow to create the bends, or use wiring inside to make the arms moveable. The wiring can be reinforced by sewing if needed.
Make 2 arms. Remember to shape them as both a left and a right arm.
Thumb
In white
Rnd 1: 6sc in mr (6)
Rnd 2-3: sc around (6)
FO the thumb with a tail for sewing. Make 2. Attach the thumbs to the hands – remember to place them so you get both a right and left hand!
Feet
In blue.
We start by working around a chain. Start by chaining 8. Work starts in the 2nd chain from your hook.
Rnd 1: 6sc, 3sc in last chain, turn the chain and continue working on the other side of the chain, 5sc, inc (16)
Rnd 2: inc, 5sc, inc, sc, inc, 5sc, inc, sc (20)
Rnd 3: In BLO, sc around (20)
Rnd 4: 6sc, 4dec, 6sc (16)
Rnd 5: 4sc, 4dec, 4sc (12)
Rnd 6: (4sc, dec) x 2 (10)
Rnd 7-9: sc around (10)
ss and FO. Make 2.
To get the most stable feet and legs, I recommend using a type of wire. I used pipecleaners and stuffed the feet afterwards. To ensure Poliwhirl can stand, extend the wiring into the feet. If possible, place the wire along the edges of the feet to get the most stable base possible.
Eye stalks
In blue.
Rnd 1: 6sc in mr (6)
Rnd 2: inc x 6 (12)
Rnd 3: (3sc, inc) x 3 (15)
Rnd 4: (2sc, inc, 2sc) x 3 (18)
Rnd 5-7: sc around (18)
Make a ss and FO leaving tail for sewing. Make 2 pieces.
Eyes
Start in black
Rnd 1: 6sc in mr (6)
make a ss in the first sc and change color to white in the ss.
Rnd 2: In BLO, inc x 6 (12)
ss and FO leaving tail for sewing. Make 2.
Assembly of your crochet Poliwhirl
Luckily there isn’t too much assembly with Poliwhirl, so the sewing is minimal.
I started by attaching the eye stalks to the top of the head. Locate the where the spiral of the body is ending, the ending of the spiral should go on the bottom. So attach the eye stalks on the opposite side of the spiral ending.
The eye stalks go on round 11-16 of the body and about x stitches apart.
Add a white highlight to the eyes and attach them to the eye stalks. Also embroider nostrils between the eyes.
The arms go on either side, with about 5-6 stitches between the top of the arm and the bottom of the eye stalks.
The feet go on last. If you want your Poliwhirl to stand, be sure to pin the feet onto the body first and test his balance. Adjust the feet if needed so he can stand.